Integrate with Microsoft
In case your company uses Microsoft 365, your corporate address book resides in Azure AD.
You can integrate Azure AD with Federated Directory.
Features
Authentication with Microsoft
Enable Single Sign On authentication by using Microsoft as your identity provider.
This removes the option to authenticate with your Federated Directory credentials but redirects the users to Microsoft for Authentication.
User management by Azure AD
The following provisioning features are supported when using provisioning from Azure AD to Federated Directory:
- Create Users: New or existing users in your Azure AD will be pushed to Federated Directory as new users.
- Update User Attributes: Updates to user profiles in your Azure AD will be pushed to Federated Directory.
- Deactivate Users: Users deactivated in your Azure AD will be automatically disabled in Federated Directory, but their contact data can still be found. If reactivated, users will regain access to Federated Directory.
Prerequisites
You will need to add Federated Directory as an Entreprise Application to your Azure AD. The easiest way to do this, is by signing up to Federated Directory with a Microsoft account with administrative privileges within your Azure AD.
This will automatically create the Federated Directory enterprise application in your Azure AD.
In case you already signed up manually and want to integrate with Azure AD, you will have to perform the following three steps.
-
Inside your Federated Directory create a new directory which will be integrated with your Microsoft environment. Switch the
Authentication methodto ‘Microsoft accounts’. -
Inside this new directory, create a new user. The username of this user should be identical to the user name (
userPrincipalName) in Azure AD that you will use to logon to Federated Directory in the next step. -
Log out and go to the login screen. Here you should switch to the new directory you just created. Click on the button
Log in with your Microsoft account. Microsoft will ask permissions to your profile. After approval you will log in as the user you just created and Federated Directory is created inside your Azure AD as an Enterprise Application.
Configuration steps
You are now ready to finalize the integration with Azure AD.
Authentication with Microsoft
The steps you have taken in the prerequisites chapter are enough to enable authentication with a Microsoft account.
The directory that contains your users, should be configured with Authentication Method set to ‘Microsoft Accounts’. The usernames of the users in this directory should be identical to the userPrincipleName of the Azure AD user.
User management by Microsoft
The following attributes will be synchronized to Federated Directory:
| Display Name | Variable Name | Mandatory |
|---|---|---|
| User Name | userPrincipalName | ️️✔️ |
| Display name | displayName | ✔️ |
| Given name | givenName | |
| Last name | surName | |
| Office phone | telephoneNumber | |
| Mobile Phone | mobile | |
| Street address | streetAddress | |
| City | city | |
| State or province | state | |
| ZIP or postal Code | postalCode | |
| Country or region | country | |
| Preferred language | preferredLanguage | |
| Employee number | employeeNumber | |
| Cost center | costCenter | |
| Job title | jobTitle | |
| Department | department | |
| Manager | manager | |
| Object ID | objectId |
The first two attributes are mandatory, all other attributes can be disabled from provisioning in Azure AD.
If you want to automatically provision your users and their profiles from Azure AD to Federated Directory.
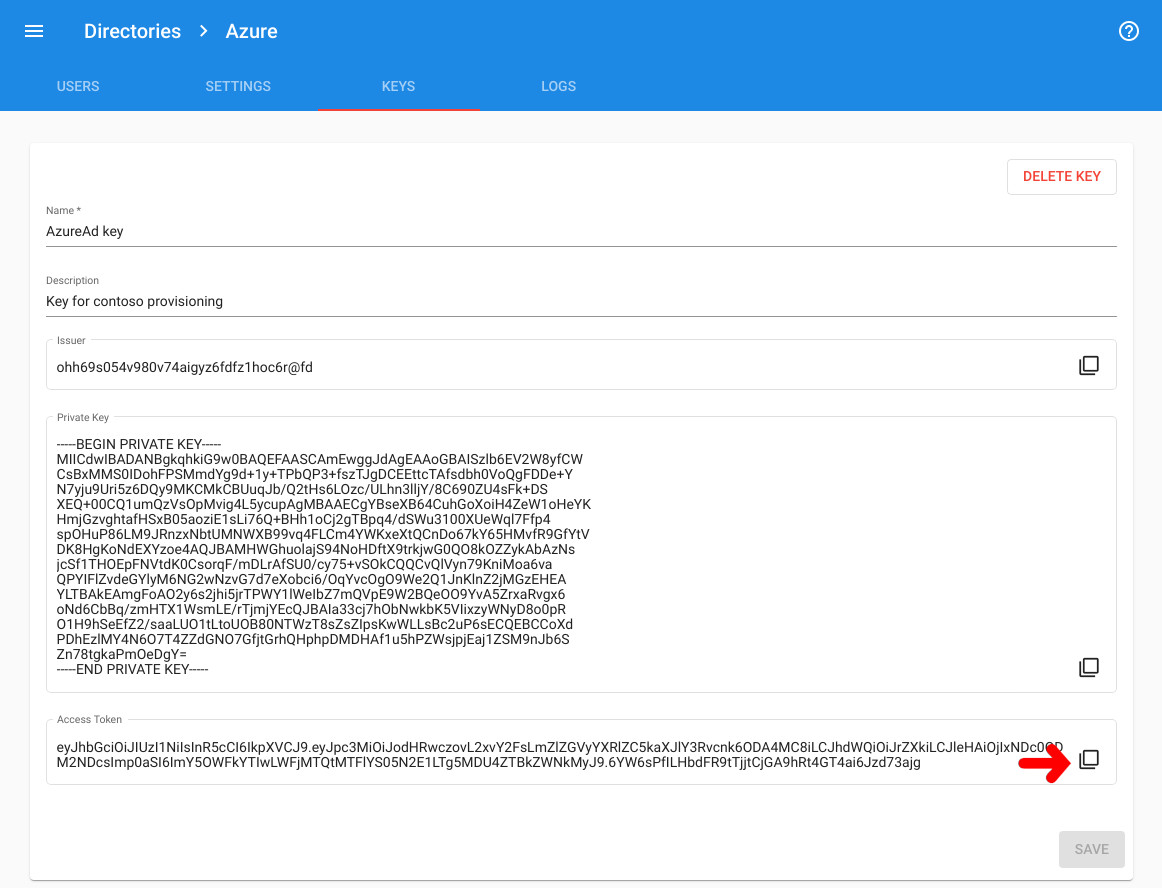
- In Federated Directory, go back to the directory you want to integrate with Microsoft and select the “keys” tab.
- Create a new key. Give it a name, like “Microsoft integration key”. Once created, copy the “access token”. The “access token” is only shown one time, directly after the creation of a directory key. You will need it in step 5.
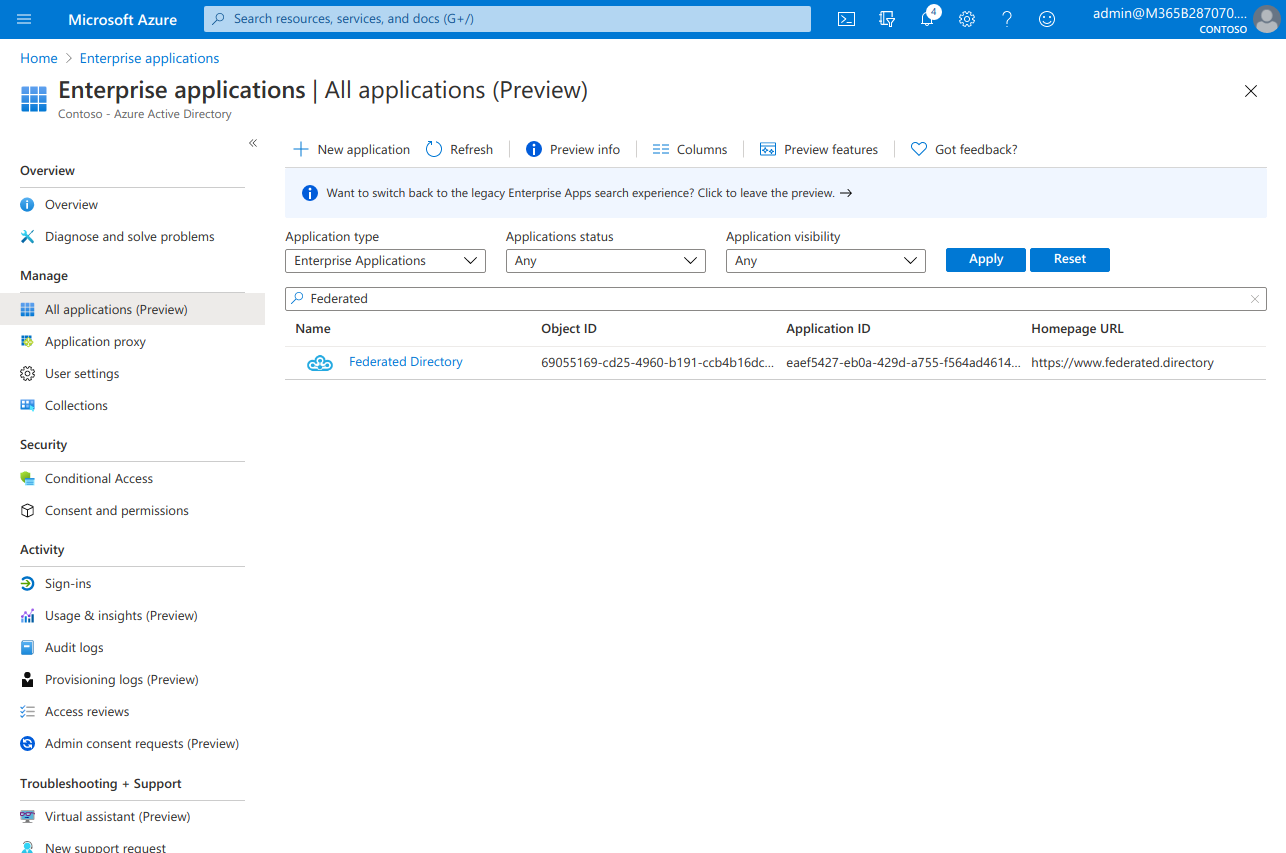
- Go to the Azure AD portal > Enterprise applications and select the Federated Directory application. (see prerequisites if you don’t see our application there).
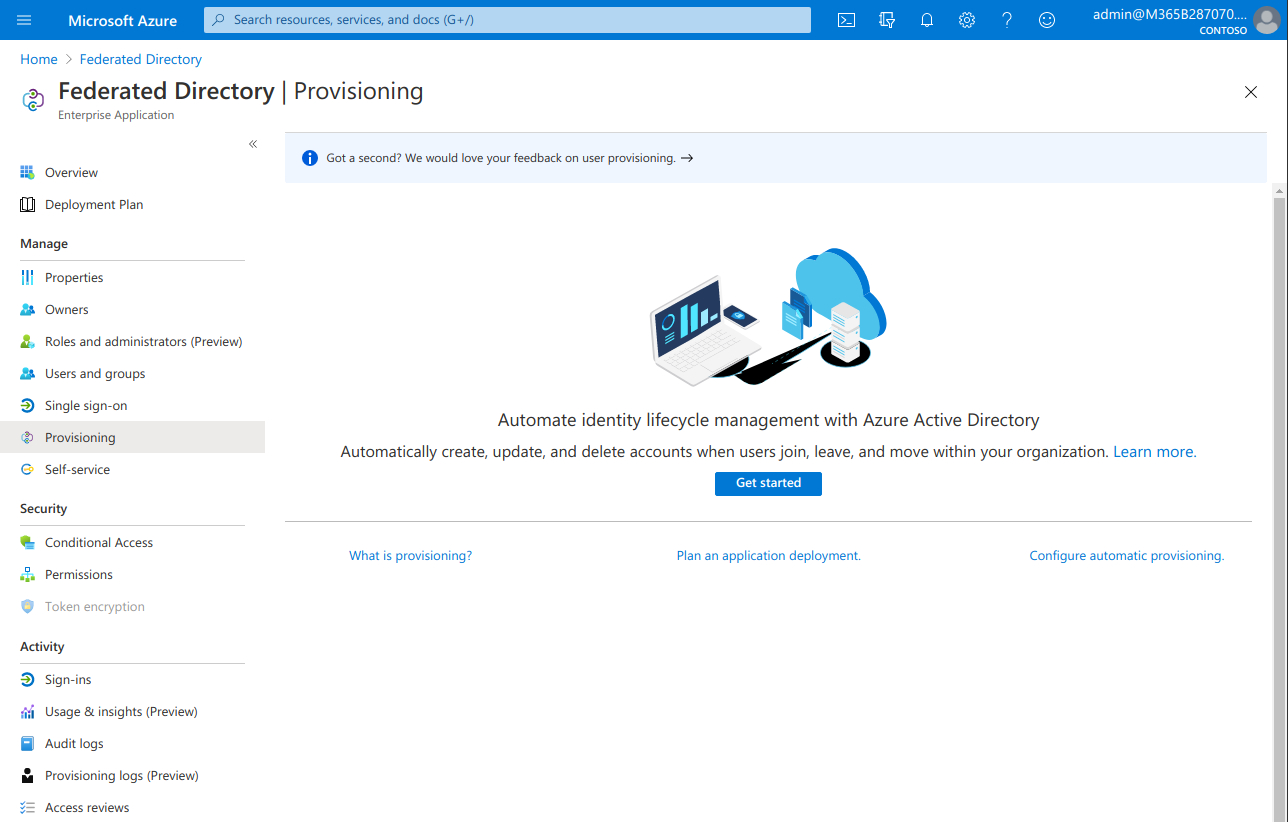
- Go to “Provisioning” in the menu and click “Get started”
- As soon as you click “Get started”, set “Provisioning Mode” to “Automatic” to get configuration screen:
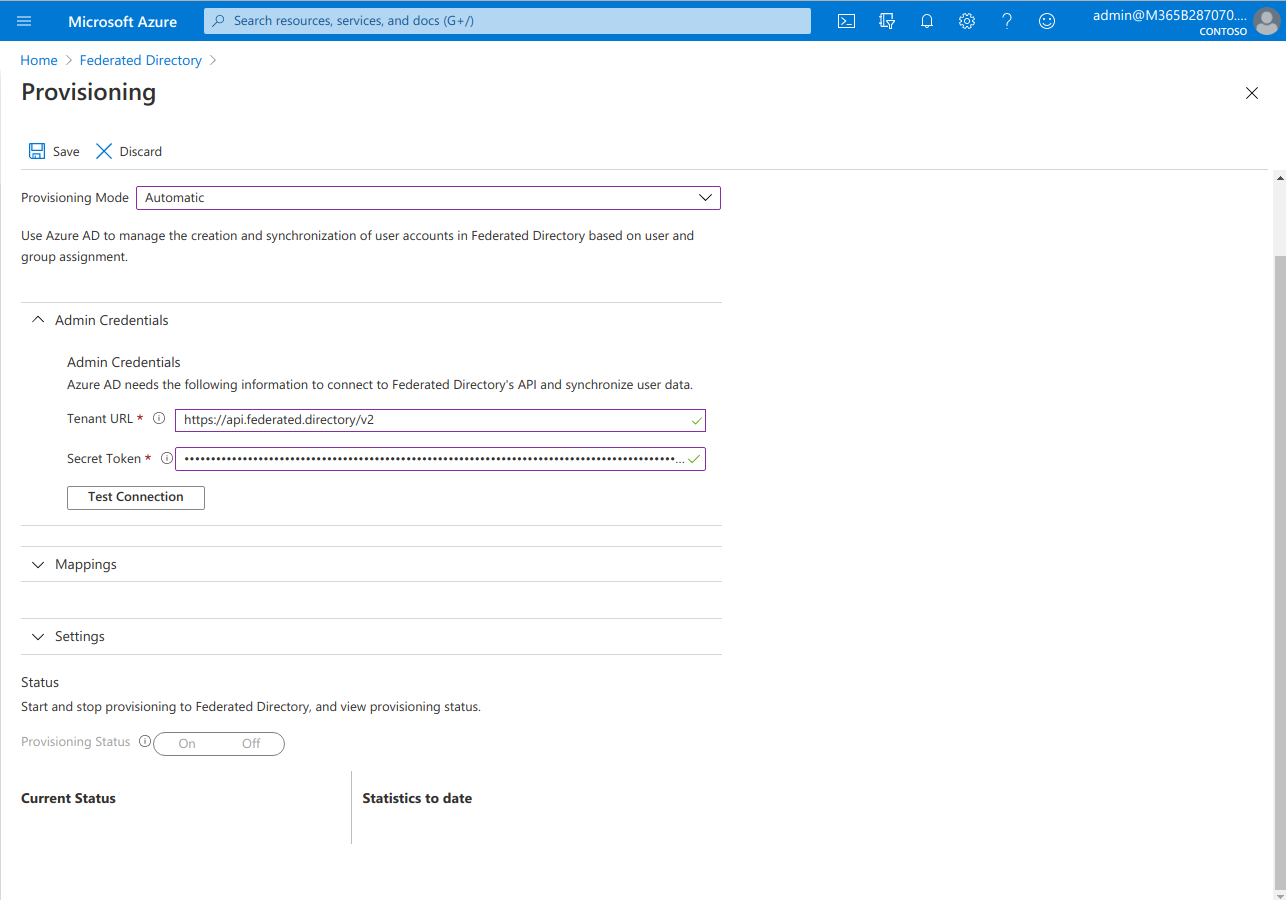
- Under Admin Credentials enter:
- Tenant URL:
https://api.federated.directory/v2 - Secret Token: The access token created in step 2
- Tenant URL:
- Click “Test Connection” to ensure the connection is working.
- At the bottom of the page, switch ‘Provisioning Status’ to
On. - Now you need to save configuration by clicking “Save” and re-enter this screen again: Click “Federated Directory” in breadcrumbs and “Edit Provisioning” button.
- In “Settings” accordion switch “Scope” to “Sync all users and groups”. If you want more control which Azure AD users are synced to Federated Directory, keep it at “Sync only assigned users and groups”.
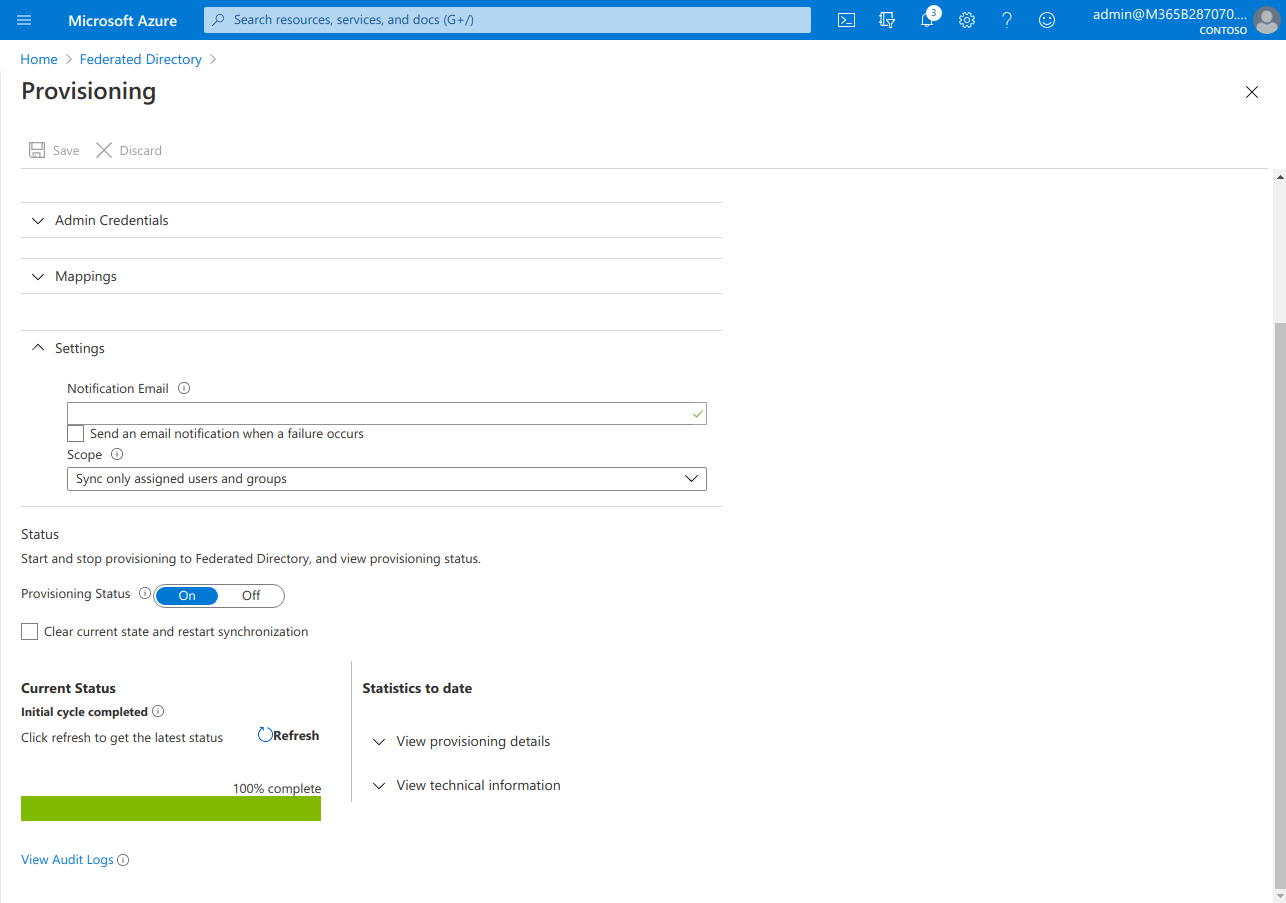
- Click “Save” button to persist the settings
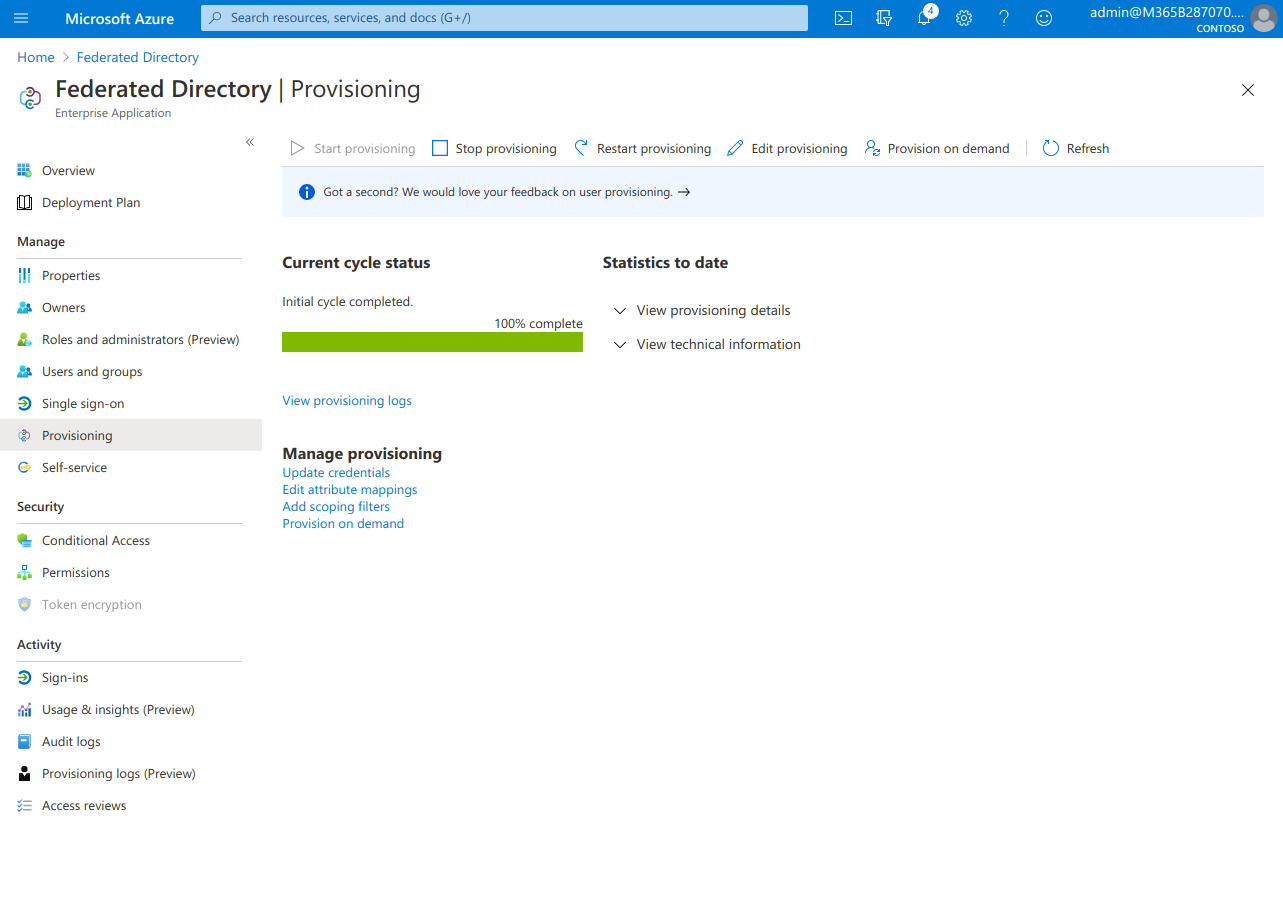
That is it. Your Azure AD users will now be synced to Federated Directory. Keep in mind that it could take Azure AD a couple of minutes (sometimes more than 30 minutes) to actually start provisioning the users to us. Look at the bottom of the provisioning page for the status.
Known limitations
Microsoft user provisioning does not support the actual deletion of a user when a user is unassigned from the Federated Directory service in your Azure AD. At that point the user will be disabled in Federated Directory and will no longer be able to log in. The user will be deleted when the user is hard-deleted from Azure AD which typically happens if you manually delete the user from the Azure AD recycle bin OR if the user is left for more than 30 days in the Azure AD recycle bin which Microsoft will then auto delete.