Getting started
You can use the information in your Federated Directory in your own applications
We made it as easy as possible to get started with our (SCIM compliant) APIs and integrate it into your application.
Getting started in four steps:
Sign Up
You’ll need a Federated Directory to get started. If you don’t have one already, sign up for free to create one. You will get 20 users and all the features for free.
Setup your environment
-
Create an Access token within your company. During this introduction we will use an access token of a directory key. A directory key only has administrative rights on the directory it was created in.
-
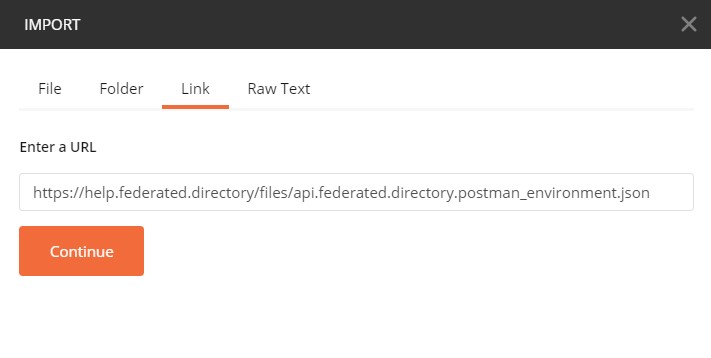
Launch Postman and click the Import button. Select Import From Link, and paste this link into the textbox:
https://help.federated.directory/assets/files/api.federated.directory.postman_environment.json
- Once it’s imported, make sure the api.federated.directory environment is selected.

- Click the eye icon next to
api.federated.directoryand select Edit to replace the following values:
| Value | Description |
|---|---|
| accessToken | Enter the access token you created earlier. This will be used in all API calls within the Postman demo collection. |
| directoryId | The unique ID of the directory your users will be created in. You can find it under the ‘settings’ tab on the same directory you created the directory key in step 1. |
Click Update to save your changes.
Import our Postman demo collection
Launch Postman and click the Import button. Select Import From Link, and paste this link into the textbox:
https://api.postman.com/collections/3391846-b6f8dc30-4a1e-4f29-b6ab-d20d9e216c75?access_key=PMAT-01GMK0V1P25KNWPQC2J87AH4NZ
Send some requests
Within the Postman demo collection you will find example API calls for the scenario’s below. Since we are using a directory key, all queries are limited to the directory the key was created in.
Perform the below queries in the correct order. IDs of the created users are used in the subsequent search, update and delete calls.
1. Create a new user
The body already contains a detailed JSON of an example user. You can of course always adjust this or create your own.
In the response you will find the users ID that you just created. This ID is stored as an environment variable in the Postman ‘tests’ of this request. We will use this in the next request to retrieve, update and delete this user.
2. Bulk create new users
Create multiple users simultaneously with a bulk request.
The body already contains a detailed JSON of a valid bulk request to create 4 users. All these users will be created in the “Bulk” department in the “Getting Started” division. The IDs of the returned users are stored as environment variables.
3. Search for users
Retrieve all the users in the “Bulk” department in the “Getting Started” division. Will only return the requested attributes. Also check out the Users API documentation for more advanced query options.
4. Retrieve the profile data from user
Get the profile data from the user created in step 1. It will only return the requested attributes. Requires a correct user ID in the environment settings.
5a. Update a user (patch)
A patch call will only change the mentioned attributes in the patch call. All other attributes will stay untouched. The response contains the complete user.
5b. Update a user (put)
A put call should contain all attributes of a user. Attributes not included in the body will be removed or reset. The response contains the complete user.
6. Delete a user
Delete the user created in step 1. No body in the response.
7. Bulk delete all created users
Remove all the users created in step 2.
These demo API calls should give you a good understanding of some basic functions of our APIs. More details can be found within our Users API documentation.