Integrate with Okta
In case your company uses Okta as their identity and access management solution, a lot of your corporate address book data resides in the Universal directory of Okta.
Which is great, because you can integrate Okta with Federated Directory.
Features
Authentication with Okta
Enable Single Sign On authentication by using Okta as your SAML identity provider.
This removes the option to authenticate with your Federated Directory credentials but redirects the users to Okta for Authentication.
User management by Okta
The following provisioning features are supported when using provisioning from Okta to Federated Directory:
- Create Users: New or existing users in Okta will be pushed to Federated Directory as new users.
- Update User Attributes: Updates to user profiles in Okta will be pushed to Federated Directory.
- Deactivate Users: Users deactivated in Okta will be automatically disabled in Federated Directory, but their contact data can still be found. If reactivated, users will regain access to Federated Directory.
The following Okta attributes will be synchronized to Federated Directory:
| Display Name | Variable Name | Mandatory |
|---|---|---|
| Username | username | ️️✔️ |
| Display name | displayName | ✔️ |
| Given name | givenName | |
| Family name | familyName | |
| Nickname | nickName | |
| Primary email | ||
| Second email | secondEmail | |
| Profile Url | profileUrl | |
| Primary phone | primaryPhone | |
| Mobile Phone | mobilePhone | |
| Street address | streetAddress | |
| Locality | locality | |
| Region | region | |
| Postal Code | postalCode | |
| Country code | country | |
| Preferred language | preferredLanguage | |
| Locale | locale | |
| Time zone | timezone | |
| User type | userType | |
| Employee number | employeeNumber | |
| Cost center | costCenter | |
| Title | title | |
| Division | division | |
| Department | department | |
| Manager display name | managerDisplayName |
The first two attributes are mandatory, all other attributes can be disabled from provisioning in Okta.
Prerequisites
-
Inside your Federated Directory create a new directory to be integrated with your Okta environment. Every new directory can be integrated with Okta. You can also create multiple directories to integrate with multiple (Okta) systems.
-
Inside Okta, add the Federated Directory application from the Okta gallery. For this, go to ‘applications’, click on ‘Add Application’ and search for
Federated Directory.
Configuration steps
You are now ready to integrate Okta.
Authentication with Okta
If you want your users to authenticate with Okta to Federated Directory. Follow the below steps.
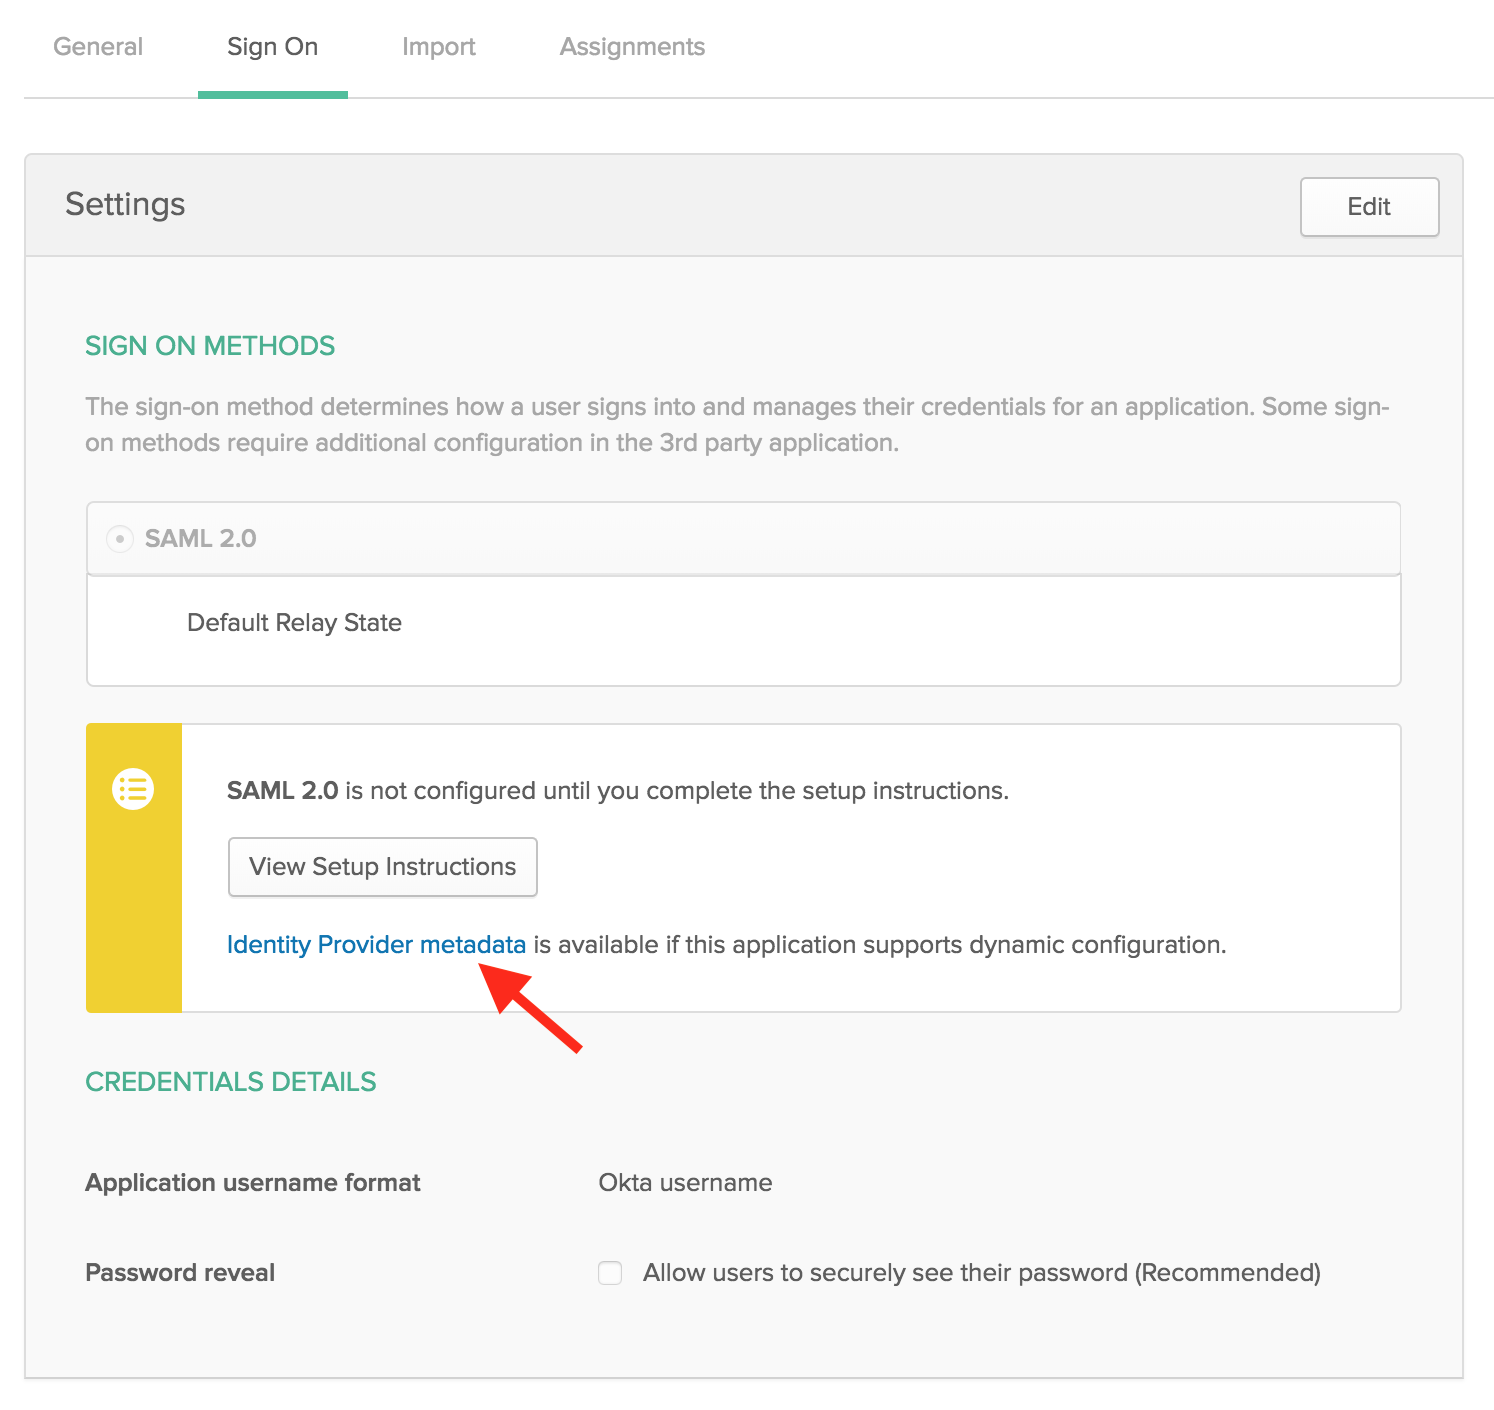
- Inside Okta’s portal go to “Sign On” section of your newly created “Federated Directory” application. Click the “View Setup Instructions” button. Keep this new tab open.
- Go back to Federated Directory as an administrator and open de directory you created before.
- Go the “config” tab of this new directory and select “SAML” in the dropdown in the authentication section.
- Go back to the Okta tab wit the “Setup Instruction” and copy:
- The
Identity Provider Single Sign-On URLinto ourlogin page url. -
The
X.509 Certificateinto ourverification certificate.Leave the other fields empty. Like this: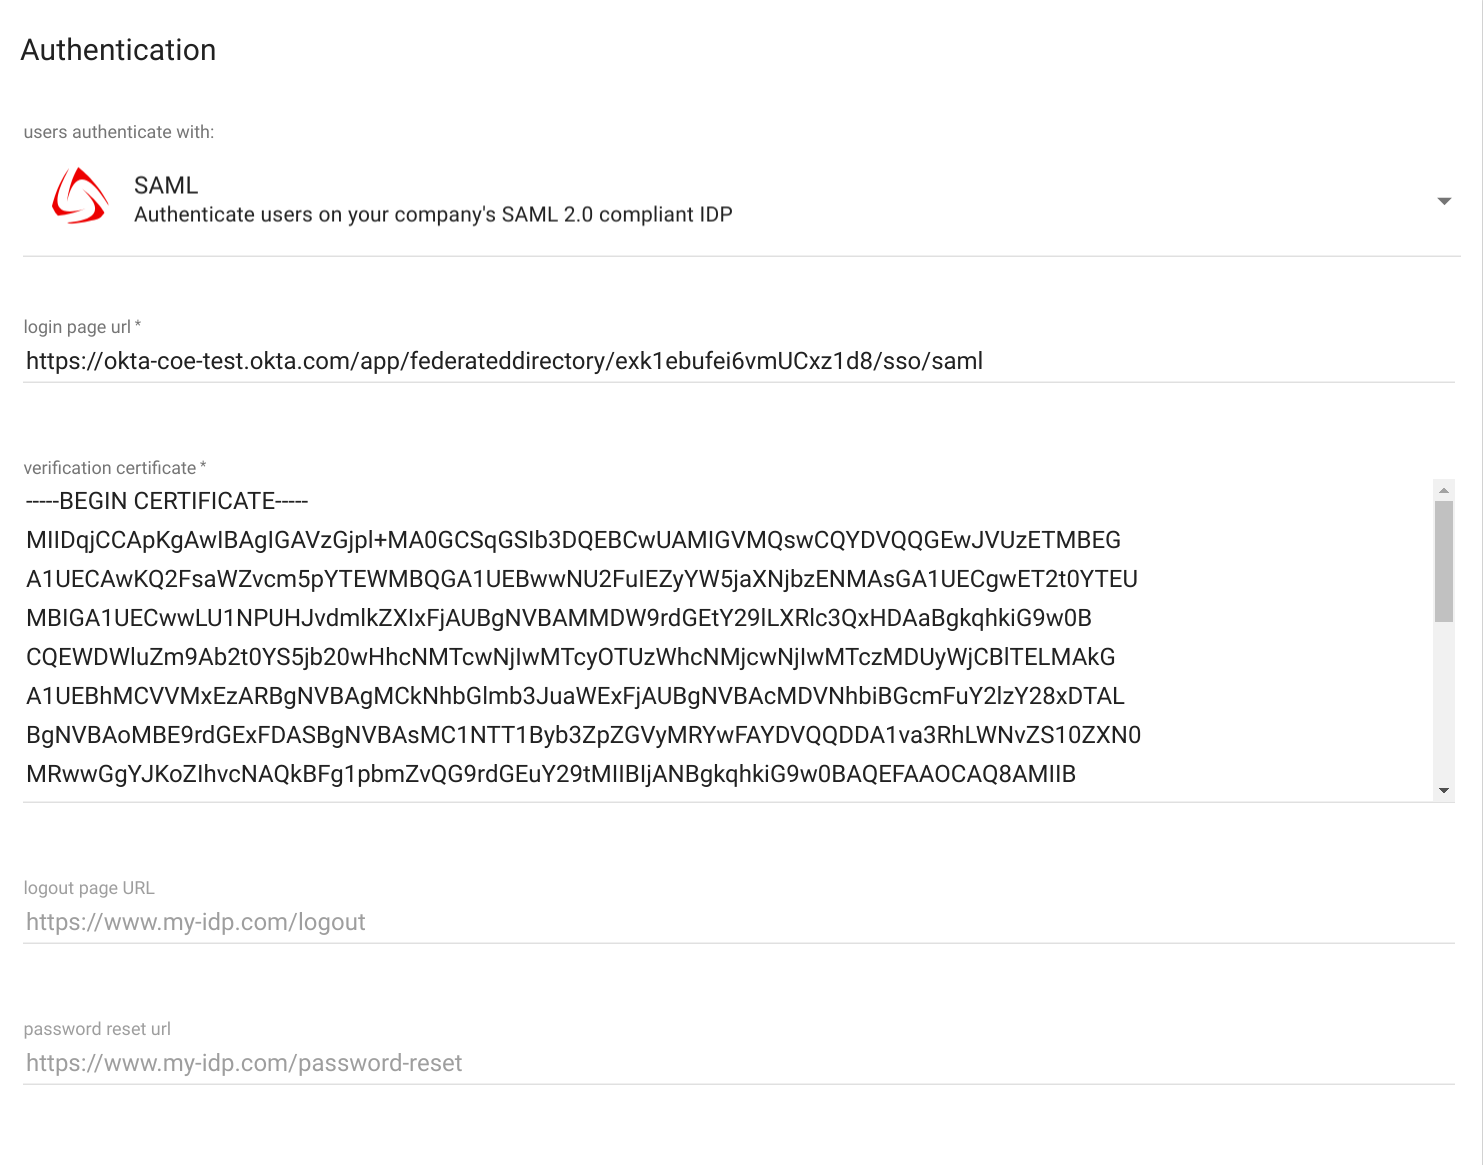
- In Federated Directory, press “save”. The users created inside this directory will be able to logon with their Okta account now. Make sure their userName matches the userName in Okta. If you let Okta provision the users to us, this is automatically taken care of.
User management by Okta
If you want to automatically provision your users and their profiles in Okta to Federated Directory. Follow the below steps.
- In Federated Directory, go back to the directory you want to integrate with Okta and select the “keys” tab.
- Create a new key. Give it a name, like “Okta integration”. Once created, copy the “access token”. You will need it in the next steps.
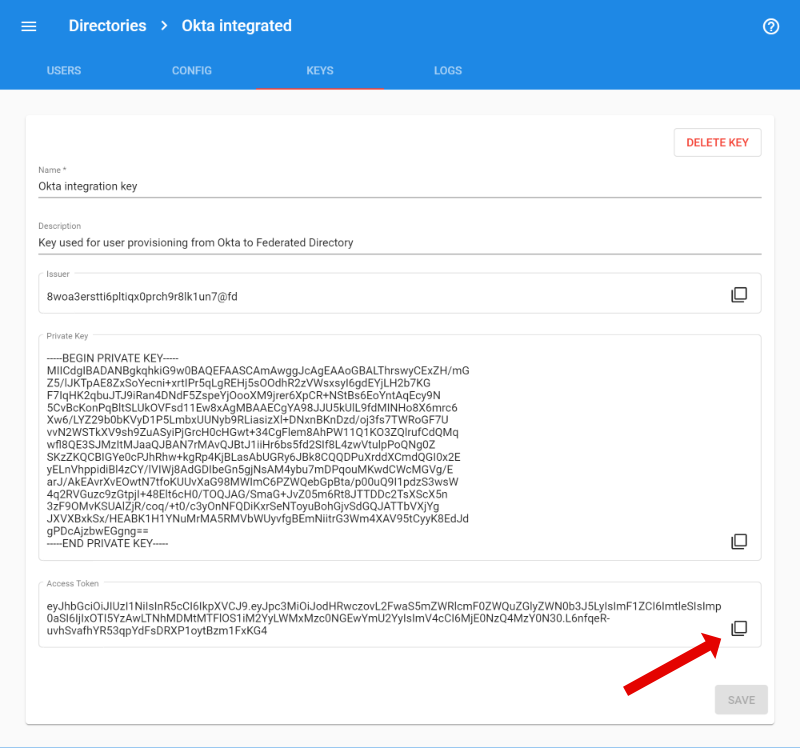
- Go back to Okta, go to the Provisioning tab and click “Configure API Integration”. Tick the “Enable API integration” box, and enter the “access token” you just created as API token.
- Click “Test API credentials” to ensure the connection is working
-
Click “Save” to enable provisioning for the Federated Directory app
- You will now activate the desired provisioning features. In the provisioning settings for the app, under “To App”, click “Edit” and enable the “Create Users”, “Update User Attributes” and “Deactivate Users”. Click “Save” to save your settings.
That is it. You are now ready to start assigning users to the app, and they will be automatically created within Federated Directory.
Known limitations
Okta user provisioning does not support the actual deletion of a user. When a service is unassigned from a user or when a user is deleted in Okta, that user will not be removed from Federated Directory. It will only be disabled for now. https://developer.okta.com/standards/SCIM/
Okta integration supports the manager attribute. However it does not include the actual manager Id, but only the displayName of the manager. This means unfortunately that you can not filter on manager in Federated Directory.