Groups
- Introduction
- Create a group
- Group roles
- Invite others to your group
- Automatically add users to a group
- Multiple companies in a group
- Chat methods
Introduction
Users are created in directories and can be made a member of multiple groups. Users can search through the contact data of members in the same groups. Which means, that if a user is not part of any group, it will not be able to find any contact data and visa versa.

A group can contain users of one or more companies.
The data that is shared between the members of a group, is configured during the creation of a group.
By default, there is one “All Users” group created in your company. The members of this group share all attributes with each other. A Smart Filter on this group automatically adds all the users of your company to this group. This group can be removed by the administrator.
Create a group
Both users and administrators are able to create groups, however an administrator can disable this for its users on the directory settings.
You create a new group by going to ‘Groups’ in the main menu and click the CREATE GROUP button.
In the next step you can configure your new group.
| Attribute | Description |
|---|---|
| Name | Give your new directory a name. Max 100 characters. |
| Description | A description of your group. Max 250 characters. |
| Shared Attributes | The attributes that will be shared between the user in this group. |
You will be able to change the name, description and the used ‘chat methods’ later on. The shared attributes can not be changed after a group has been created. This way, we protect the privacy of the members of that group. After the group is created, you can also change the logo of the group.
Click the NEXT button. Confirm the creation of the group in the last step by clicking the CREATE GROUP button.
Group roles
A group knows two roles:
- Member
- Owner
Only group owners are able to make changes and invite users to a group.
You will be made an owner of every group you create. The owner is able to make any member of the group an owner as well. Even members from another company.
Invite others to your group
When you want to add other users to a group in which you are an owner, you can send them an invitation.
To do this, open the group and go to the ‘Members’ tab. In here you will find the ADD MEMBERS button.
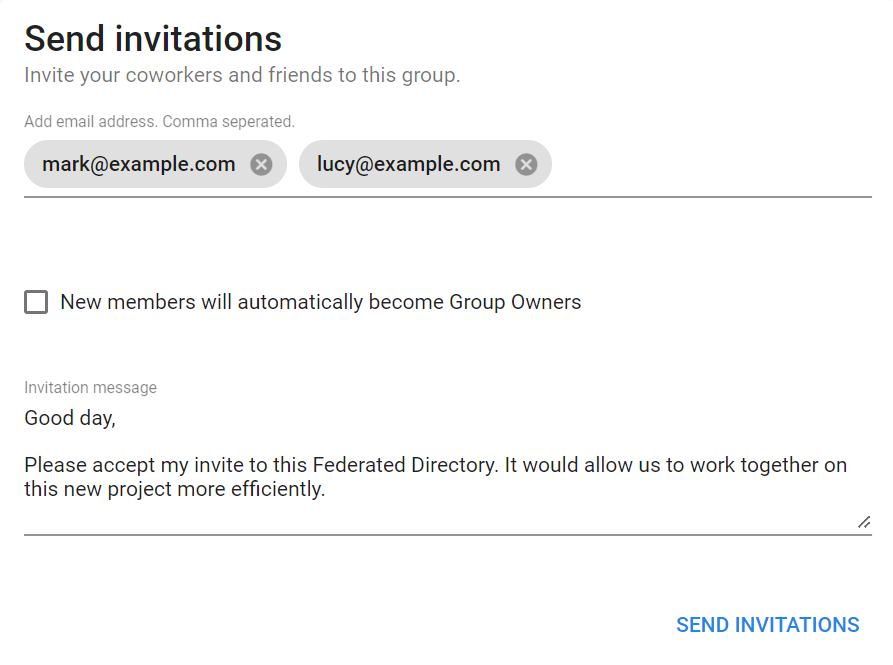
In the “Send invitations” card, enter the email addresses of the users you want to invite. Separate multiple email addresses with a comma. This can be users from your own or other companies.
Select the checkbox if you want to make these users, owner of this group as well. This could be useful when these users should invite others as well.
Lastly enter an optional custom message, which we will include in the invitation. Click the SEND INVITATIONS button.
After the invitations have been sent, you will see them added to the ‘past invitations’ rows below. By selecting a ‘past invitation’, you can see who send it and when. But you can also revoke or resend the invitation.
Automatically add users to a group
It is also possible to automatically add users to a group based upon a Smart Filter on the users in your company. This will add the users to this group, without an invitation and without the users explicit approval. That is why, the next steps can only be done by a group owner that is also an administrator within a company.
A Smart Filter adds all the users to a group that adhere to this filter. The filter is reevaluated during every change on a user inside your company.
If you are both a group owner and an administrator in your company you can add a Smart Filter by going to the ‘Settings’ tab in your group.
In the “Smart Filter” card, click the ADD FILTER button.
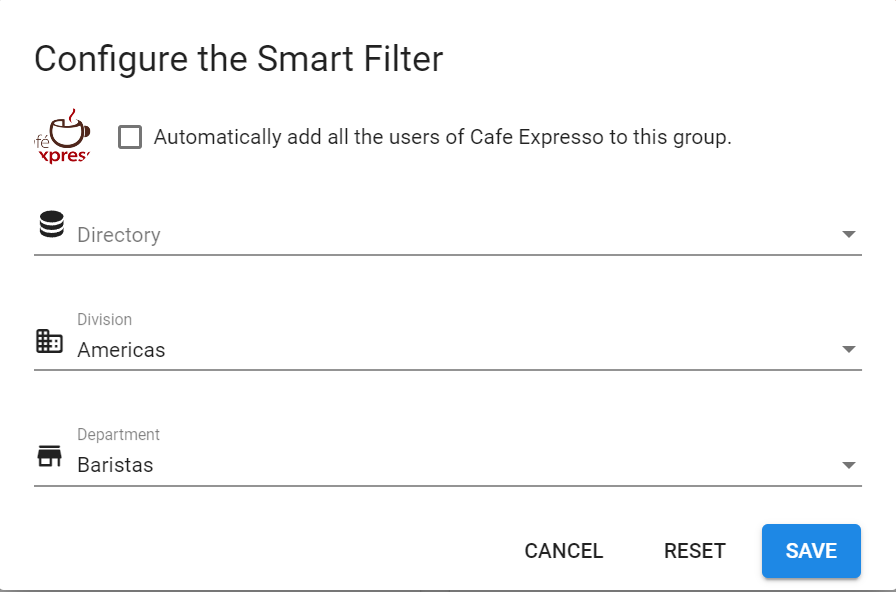
Build your Smart Filter with these parameters
| Filter | Description |
|---|---|
| All the users in your company | Select this checkbox if you want to add all the users of your company in this group. This will disable the other filter options below. |
| Directory | Select one directory that contains the users that you want to add to this group. |
| Division | Select one division that contains the users that you want to add to this group. |
| Department | Select one department that contains the users that you want to add to this group. |
After you save the Smart Filter, it will be directly processed. The users that meet your filter will be added to your group. You should see the new members under the ‘Members’ tab.
Every company present in a group can add one Smart Filter to that group. Provided that one of these users from that company is a group owner and an administrator in its company.
Multiple companies in a group
To combine the contact data of multiple companies, you need to create a group and invite one or more users from the other companies to this group.
Make those users a group owner as well, so they can invite others or add a Smart Filter to add the users from their company automatically.
Chat methods
Manage the chat methods that are being used within this group. This will add the option, on the detail page of a contact, to start a chat.
Enable a chat method on an email address, phone number or username.
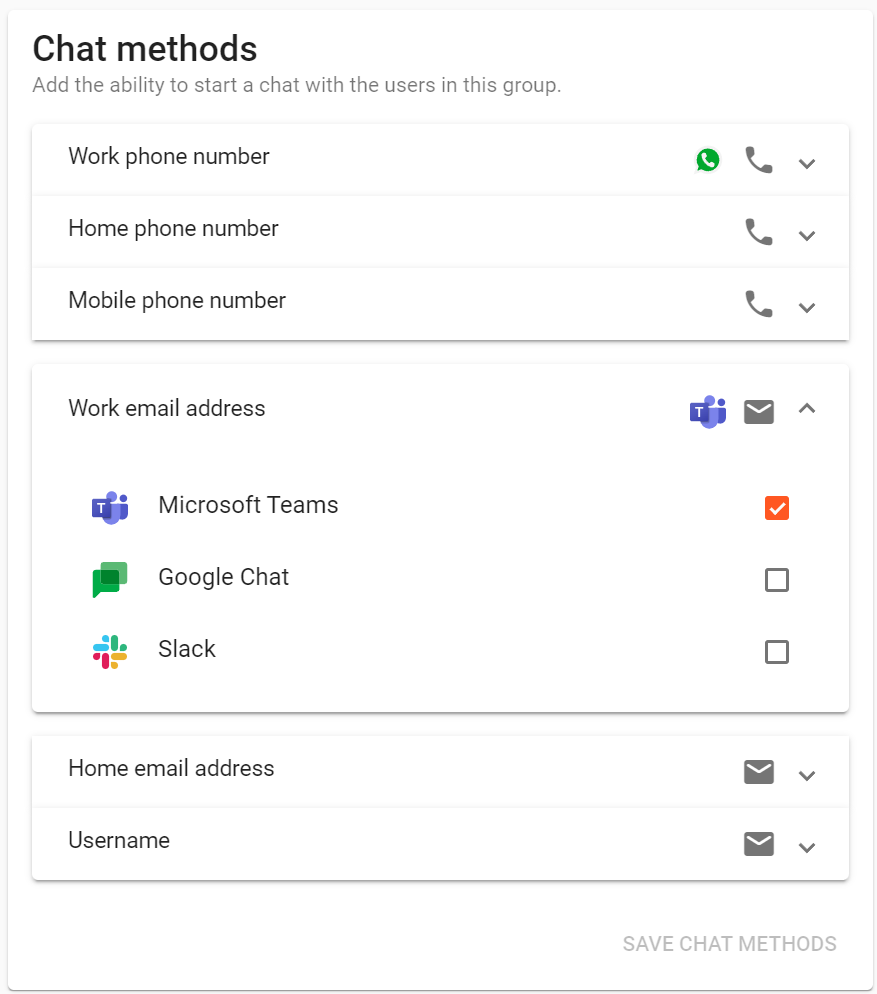
Federated Directory is currently integrated with these chat methods.
| Chat Methods | Enabled option on a contact | |
|---|---|---|
 | Google Chat | Copy email address and open Google Chat |
 | Microsoft Teams | Open a direct chat in Microsoft Teams |
 | Slack | Copy email address and open Slack |
 | Open a direct chat in WhatsApp |