Integrate with Google
If your corporate address book resides in Google Workspace you may want to integrate it with your Federated Directory.
Integrating Federated Directory with Google Workspace provides you with the following benefits:
Before you continue make sure you signed up to Federated Directory.
Authentication
The login chapter describes how users can login with their Google account. Enabling this, is as easy as selecting Google accounts as an authentication method on the settings tab on a directory.
We only allow access to users that are created in this directory. During the authentication process we map the users Google ID with the userName of the user in our directory.
| Google Directory | Federated Directory | |
|---|---|---|
| Attribute mapping | id | userName ️️ |
So make sure these two match.
User management by Google Workspace
The following provisioning features are supported when using provisioning from Google Workspace to Federated Directory:
- Create Users: New or existing users in your Google Workspace will be pushed to Federated Directory as new users.
- Update User Attributes: Updates to user profiles in your Google Workspace will be pushed to Federated Directory.
- Deactivate Users: Users deactivated in your Google Workspace will be automatically disabled in Federated Directory, but their contact data can still be found. If reactivated, users will regain access to Federated Directory.
- Delete Users: When a user is deleted in your Google Workspace it will be deleted in Federated Directory as well.
Enabling Google Workspace to sync users to Federated Directory consists of two steps:
- Install Federated Directory from Google Workspace marketplace
- Enable the sync of users from your Google Workspace to Federated Directory
Install from Google Workspace Marketplace
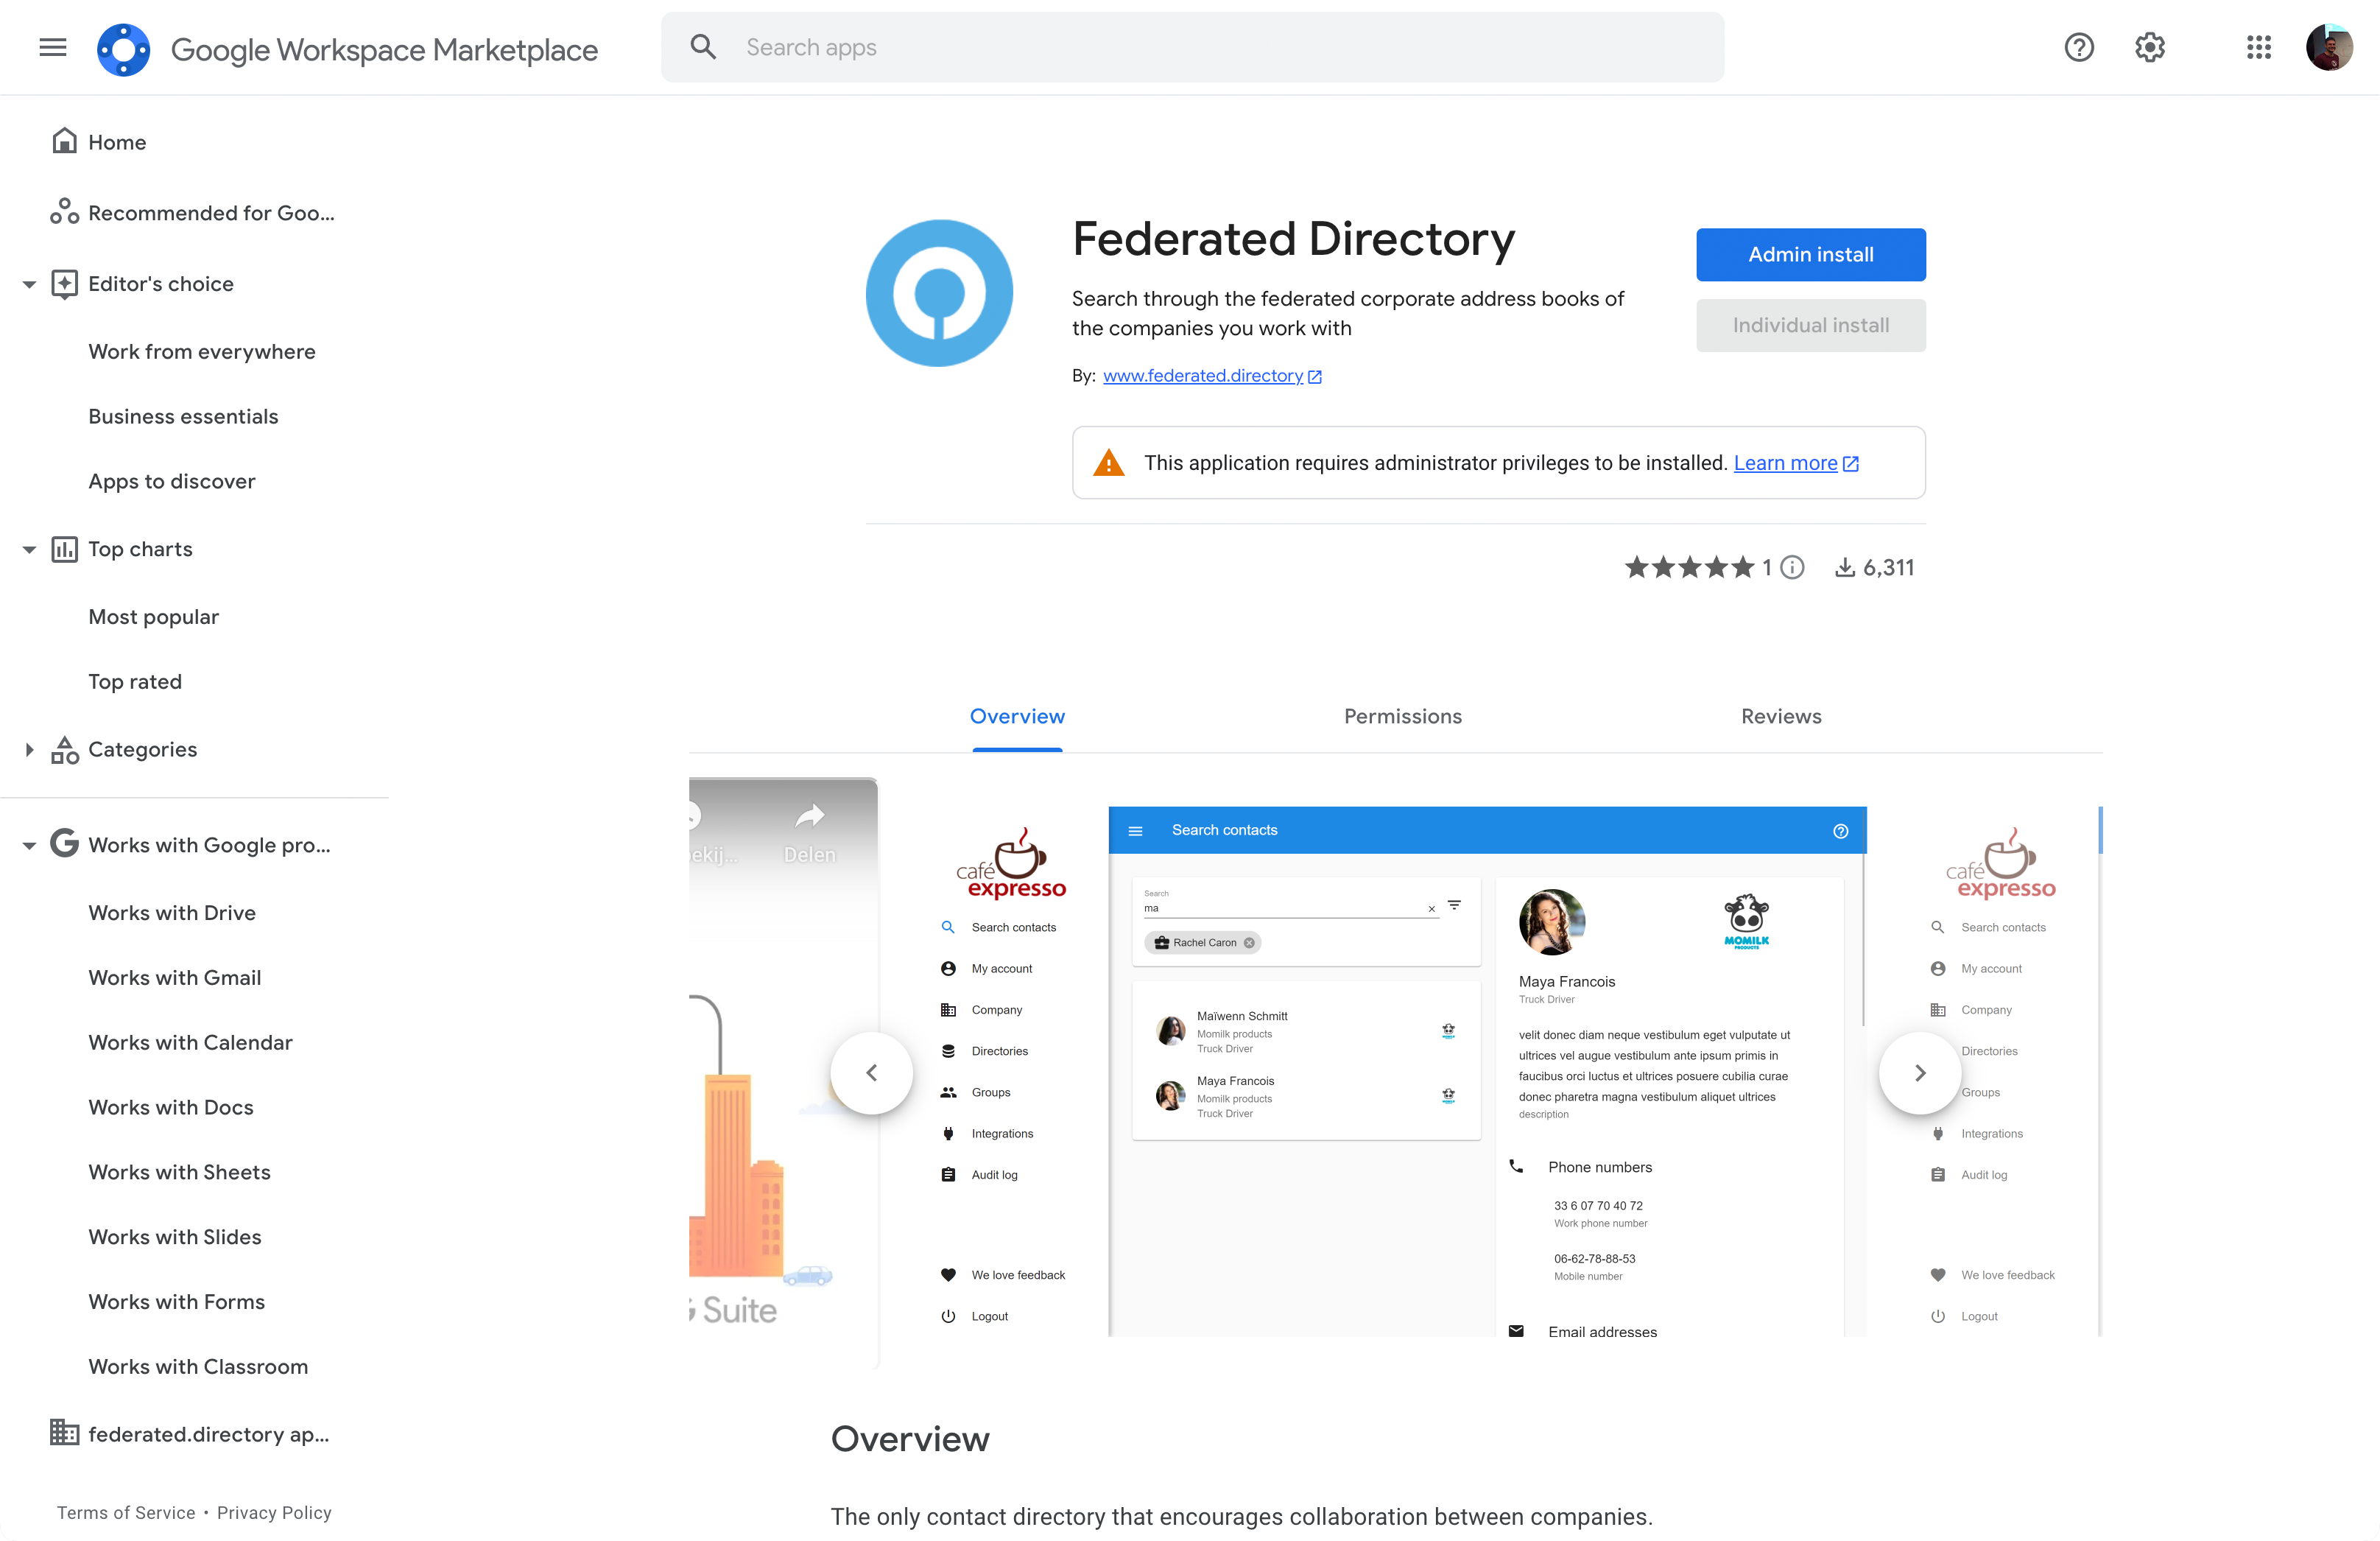
Make sure you are a Google Workspace administrator and go to our app in the Marketplace: https://workspace.google.com/marketplace/app/federated_directory/293967924849
On the screen of the Federated Directory app click, Admin install.
This will kick off the consent process to allow users to log in to Federated Directory using a Google Workspace account. Click CONTINUE:

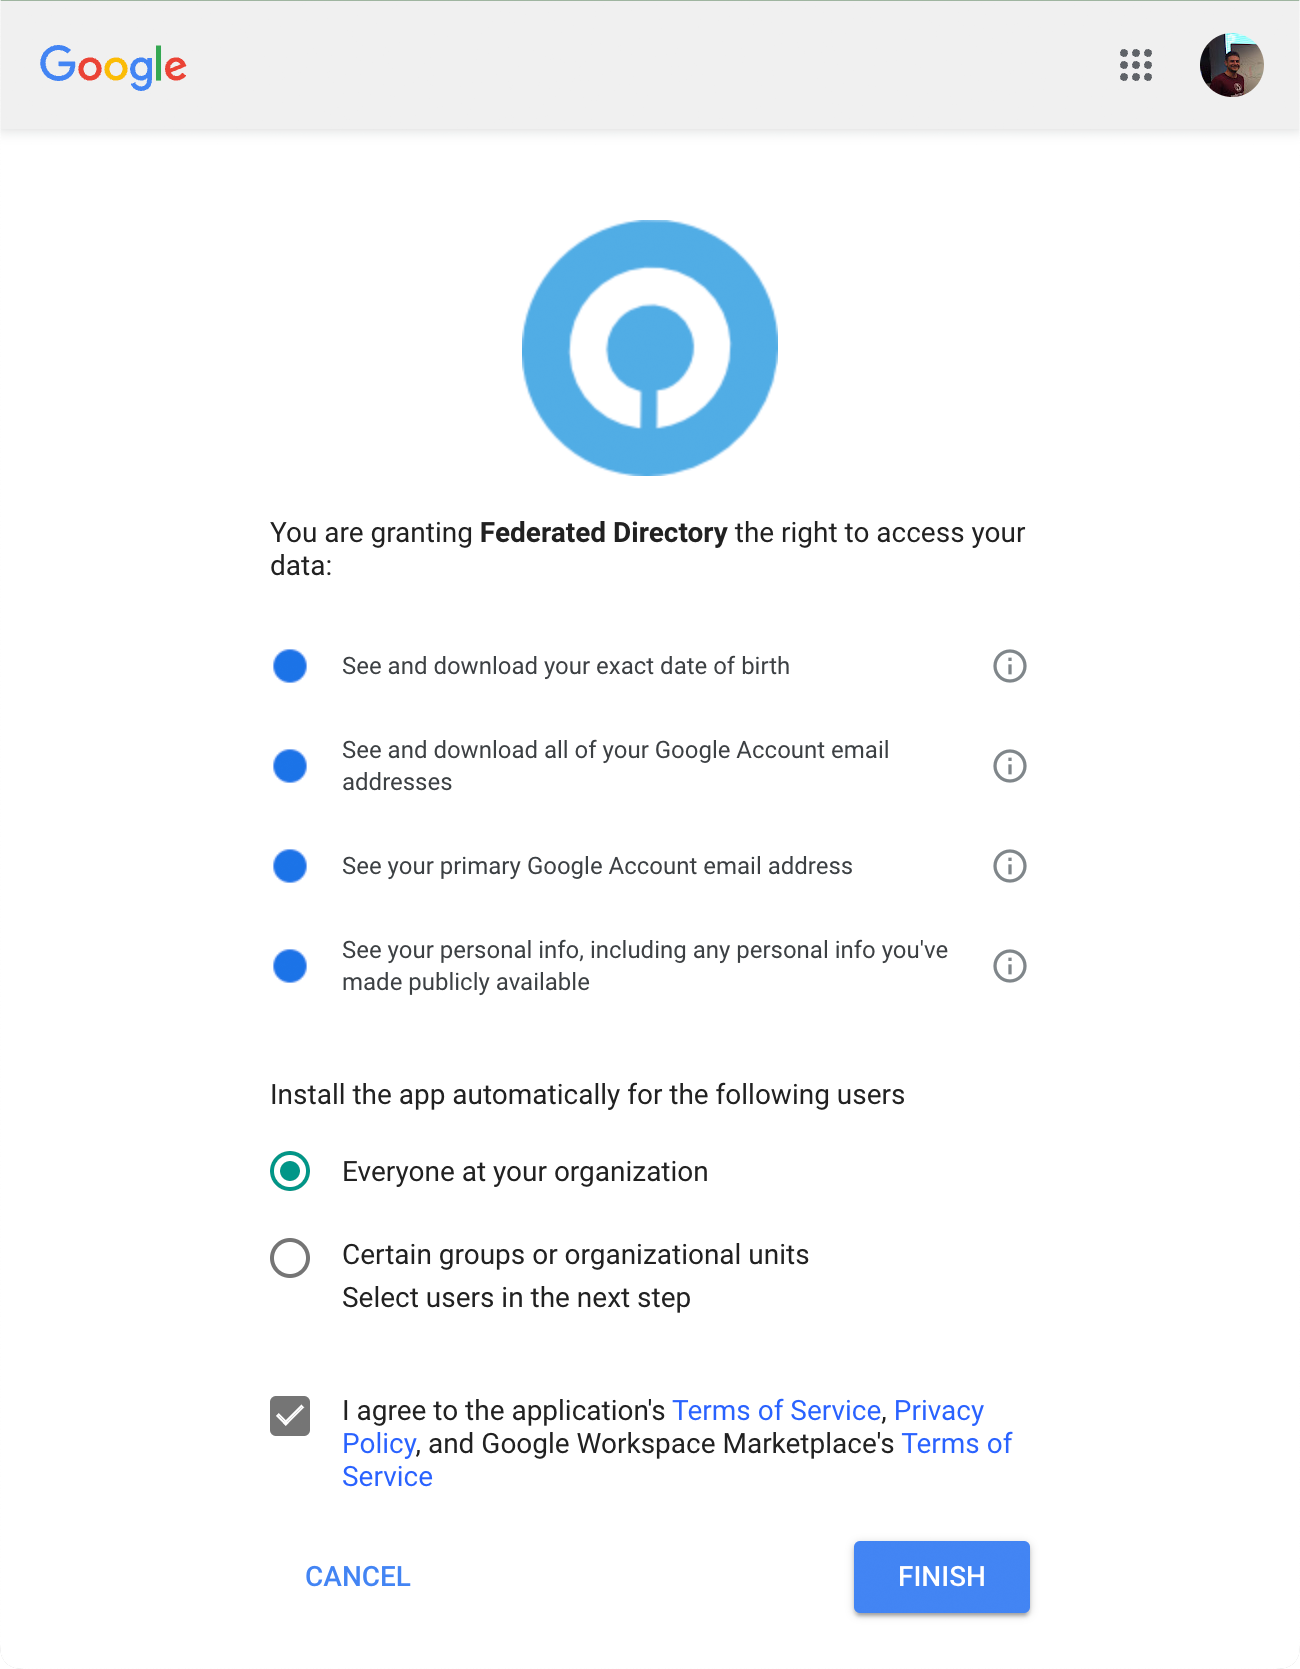
After you’ve accepted consent, you will see an information dialog.
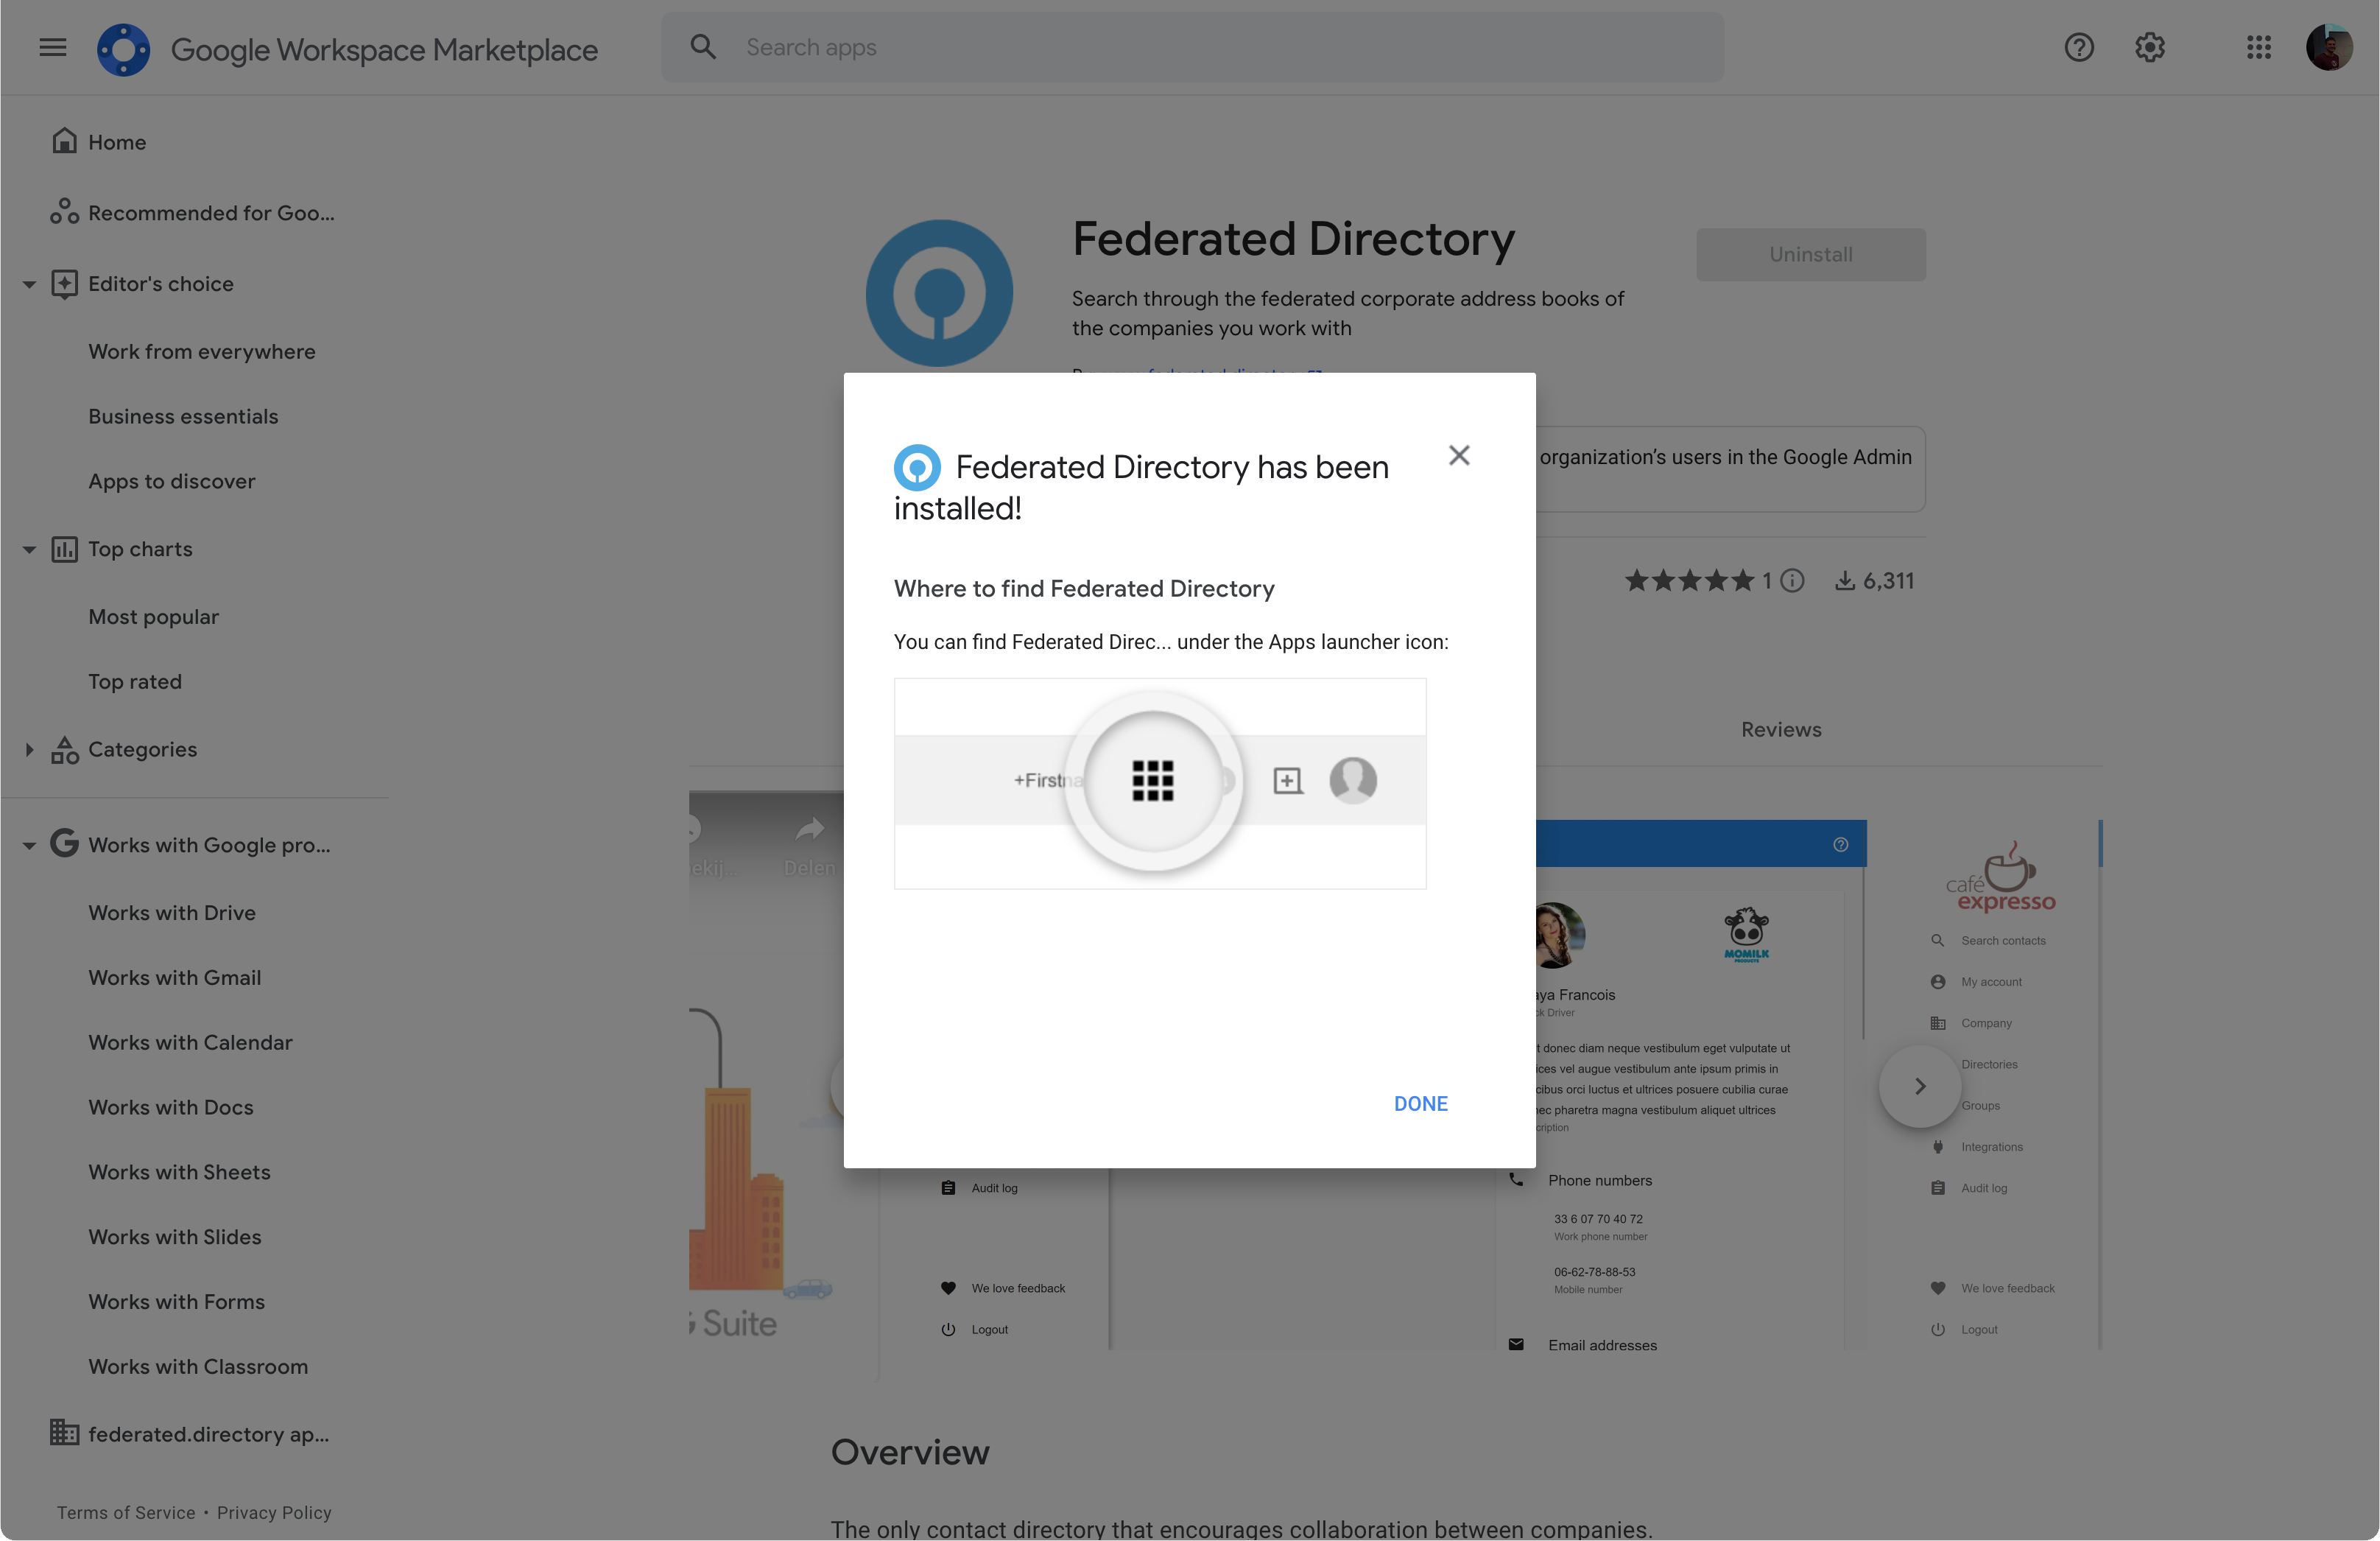
From now on you should be able to see the Federated Directory app inside installed apps in Google Admin Console
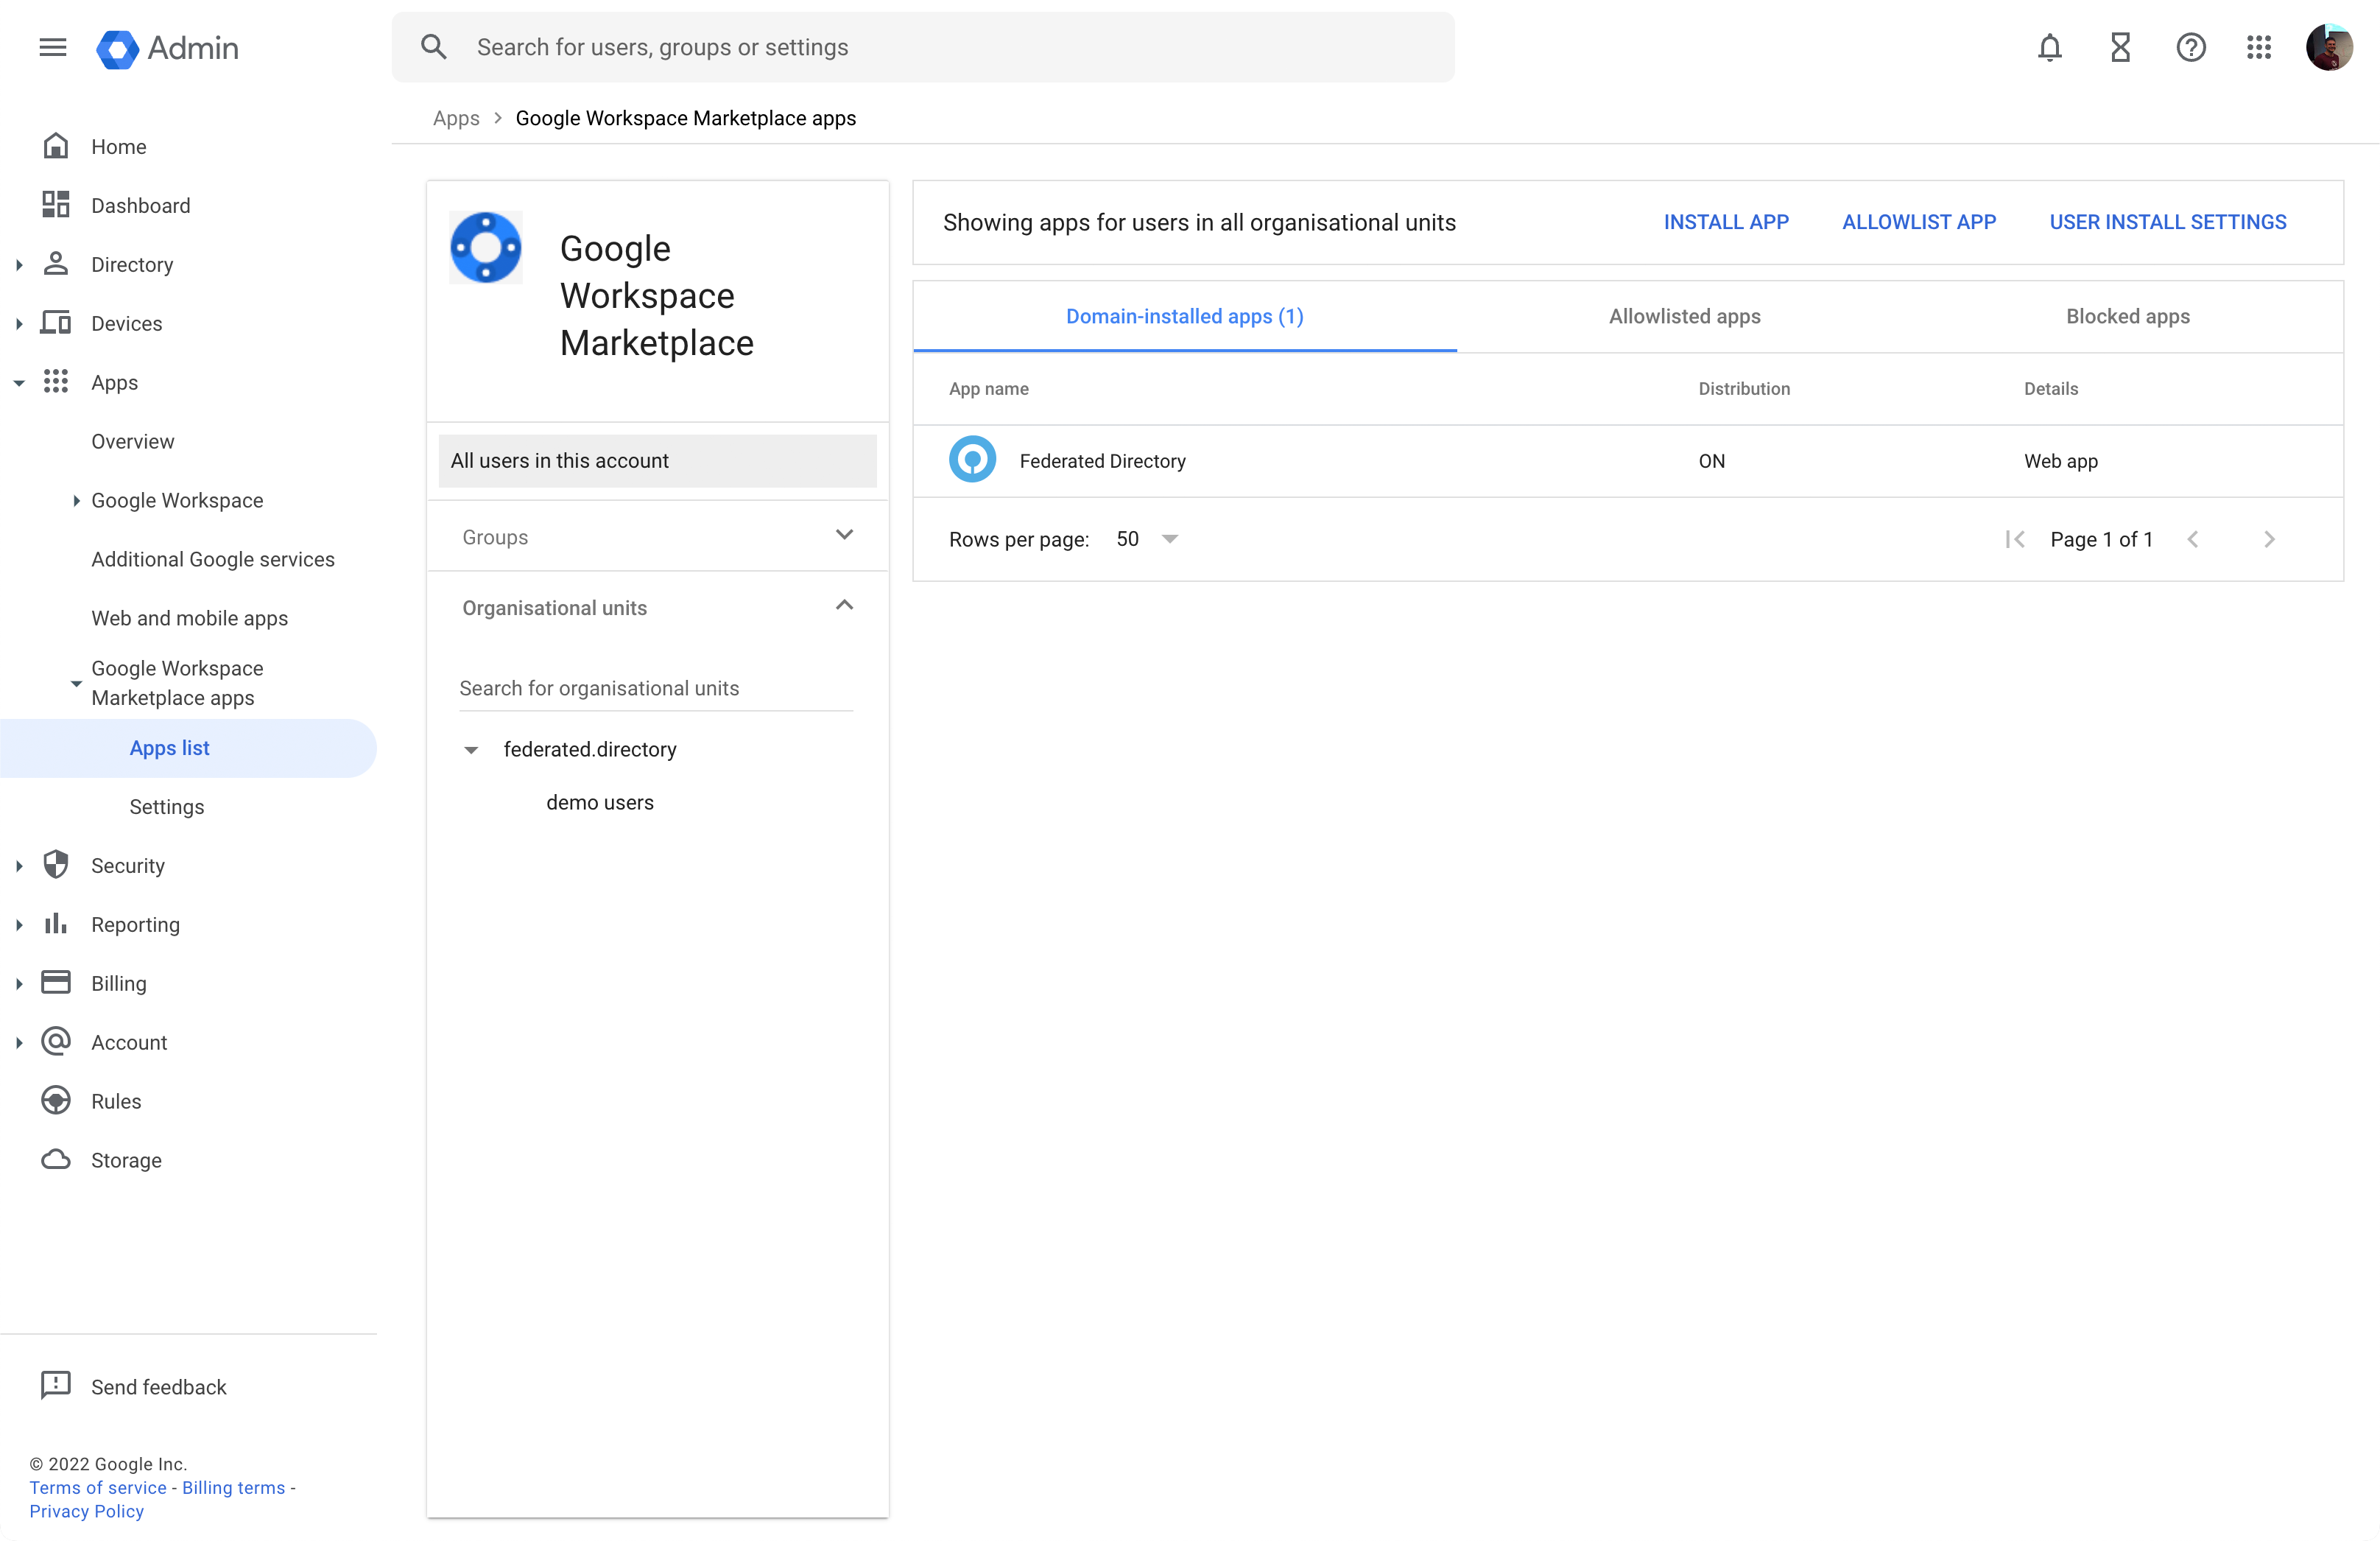
Visit this link to confirm: https://admin.google.com/ac/apps/gmail/marketplace/apps.
Enable the sync of users from your Google Workspace to Federated Directory
From your Google admin console, browse to Apps ⇒ Web and Mobile Apps. Once that screen is shown, click the Add app button and then “Search for apps”
In the filter box enter ‘Federated Directory’ and select it by clicking Select button
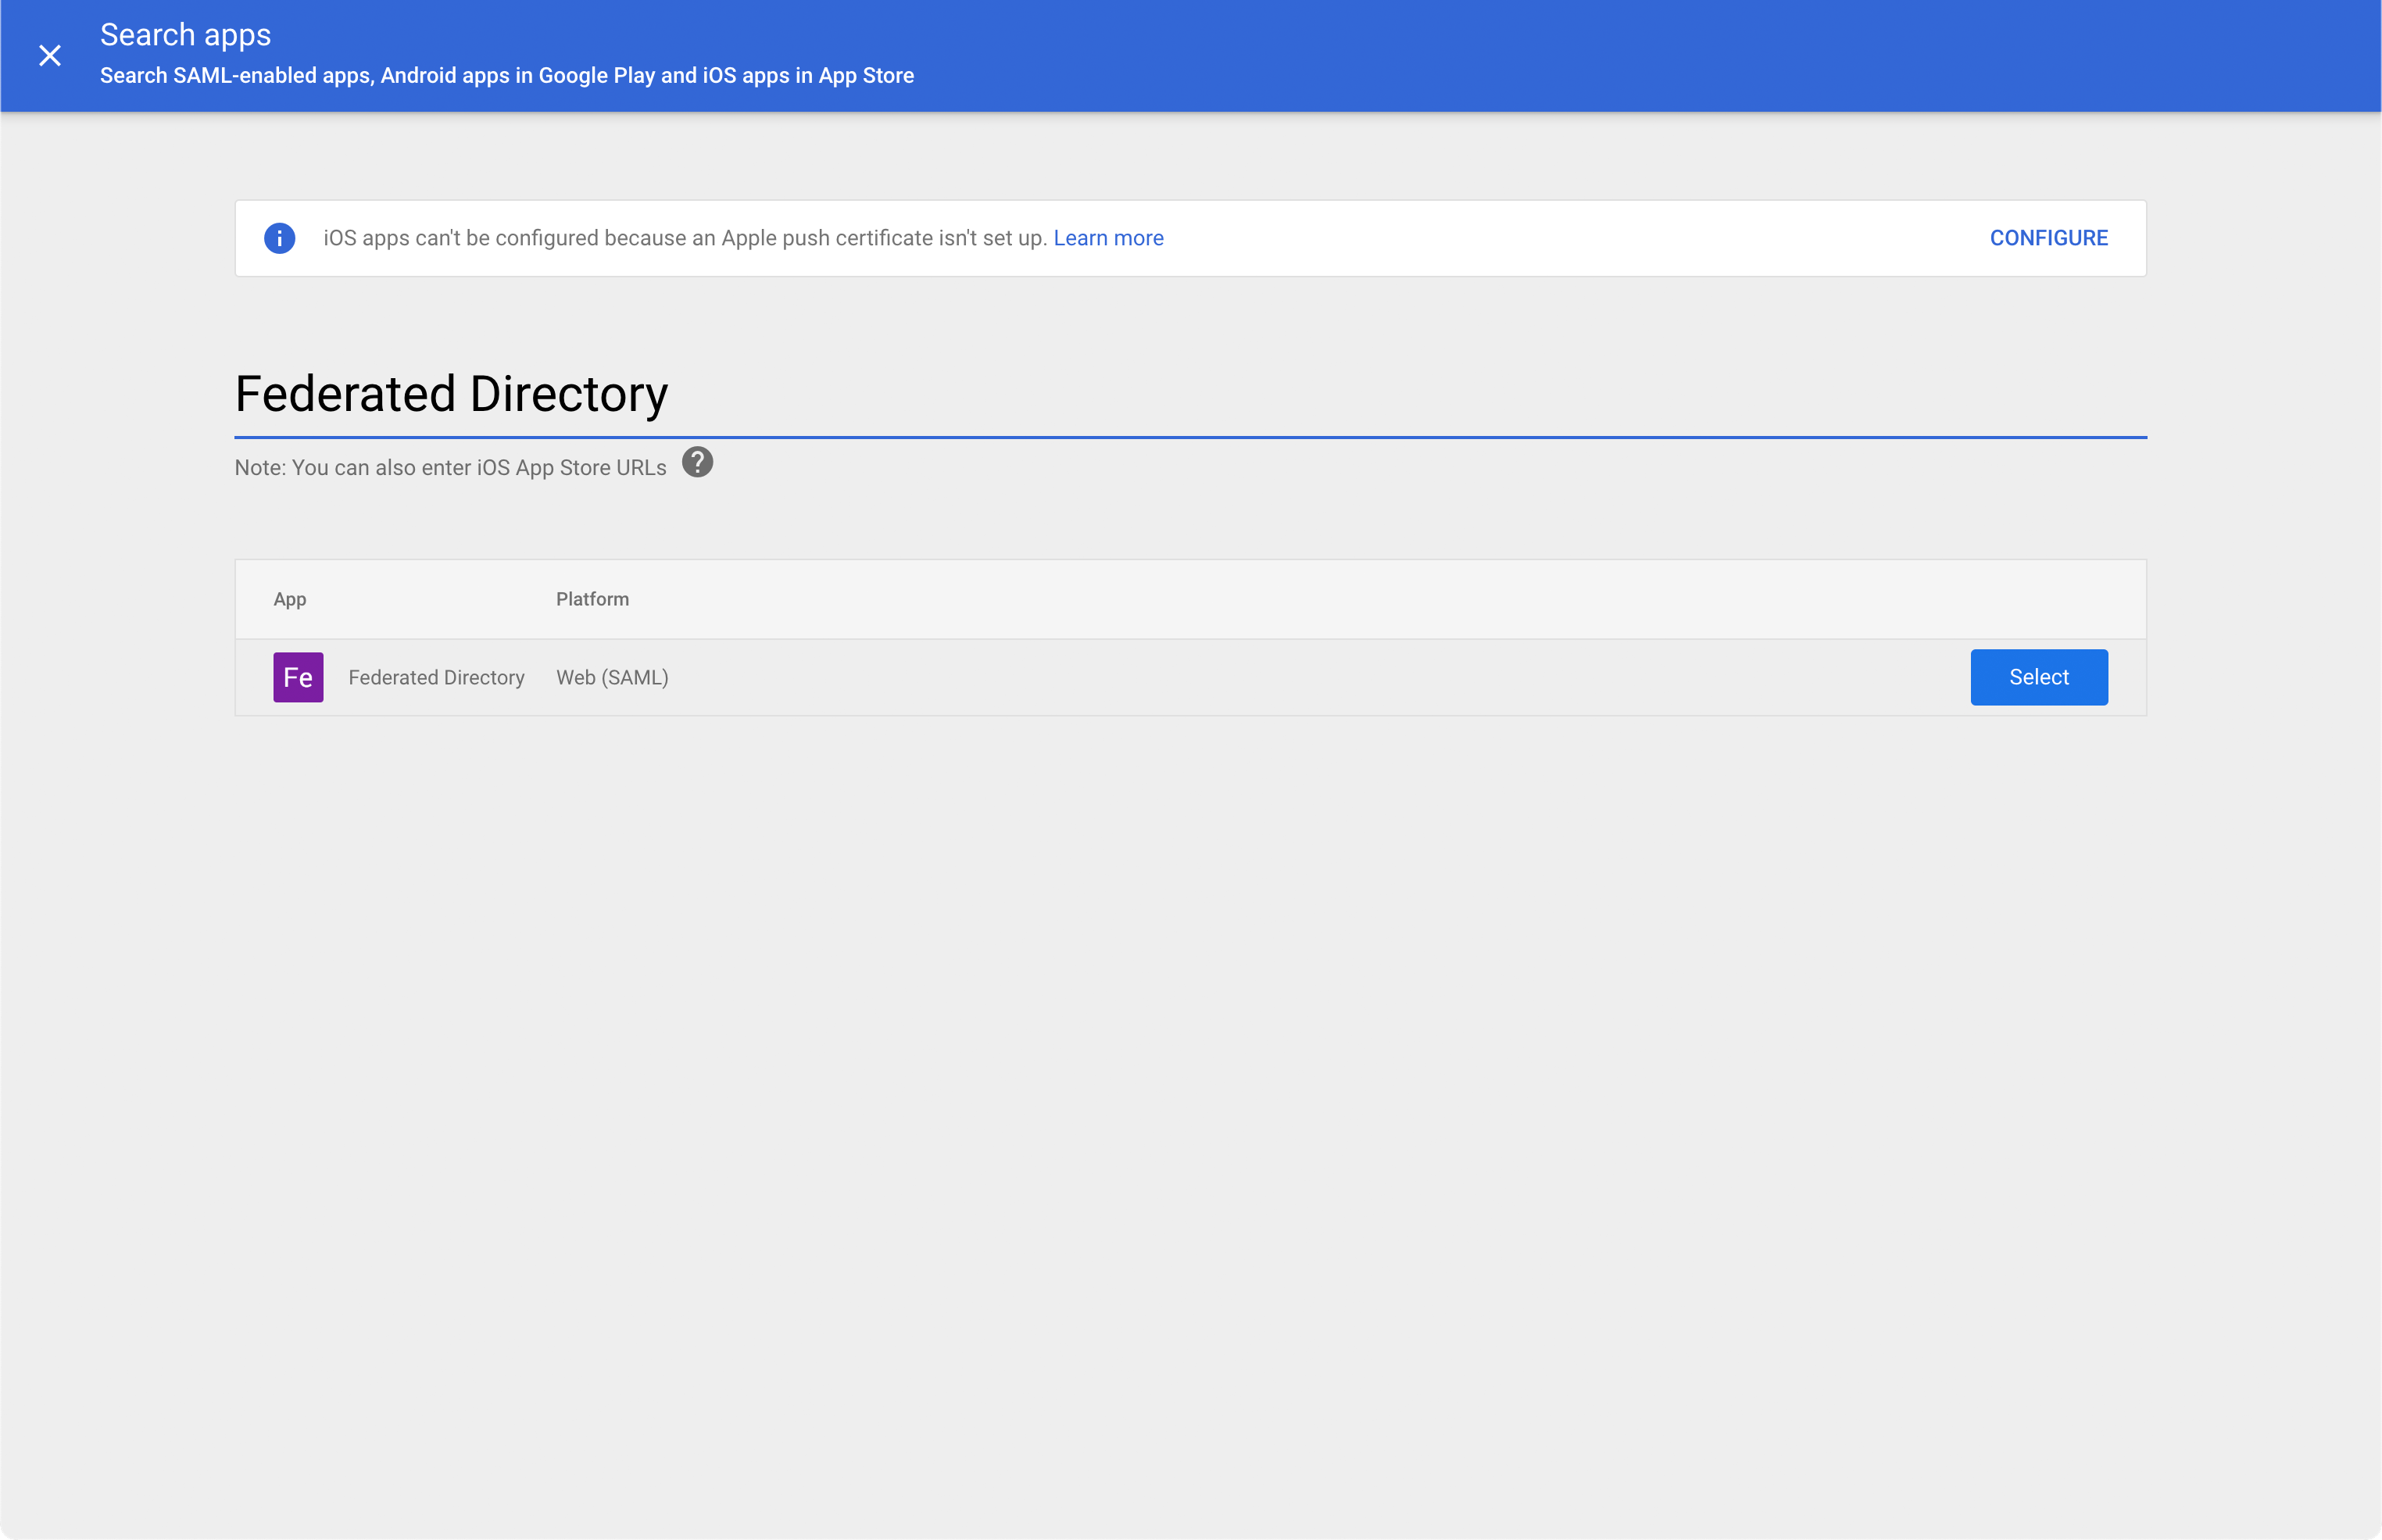
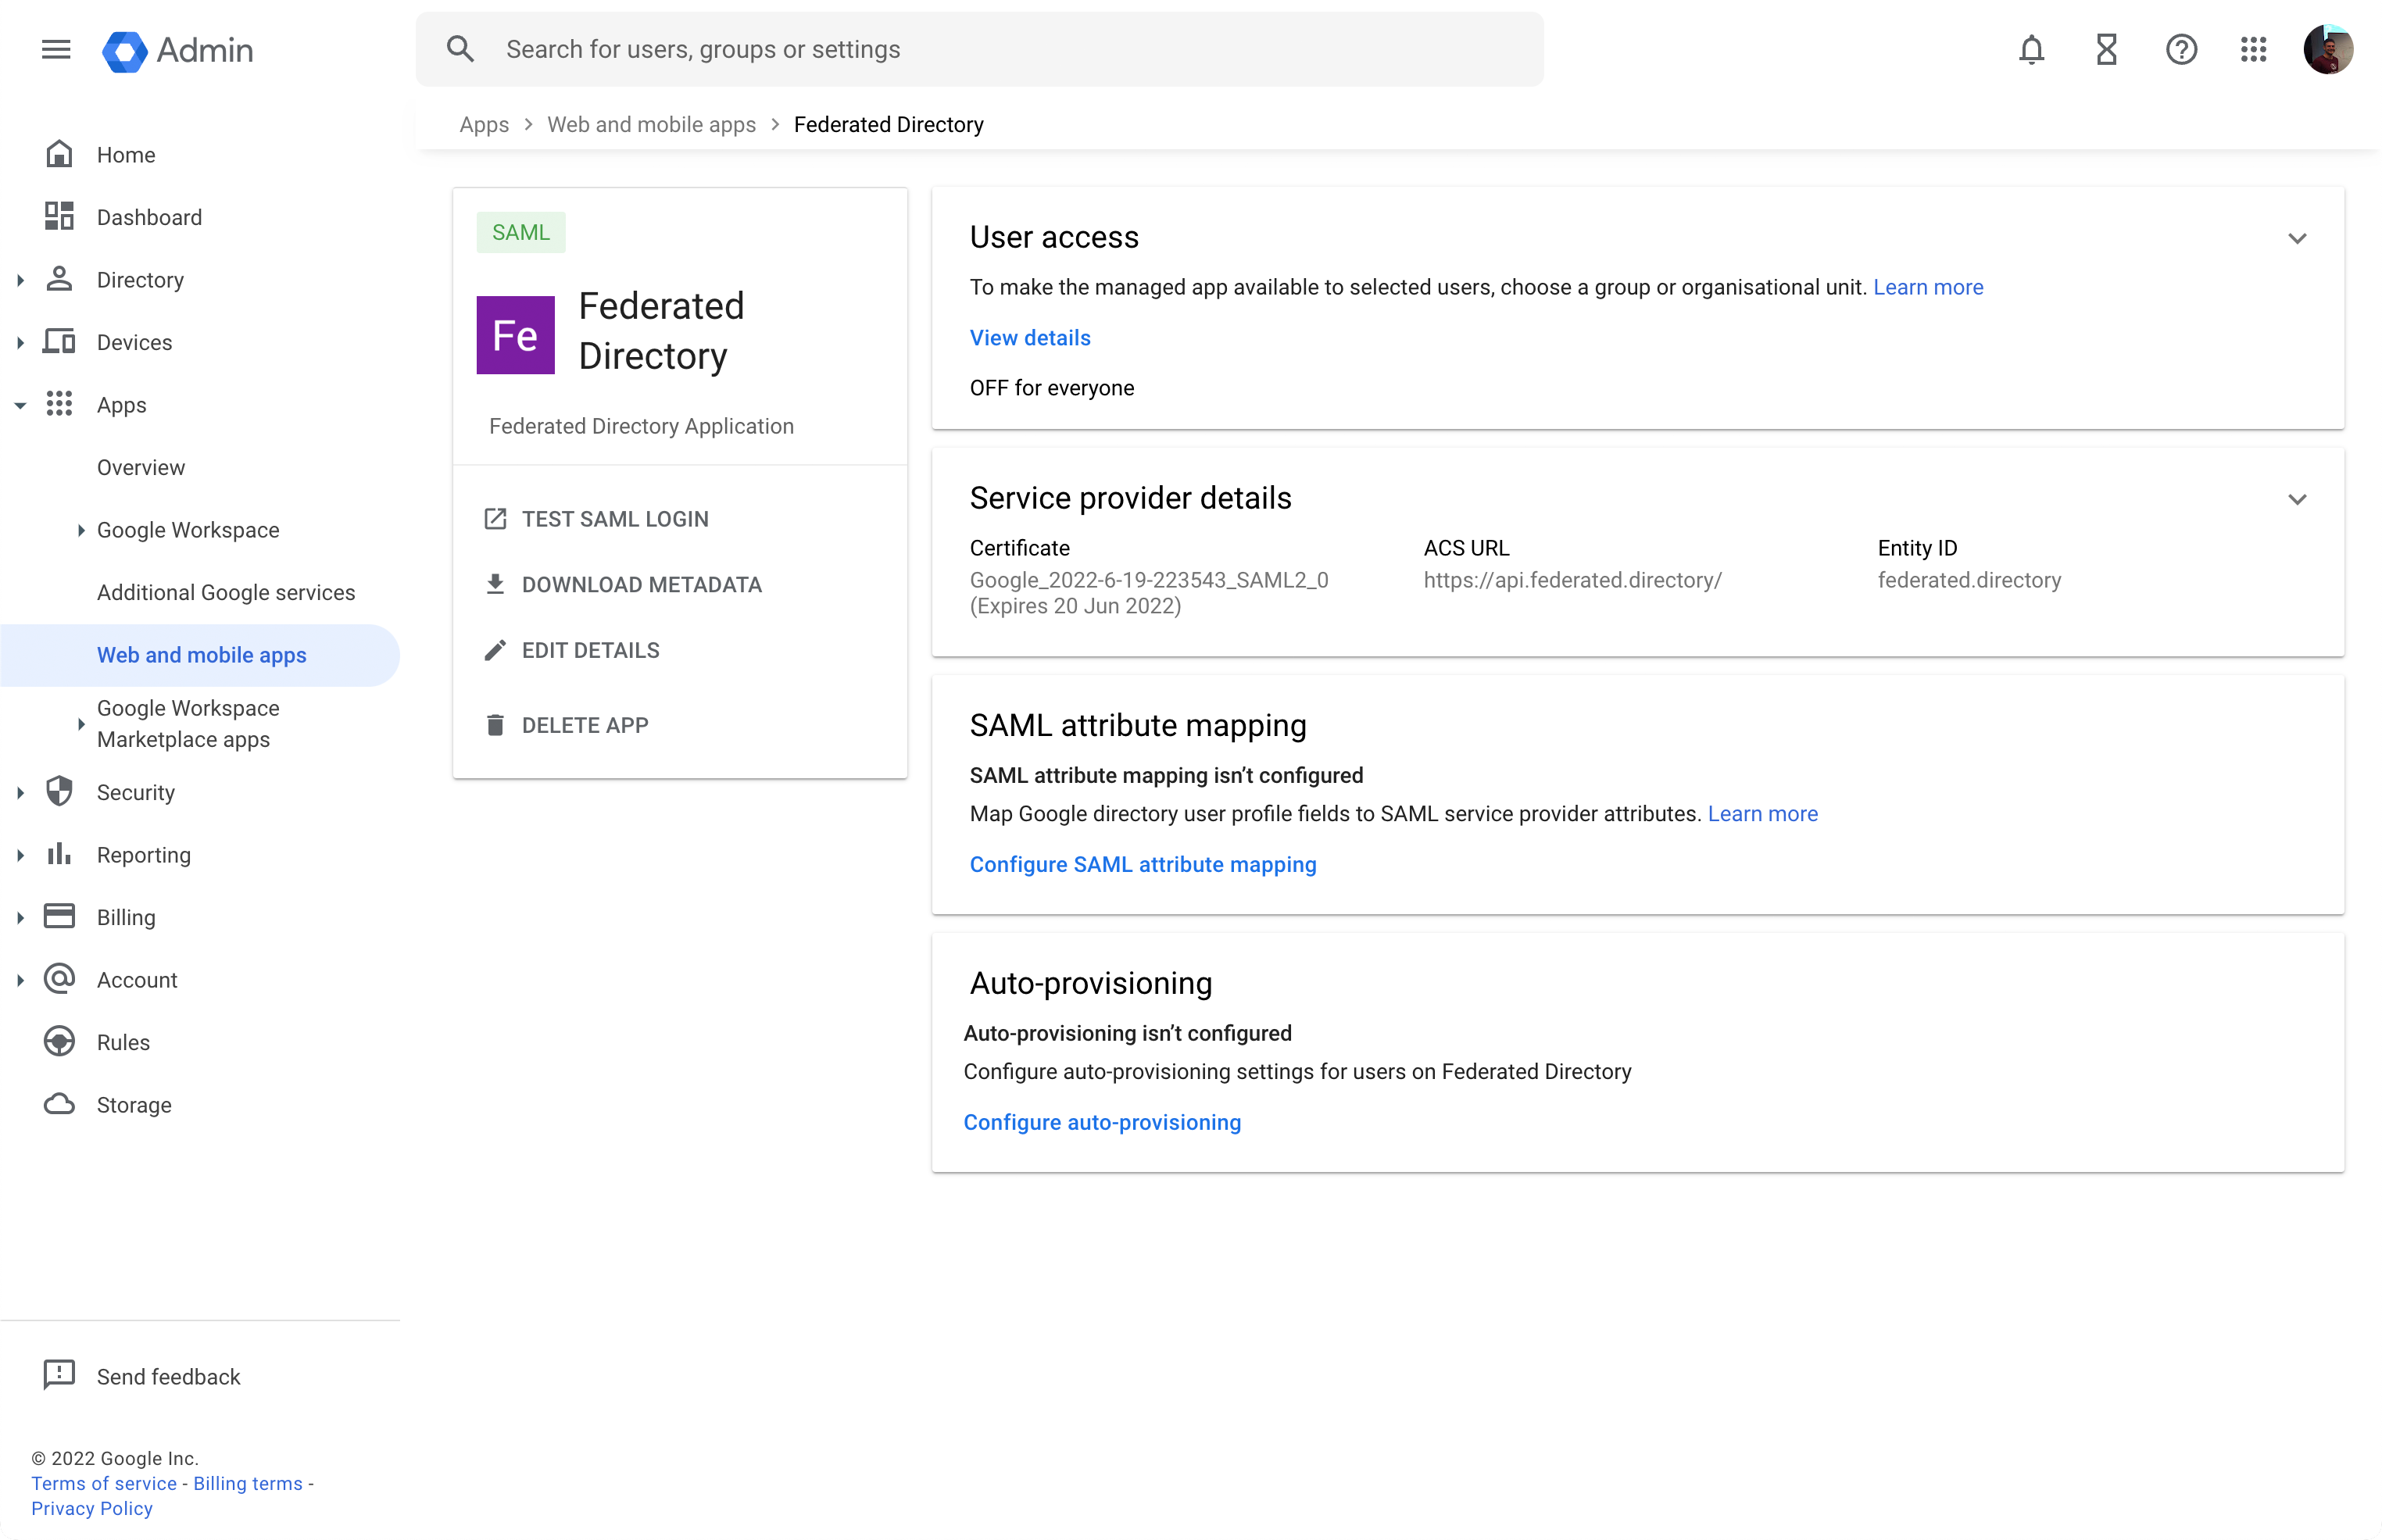
You will arrive on the configuration screen.
To enable user provisioning (sync) in Google, it requires you to configure Single Sign-On. Although we don’t use these settings directly we have to finish this step.
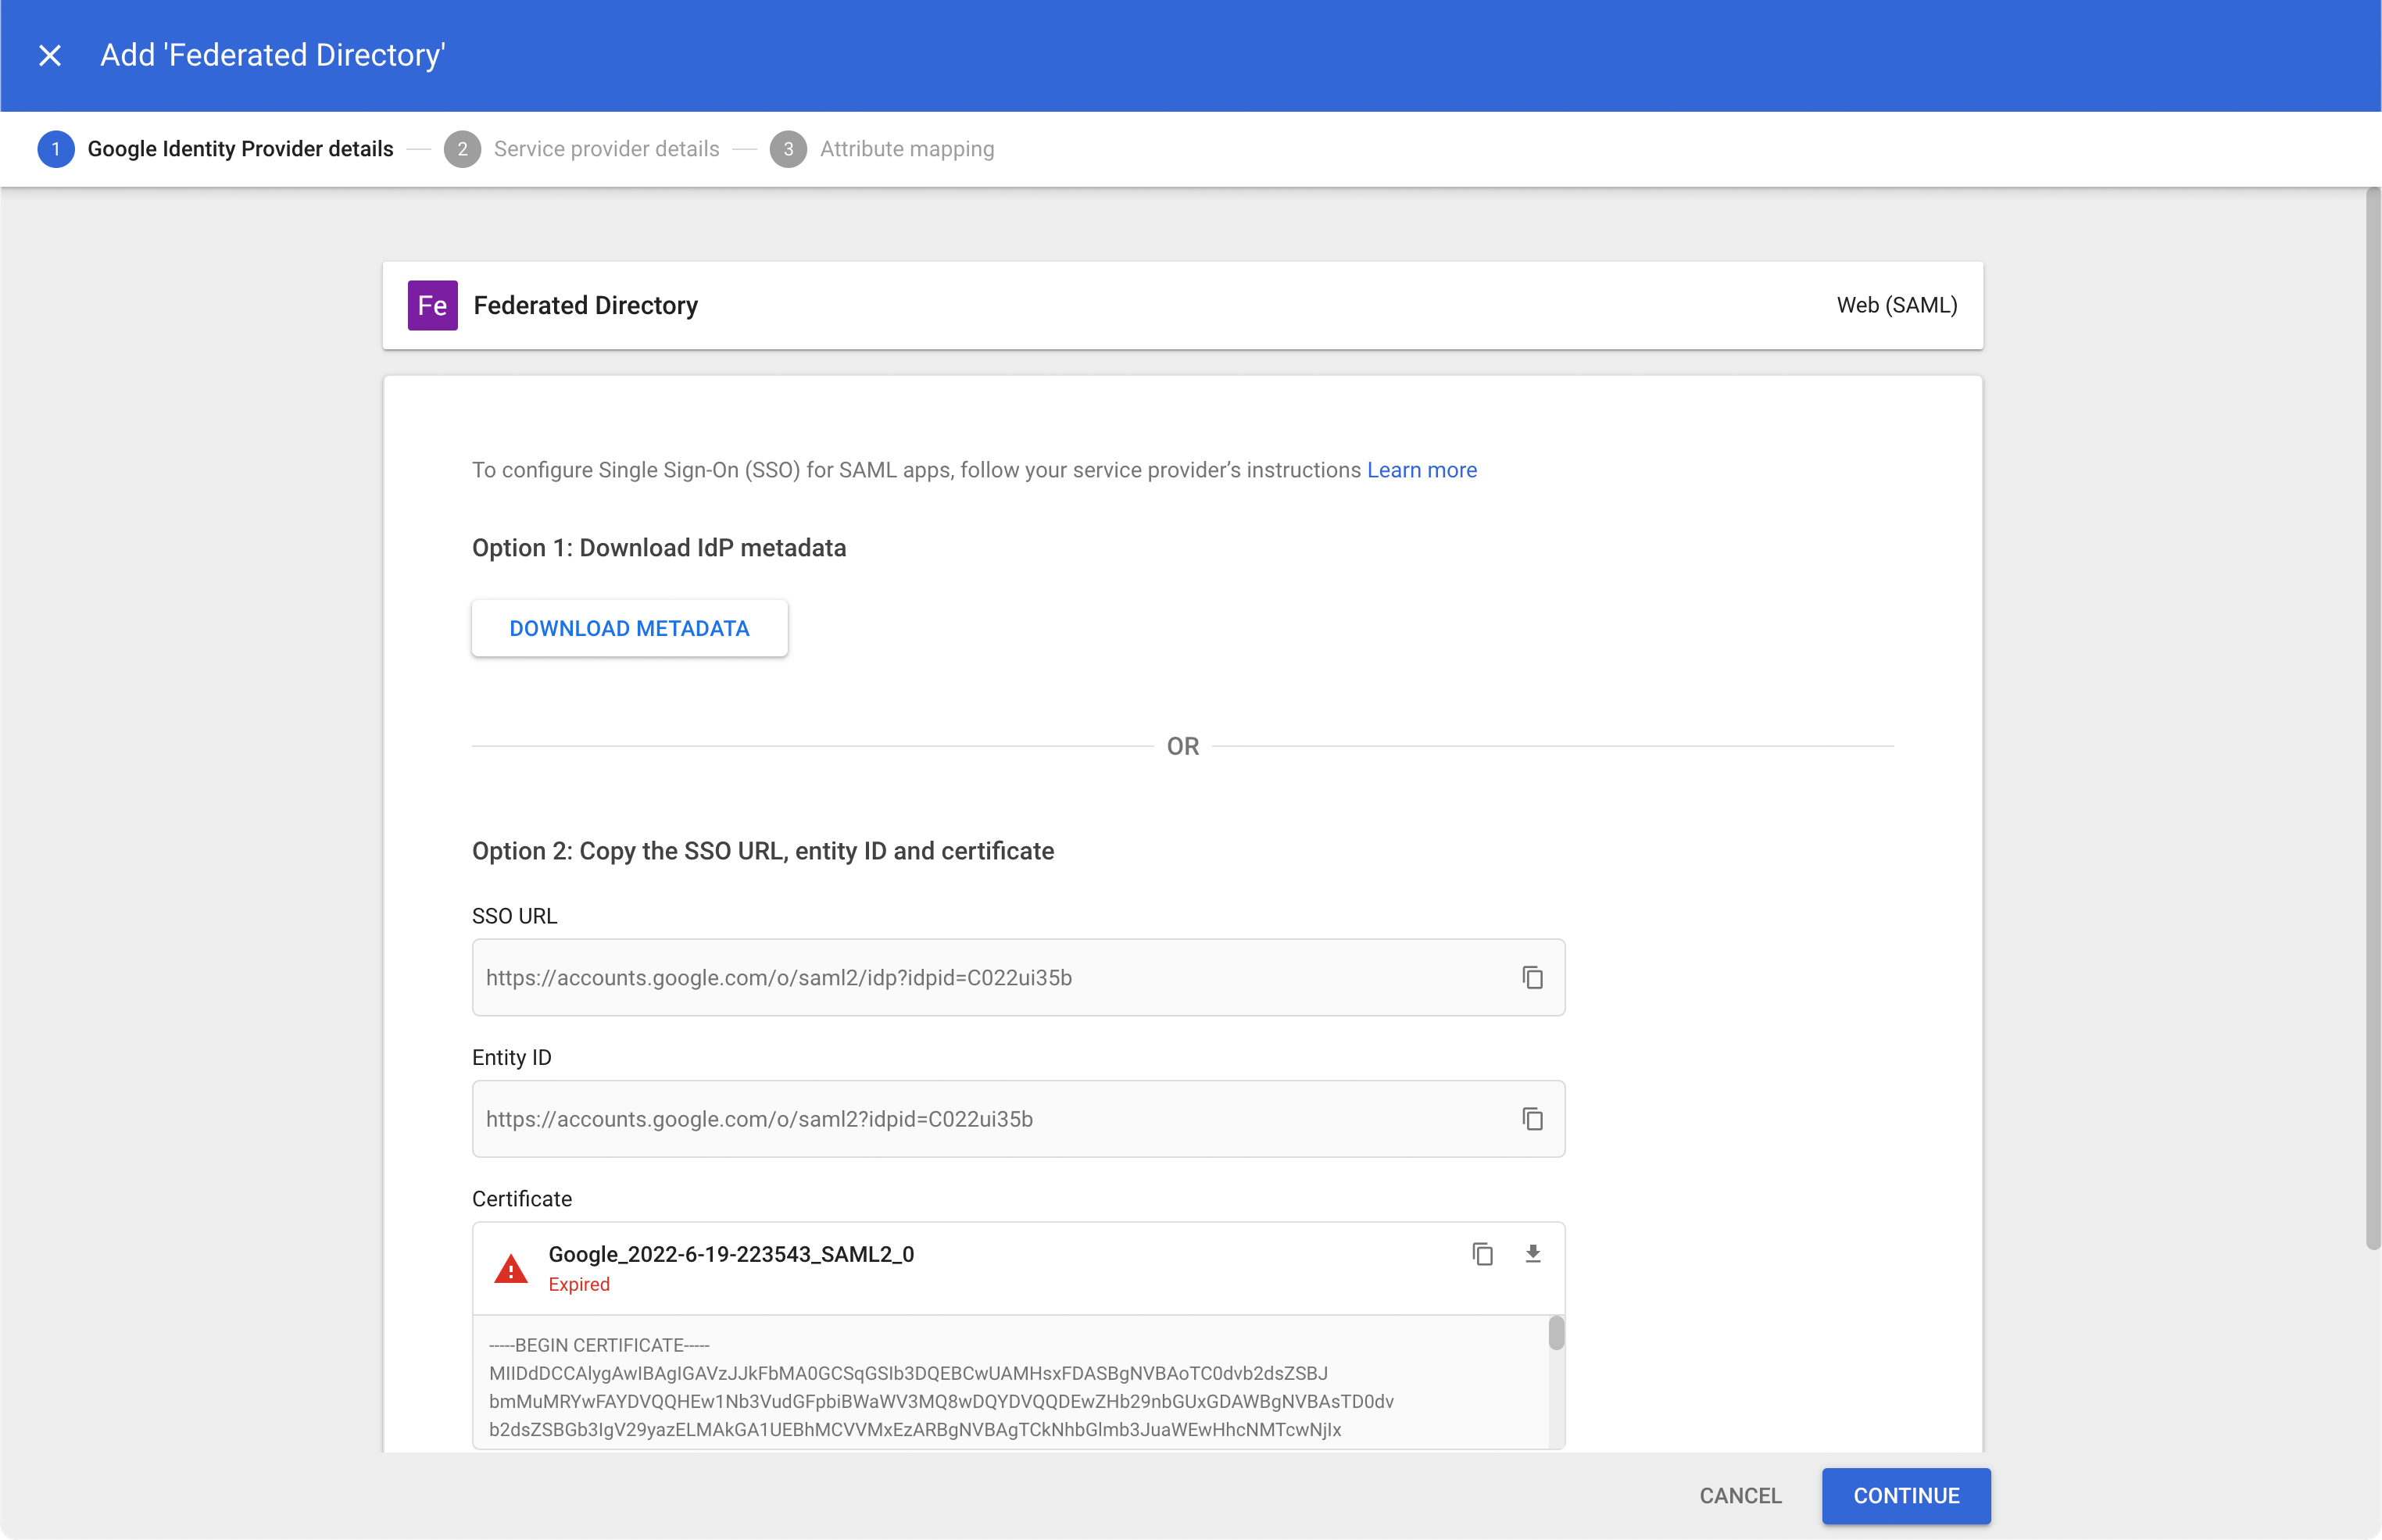
Accept defaults and click CONTINUE:
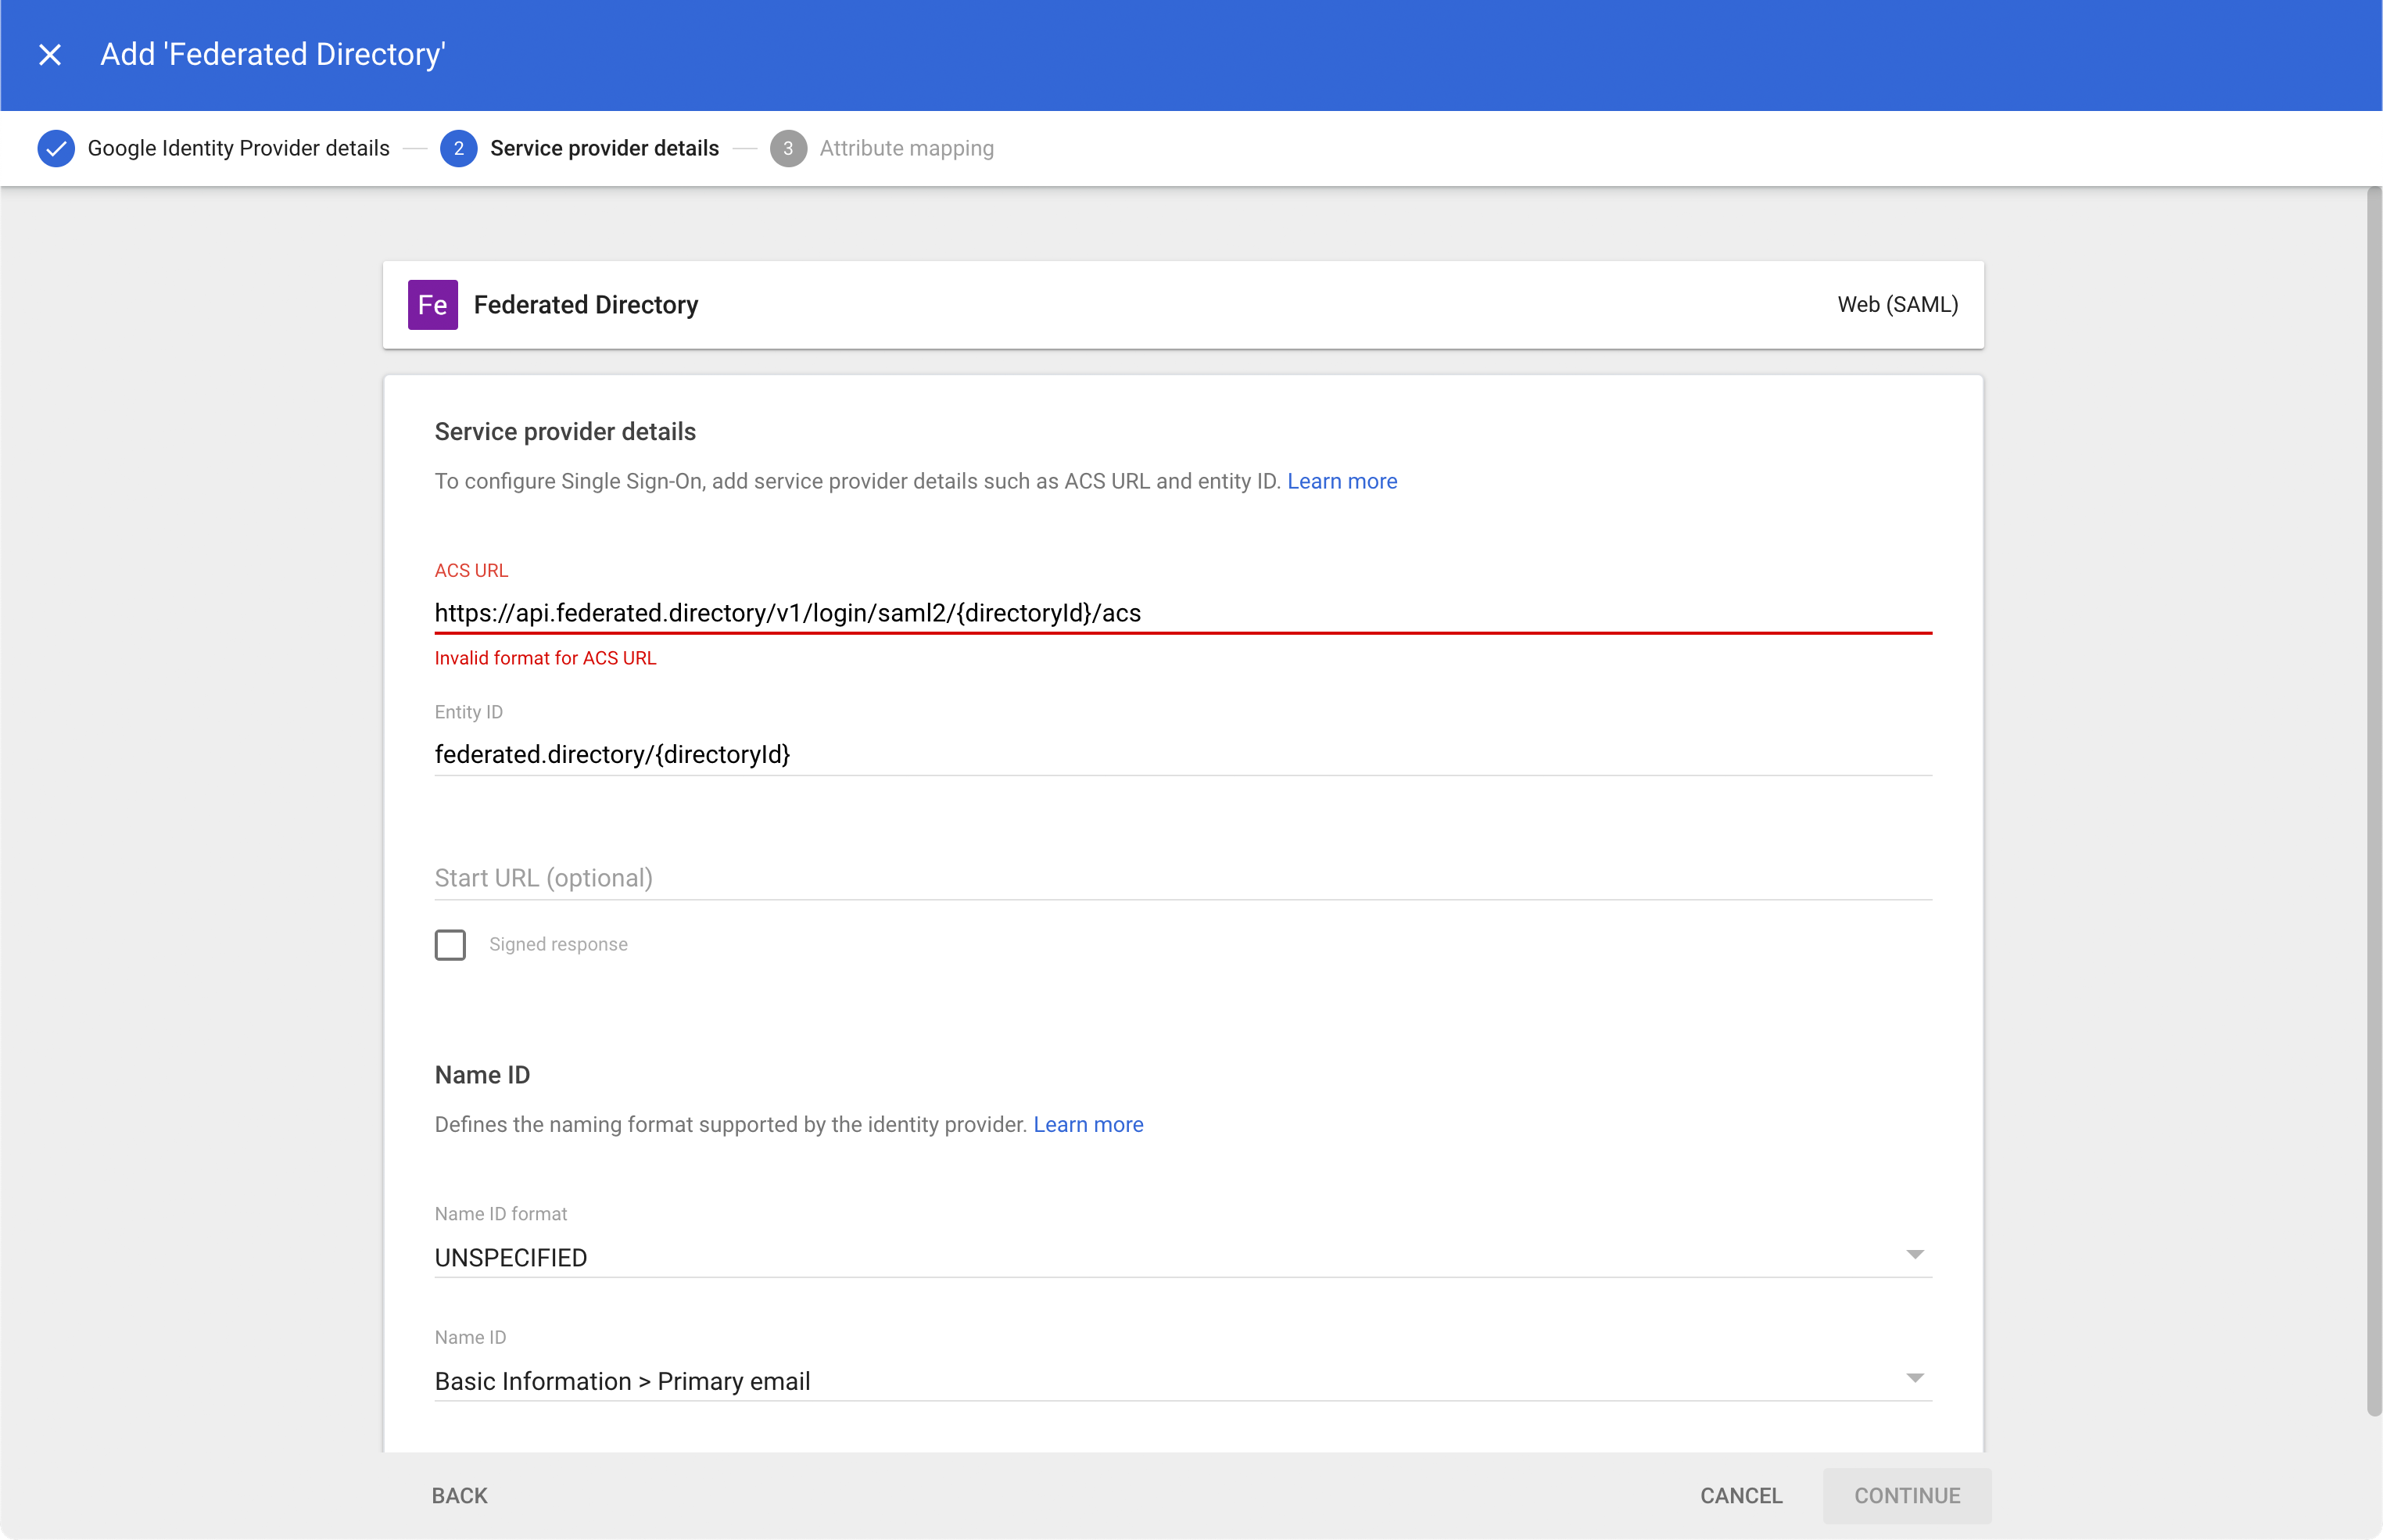
Change ‘ACS URL’ to https://federated.directory and ‘Entity ID’ to federated.directory and click CONTINUE.
Click FINISH.
Now we can actually configure the user provisioning.
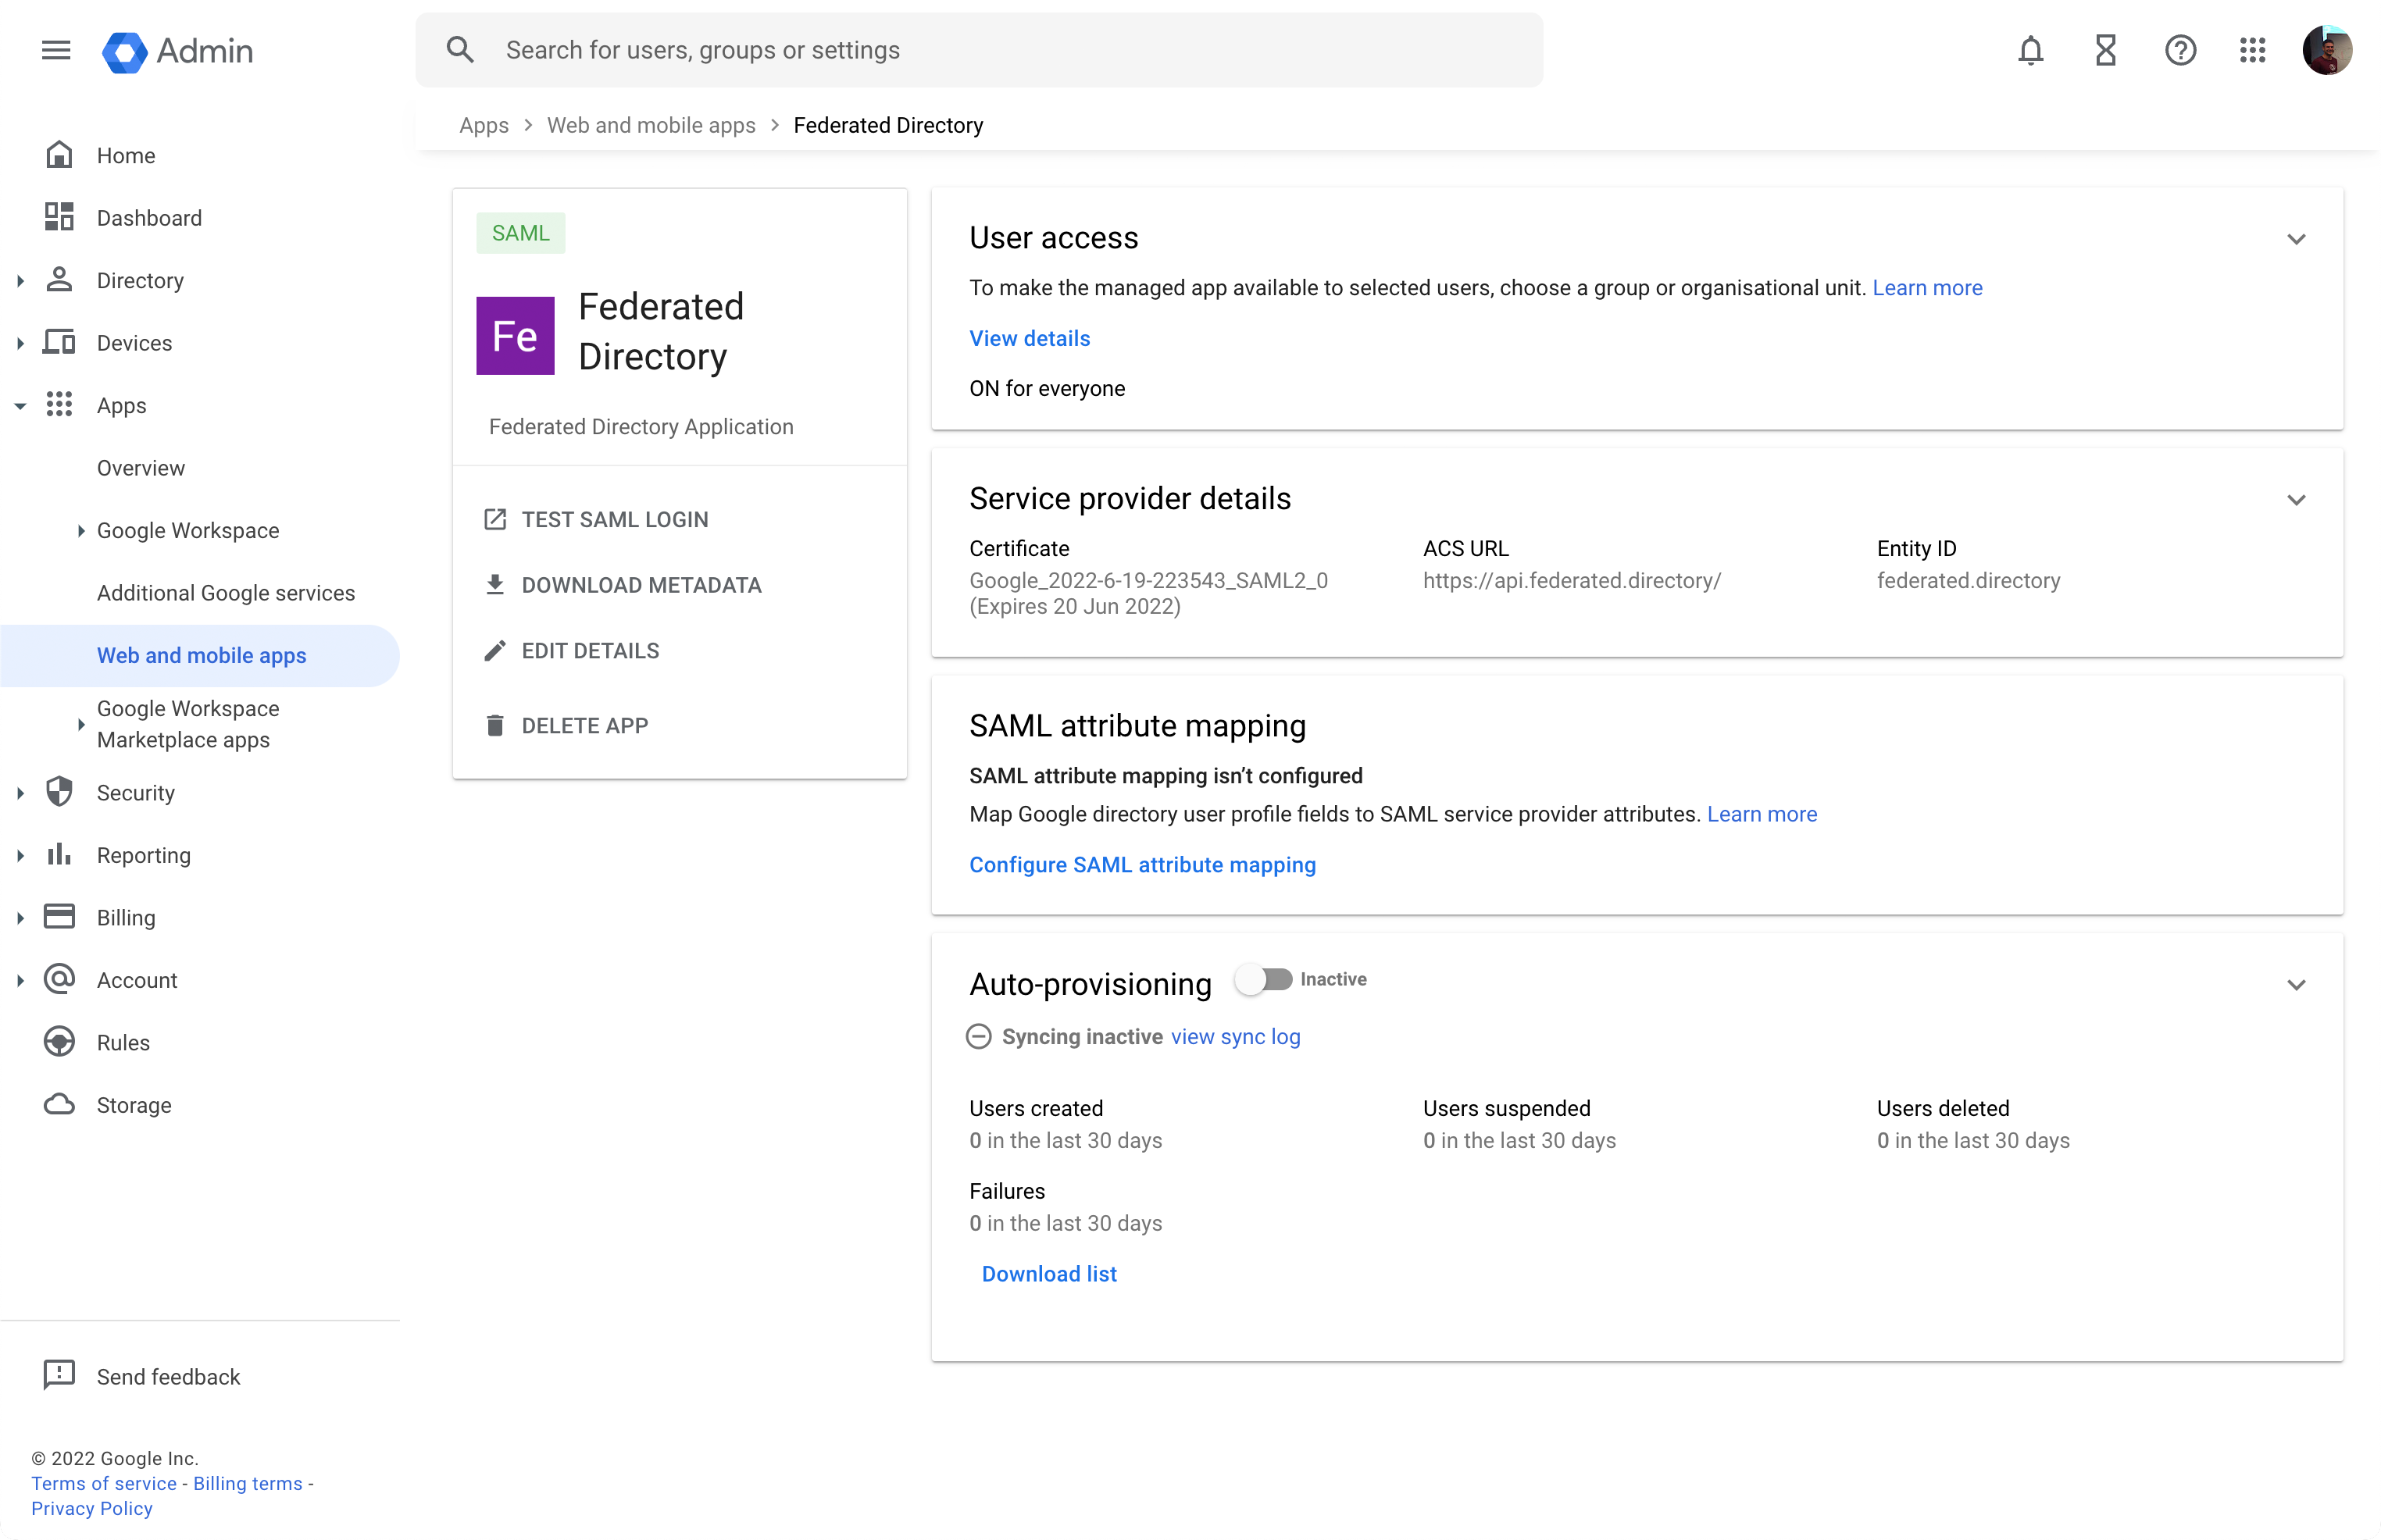
First of all, enable the service for all users within your Google Workspace domain by clicking the header “User access”.
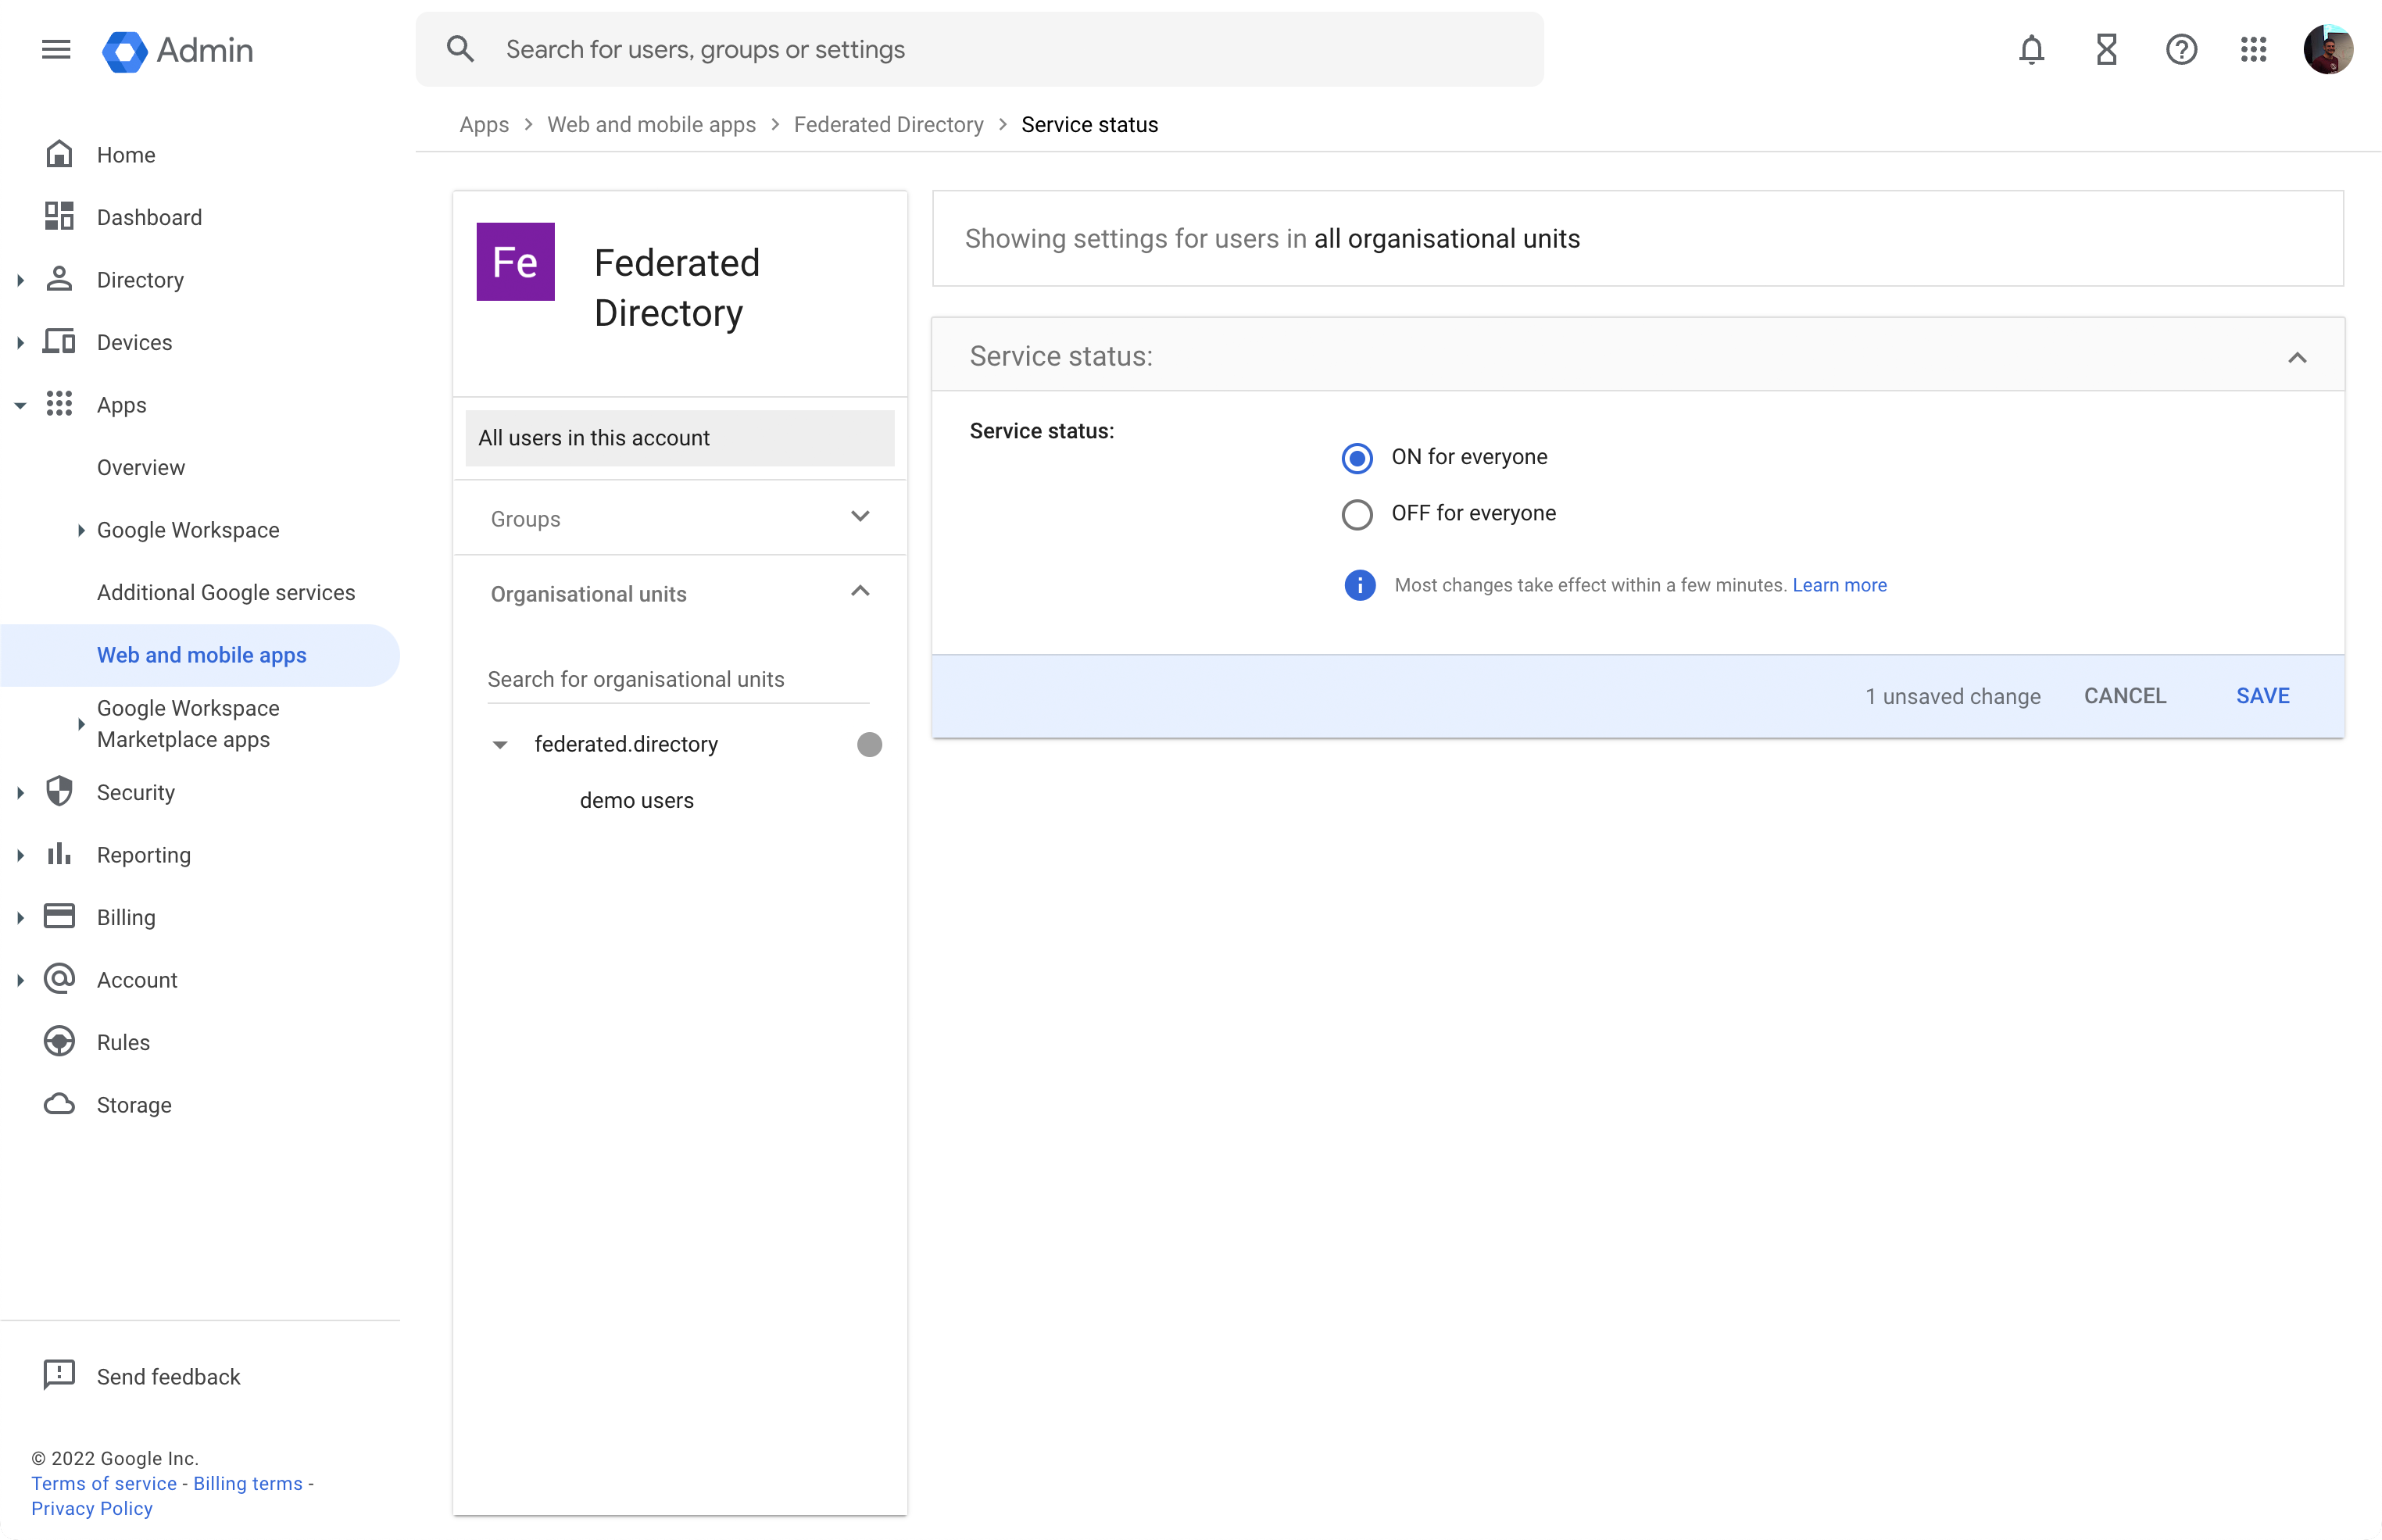
Select ON for everyone and click SAVE. Now navigate back to the Configuration dialog by clicking “Federated Directory” in the breadcrumbs:

Click Configure auto-provisioning in the “Auto-provisioning” pane.
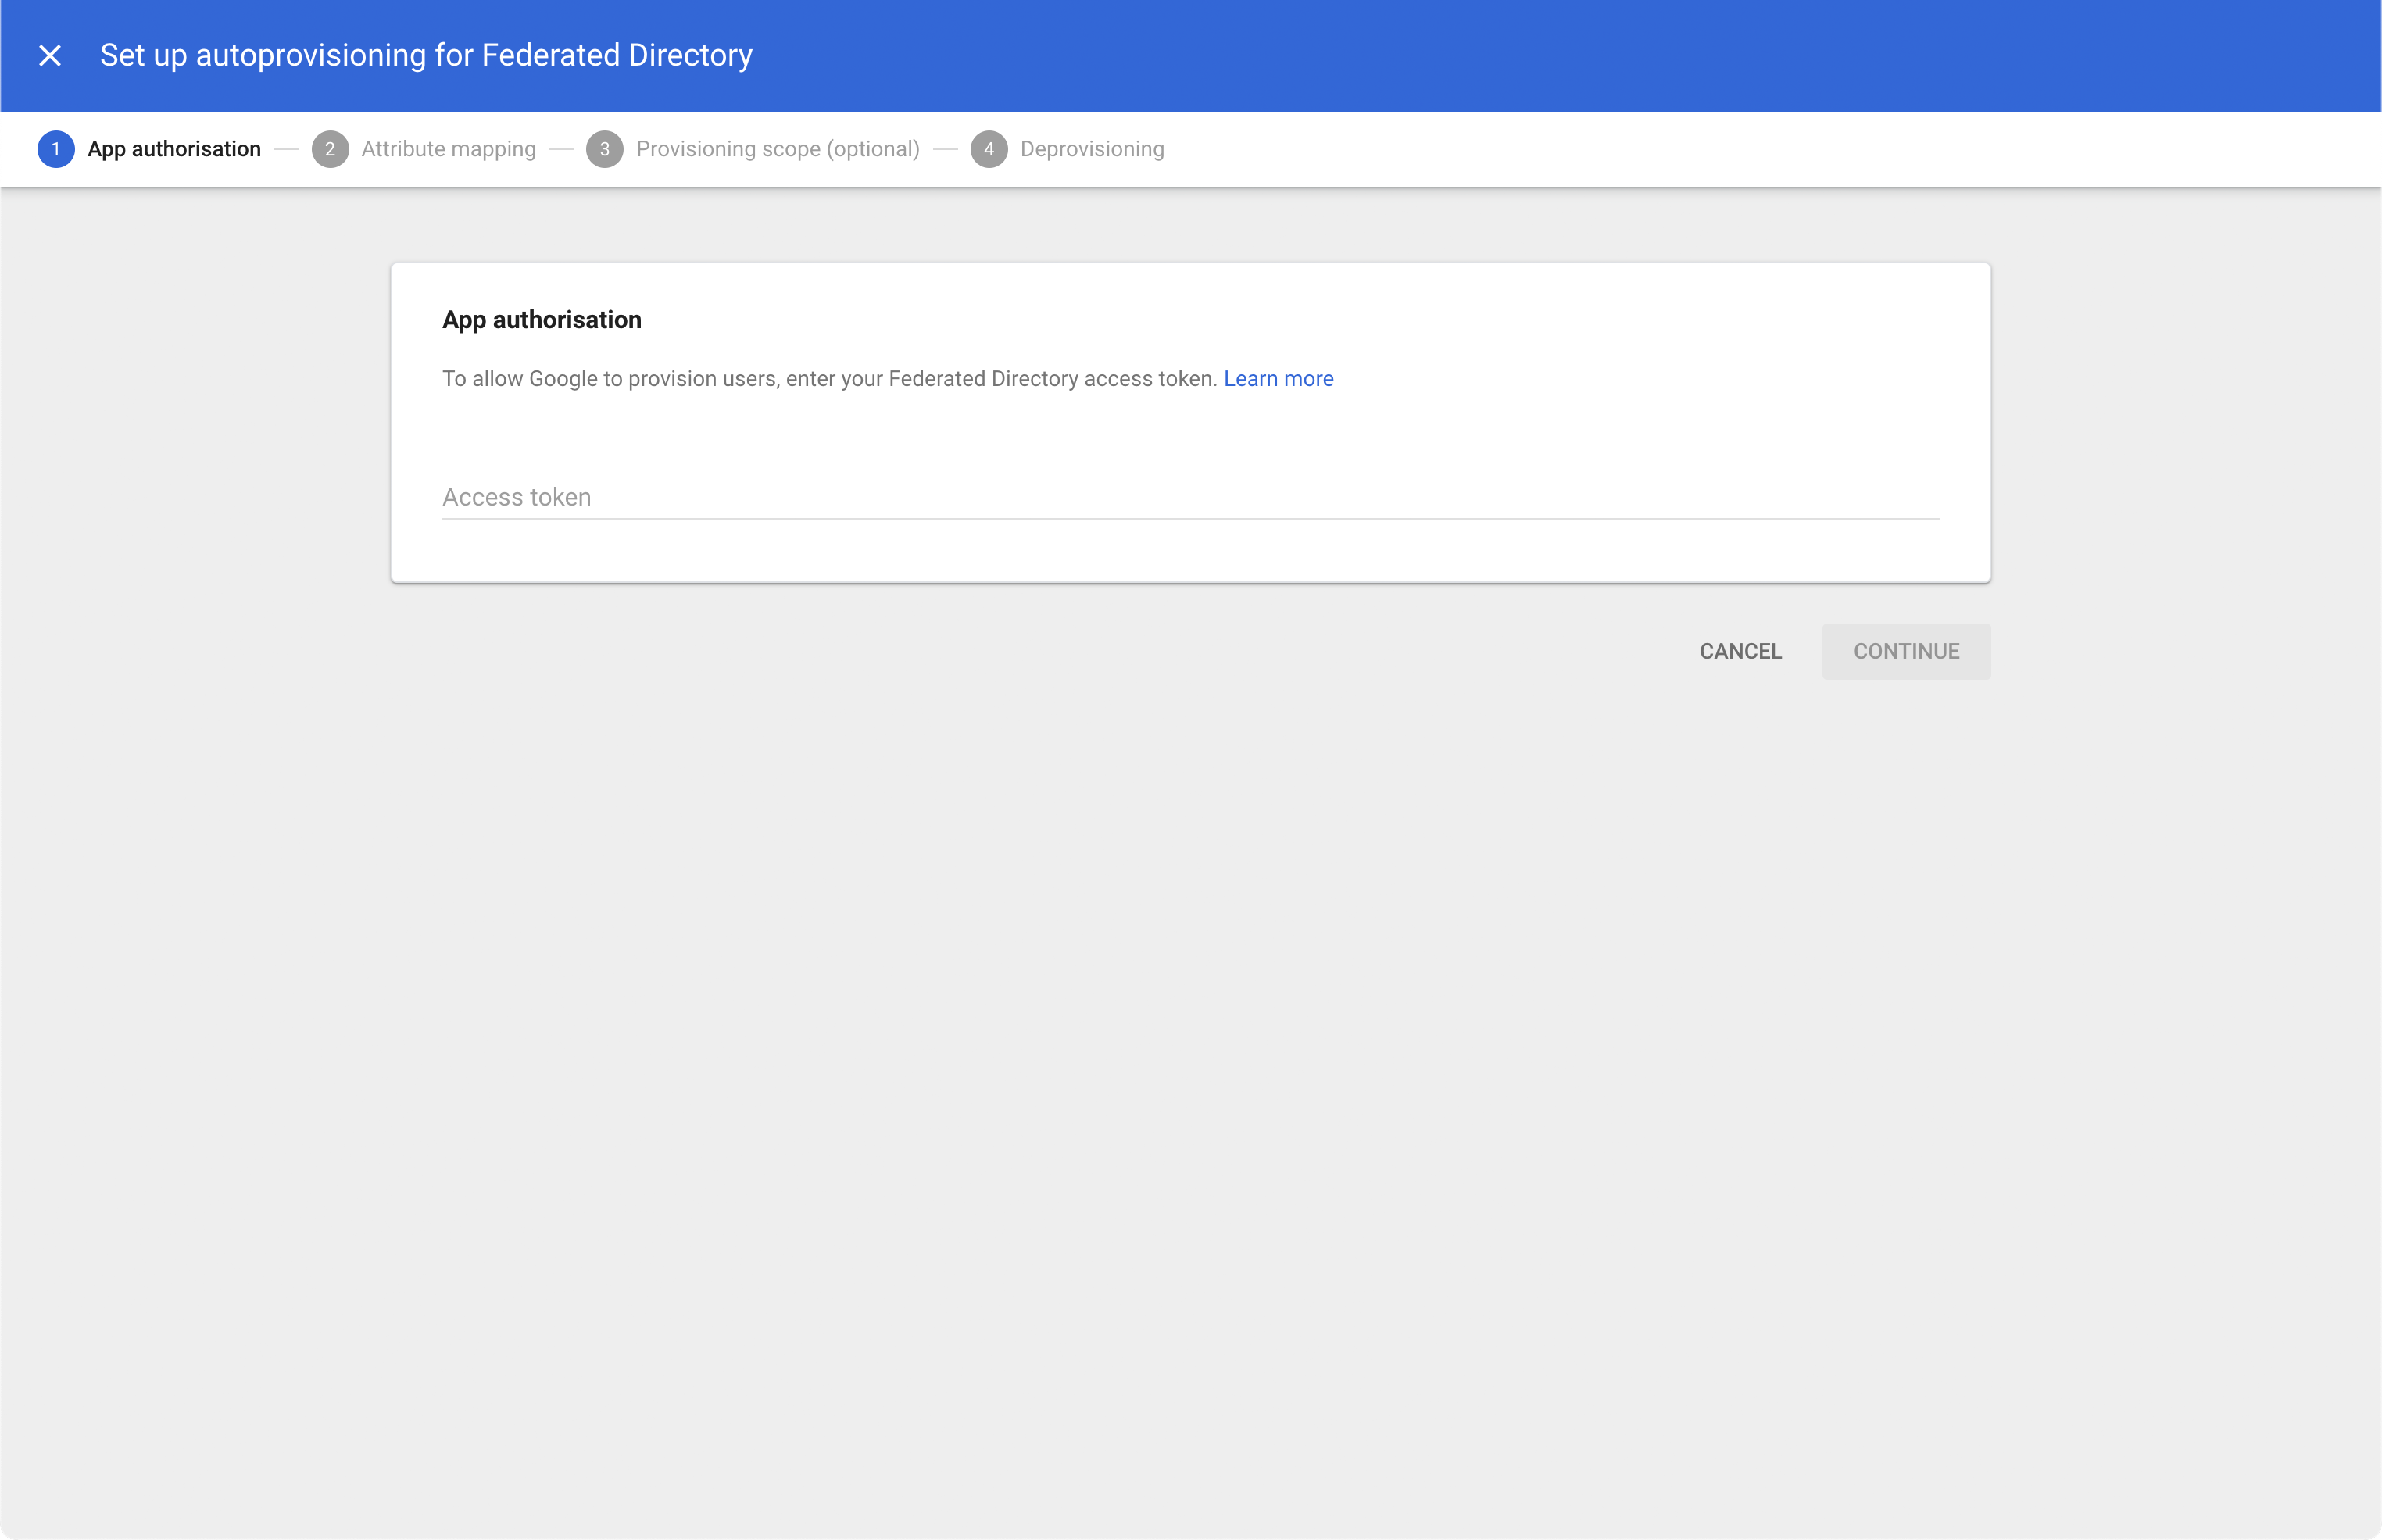
Enter an access token from a directory API key and select CONTINUE. If you don’t know how to create such a directory API key in Federated Directory, please see these instructions
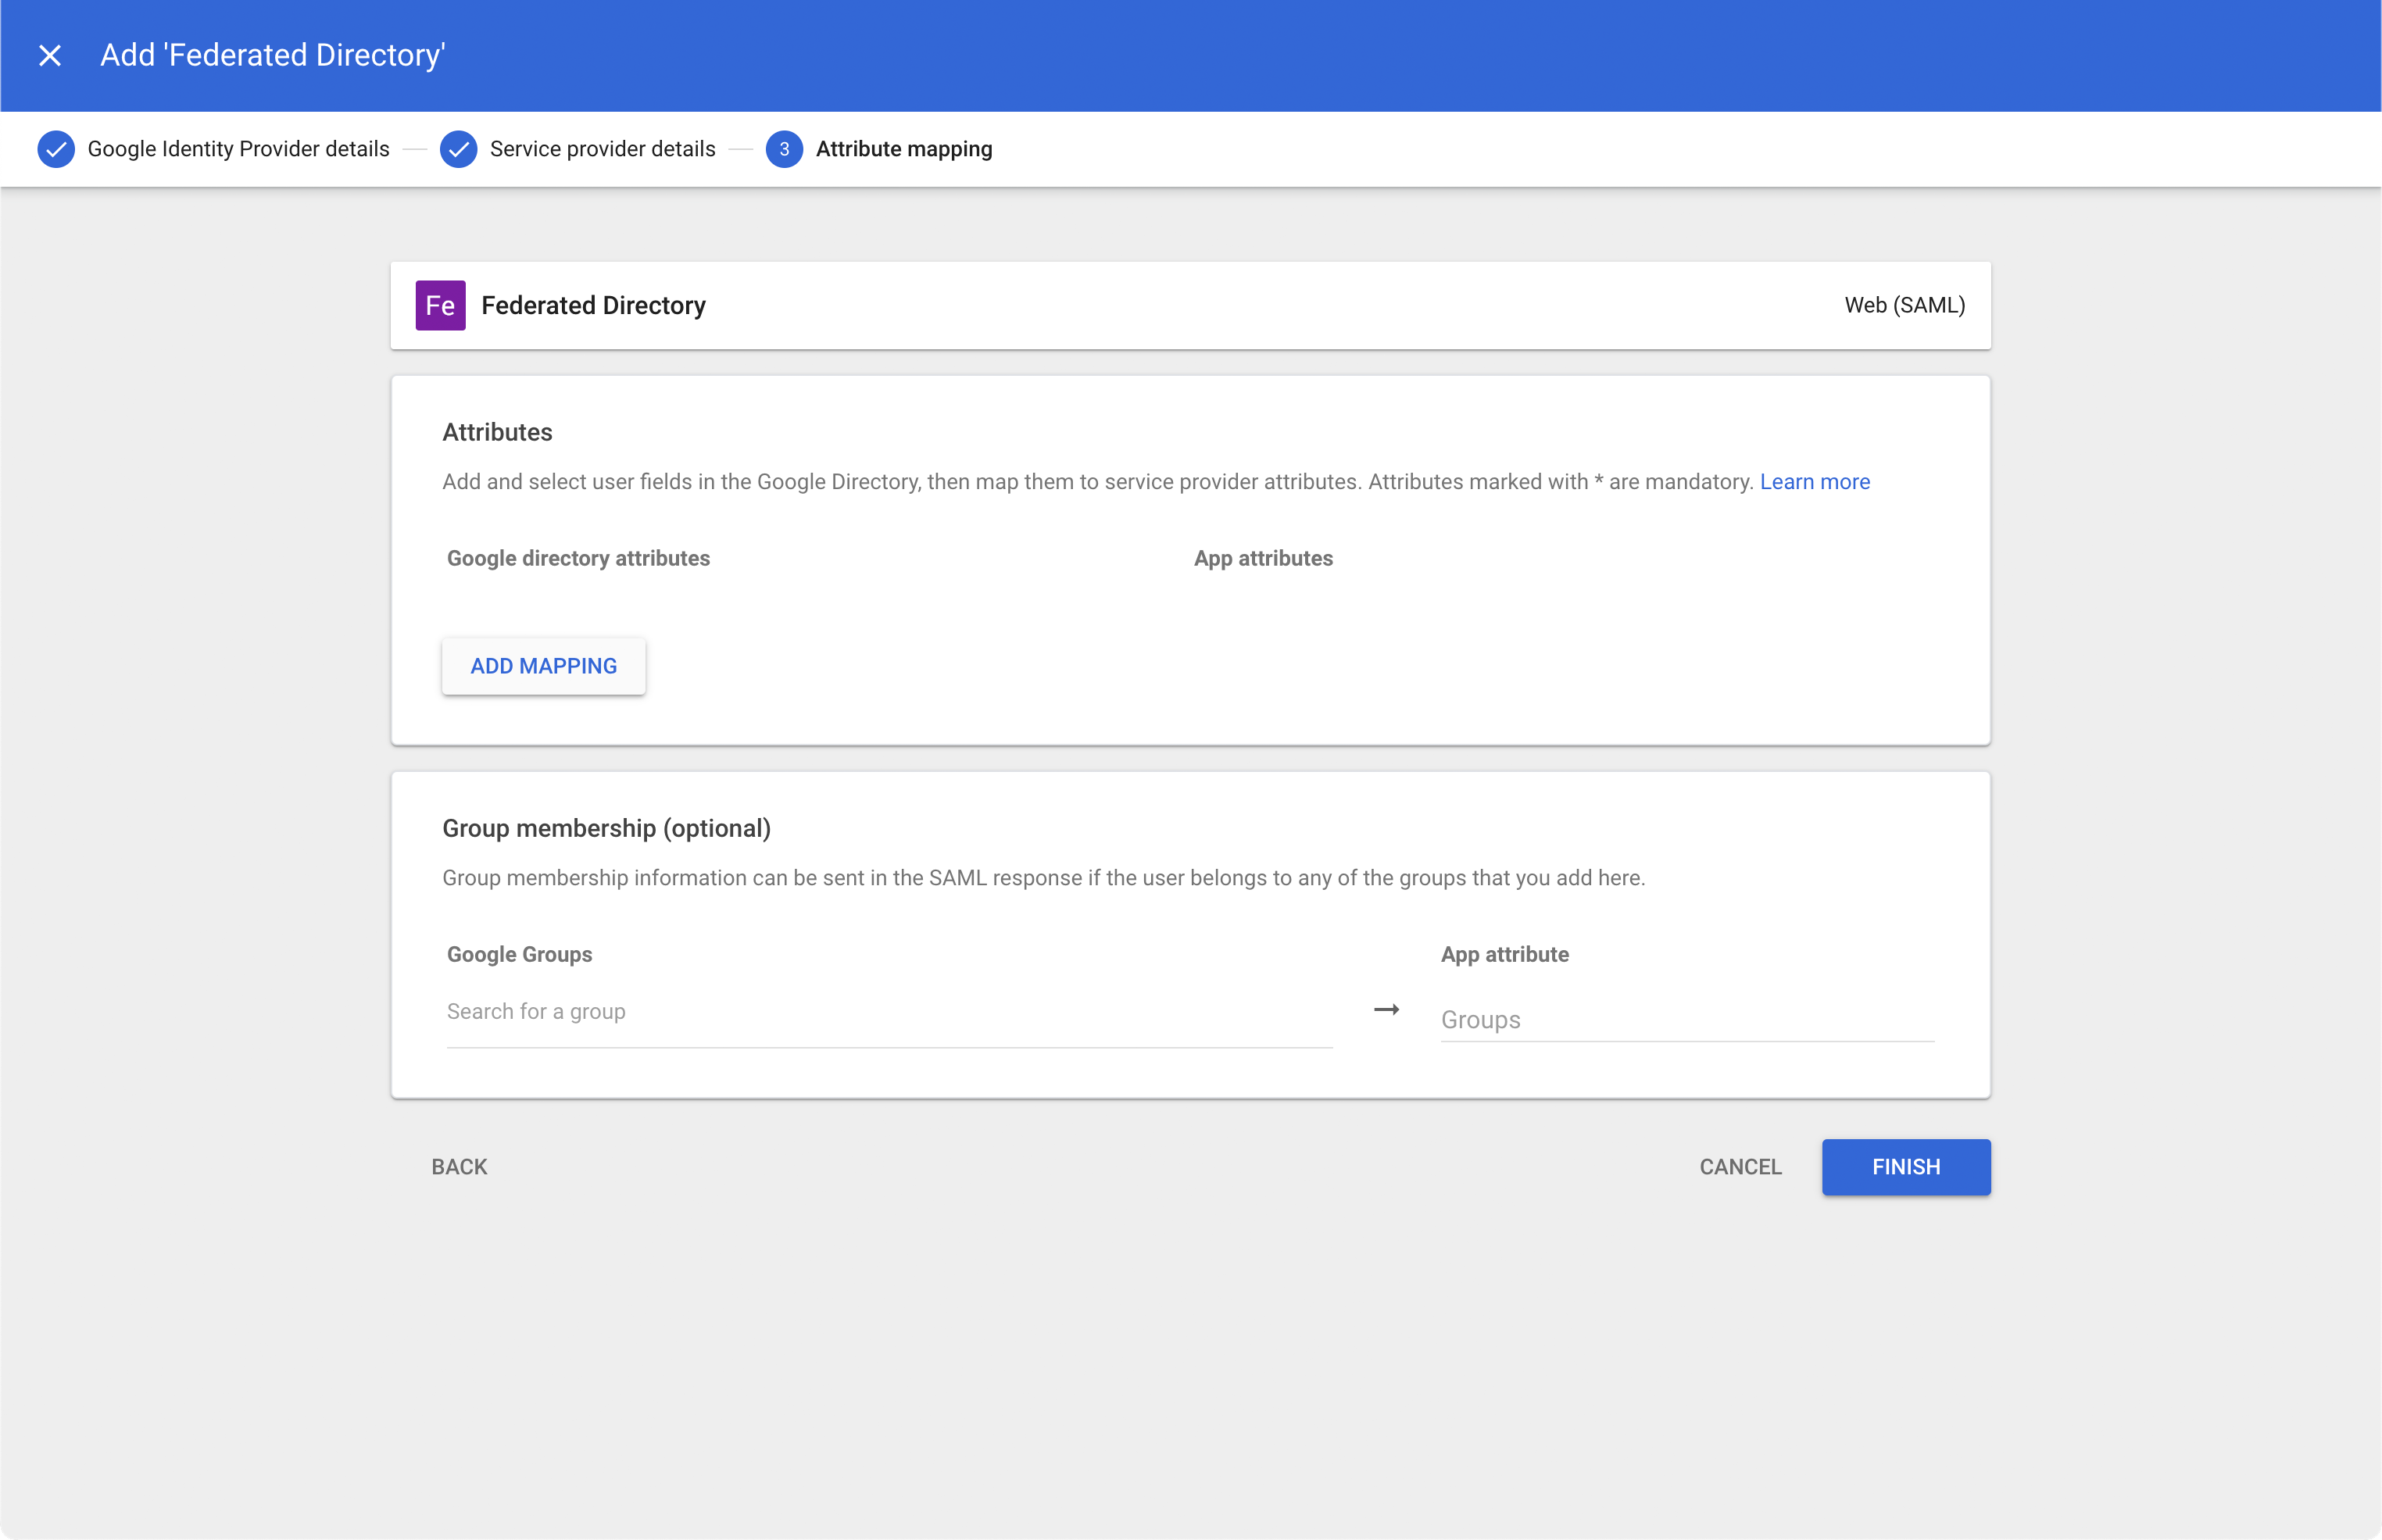
On the “Map attributes” screen, set the mapping to the correct values.
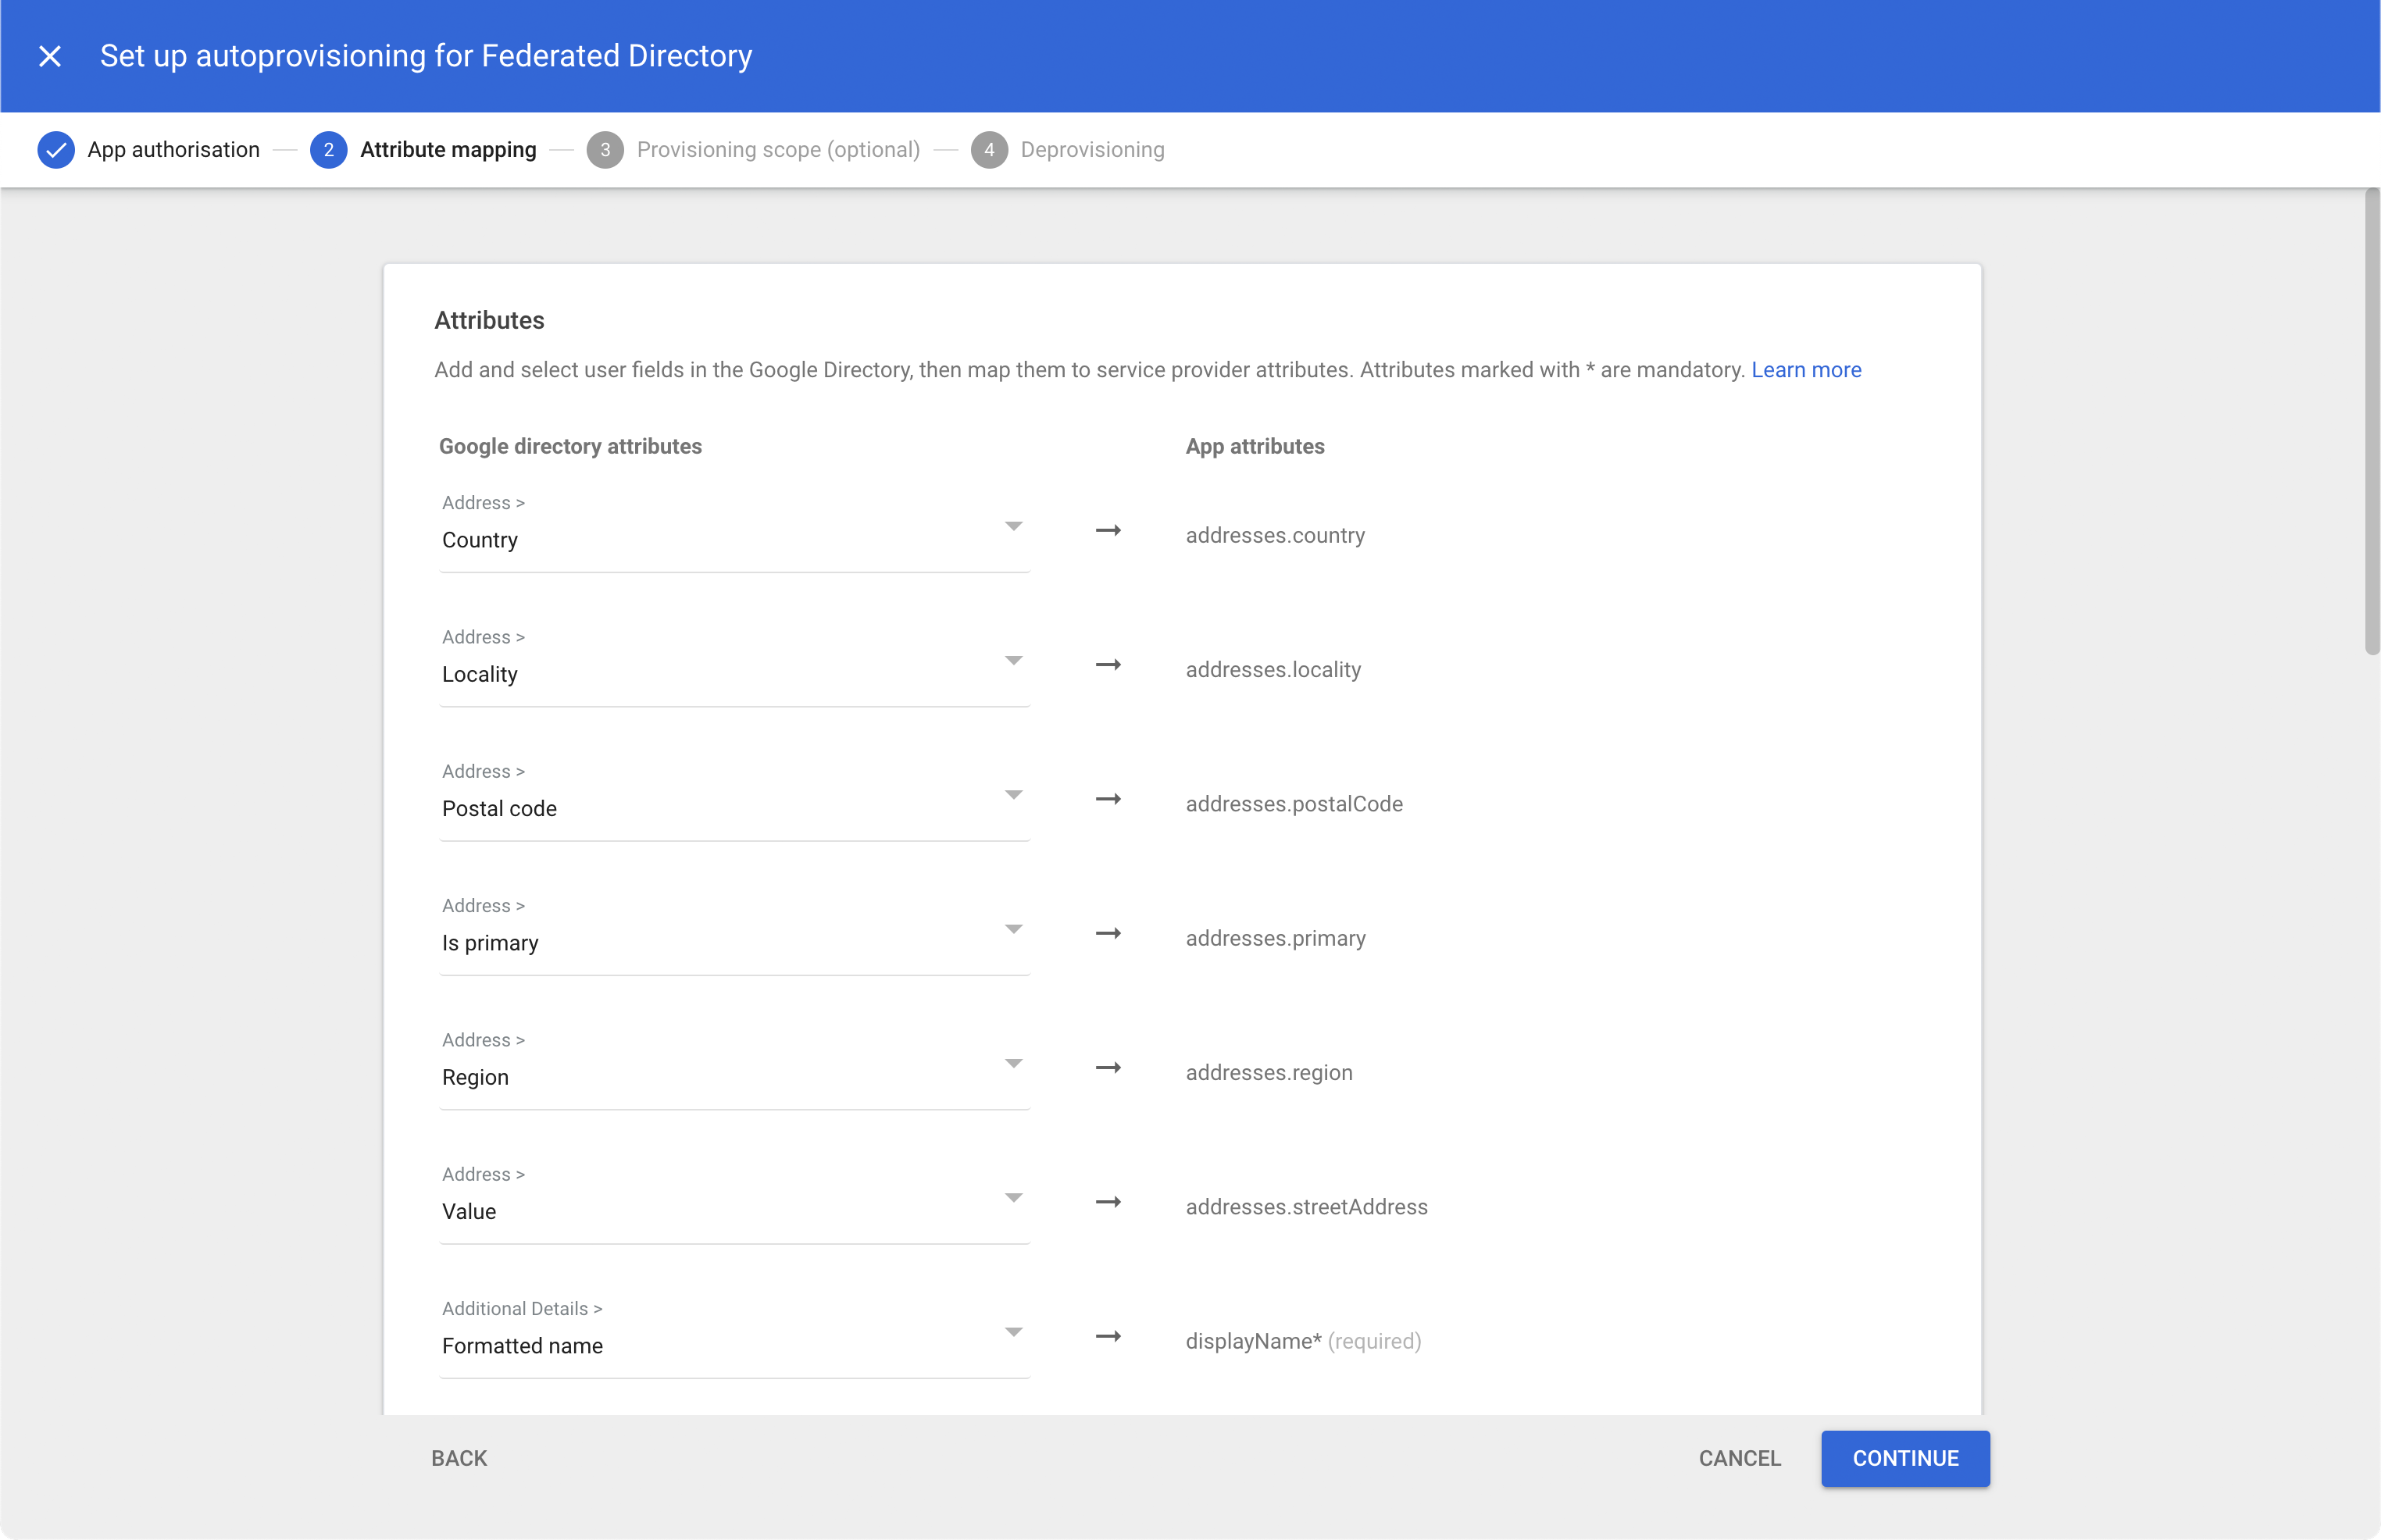
Compare values in the screen with these:
| Google directory attributes | App attributes |
|---|---|
| Country | addresses.country |
| Address > Locality | addresses.locality |
| Address > Is primary | addresses.primary |
| Address > Region | addresses.region |
| Address > Value | addresses.streetAddress |
| Additional Details > Formatted name | displayName |
| Email > Is primary | email.primary |
| Email > Type | emails.type |
| Email > Value | emails.value |
| Basic Information > Last name | name.familyName |
| Basic Information > First name | name.givenName |
| - | nickName |
| Phone > Is primary | phoneNumbers.primary |
| Phone > Value | phoneNumbers.value |
| Additional Details > Website URL | profileUrl |
| Employee Details > Title | title |
| Employee Details > Department | urn:ietf:params:scim:schemas:extension:enterprise:2.0:User.department |
| Basic Information > Username | userName |
| Employee Details > Type | userType |
Click CONTINUE

If you want, you can limit the scope of users that will be provisioned to your Federated Directory. A scope is not required, click CONTINUE
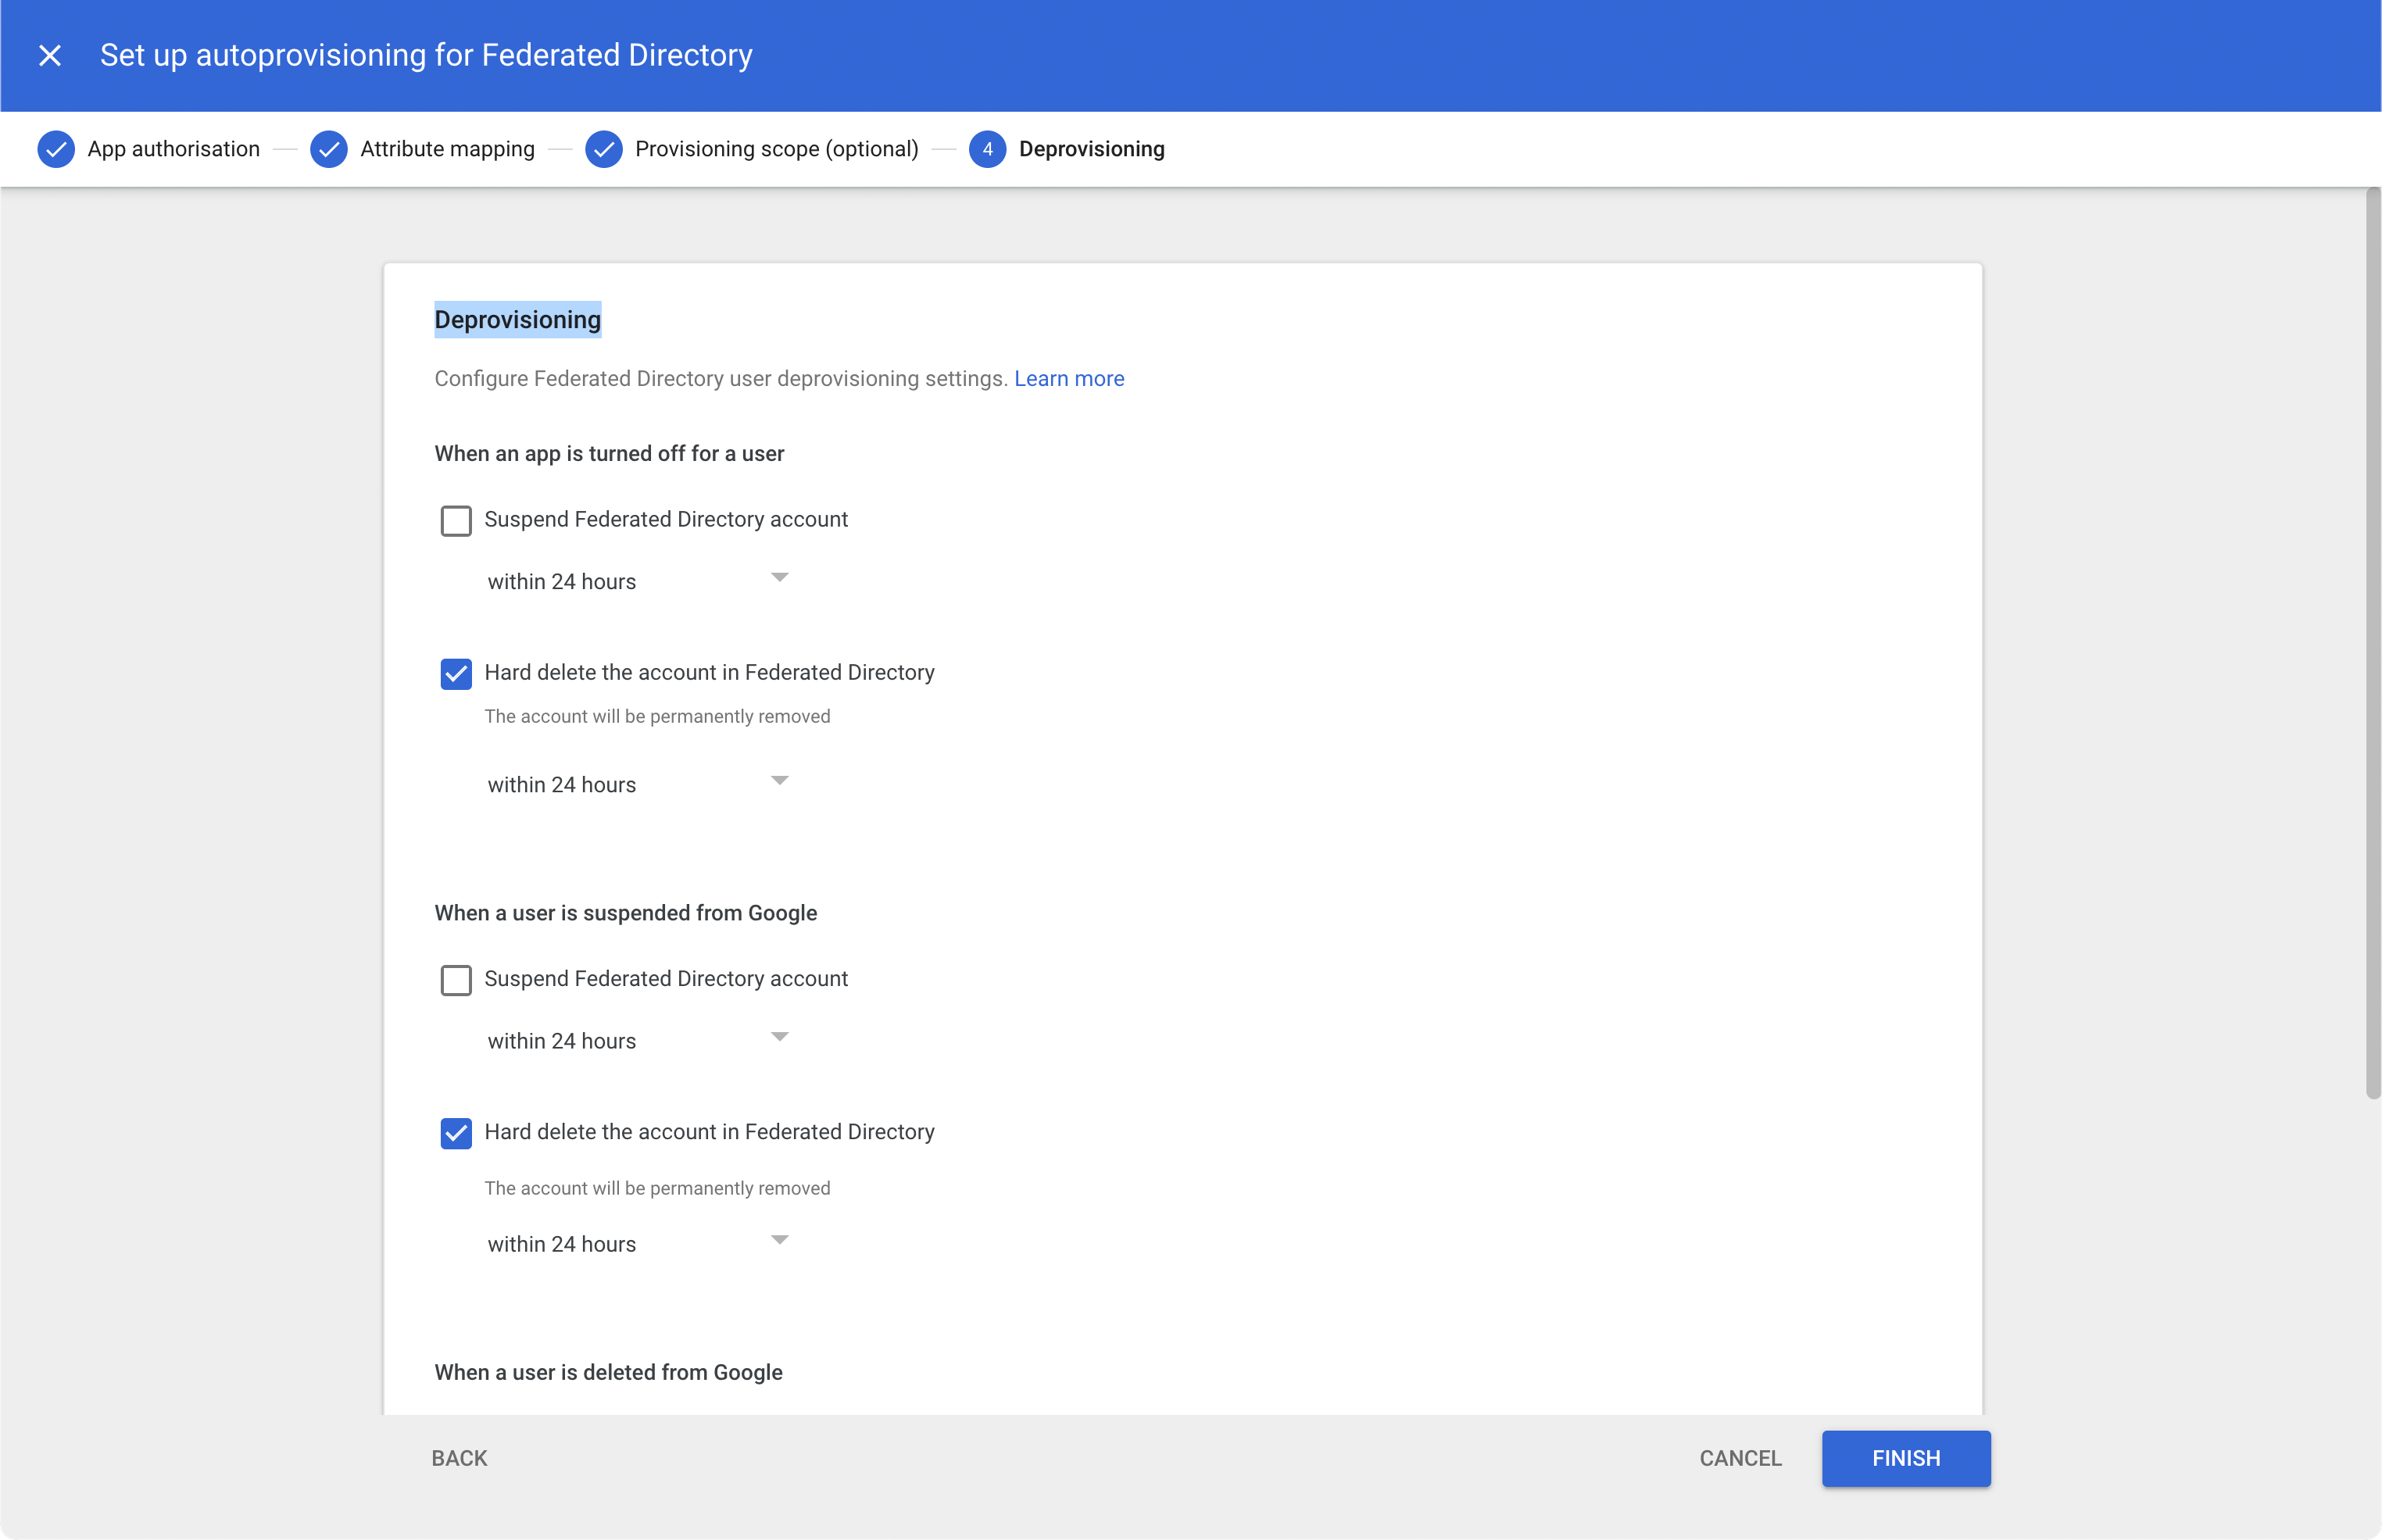
Choose the “Deprovisoning” options that you think are appropriate for your company and click FINISH
Now it’s time to turn on provisioning by switching the state from the “Inactive” to “Active”. When you click Inactive switch, you will get a consent dialog
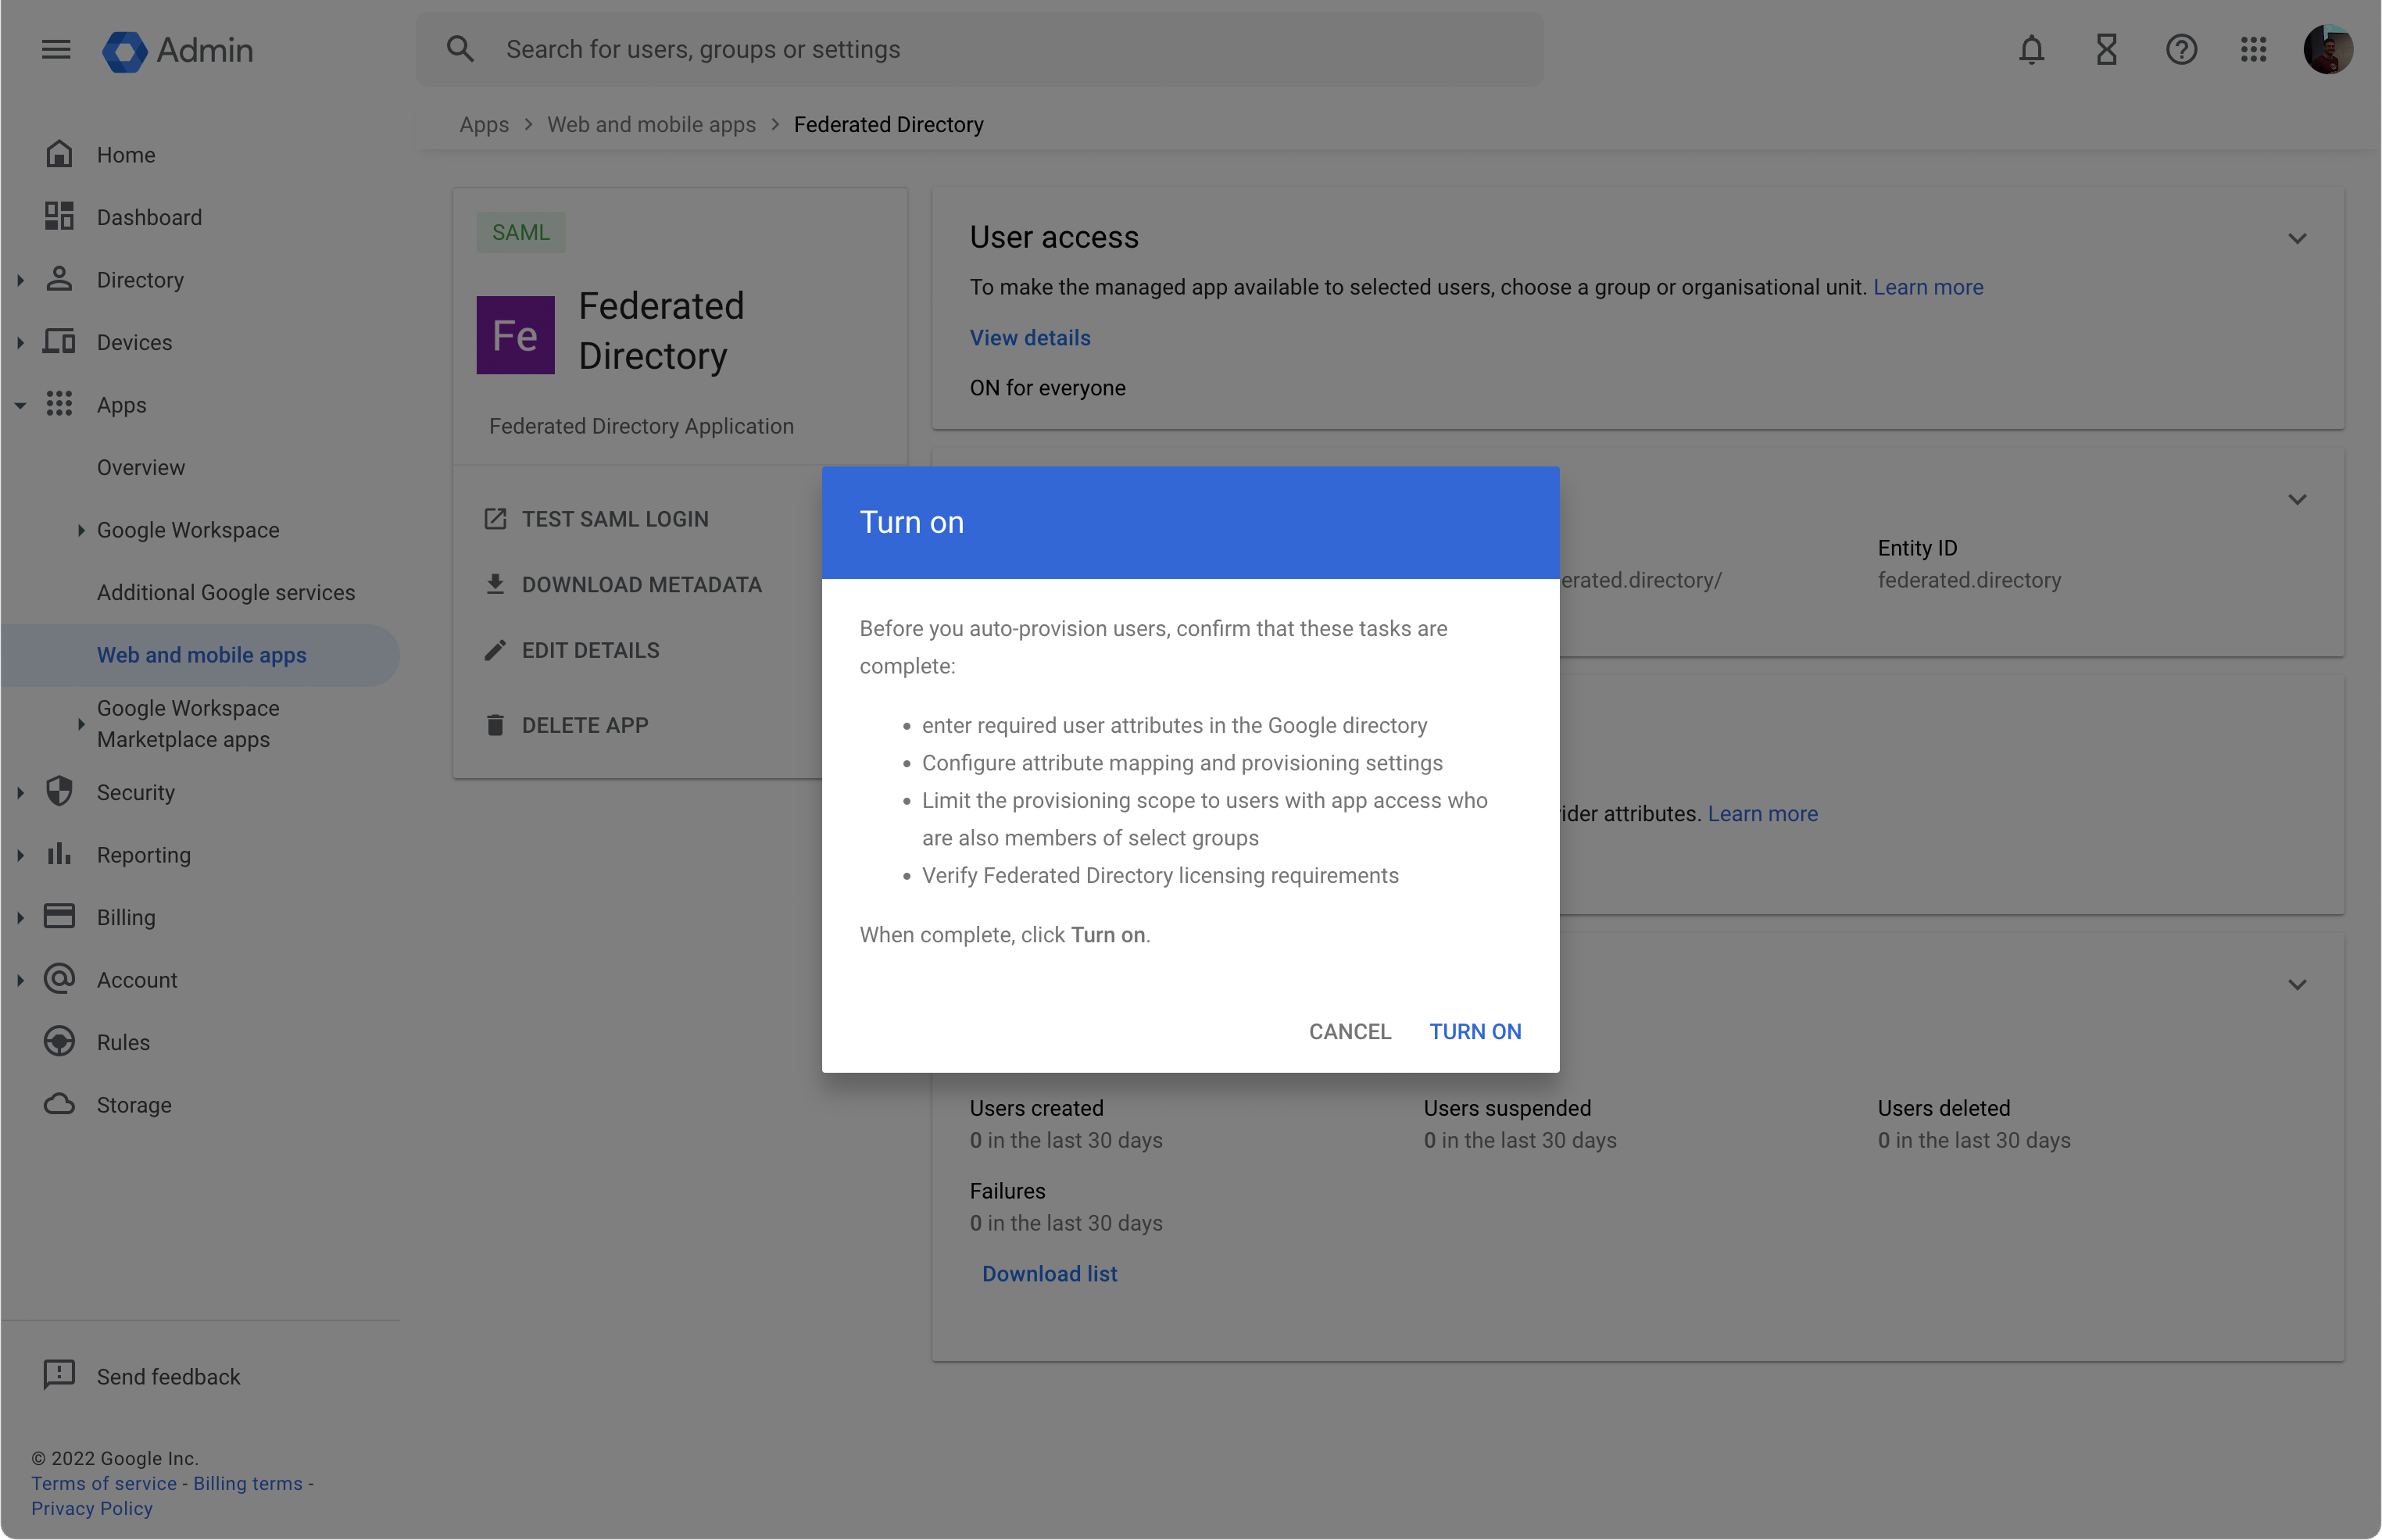
Click TURN ON and you’re good to go. Google will now start provisioning users to your Federated Directory.
Troubleshooting
Whenever you don’t get the expected results go to the Federated Directory app in your Google Admin console. You will see the provisioning results on the ‘auto-provisioning’ card.
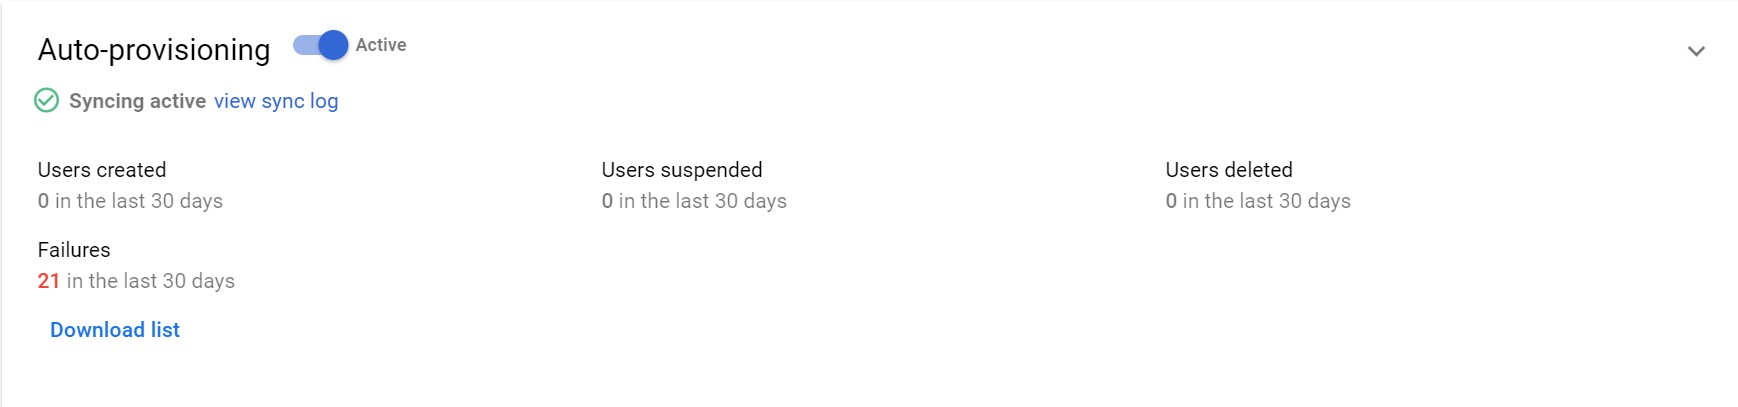
View the sync log or download the list with provisioning failures. Alternatively, you can always contact us at help@federated.directory.